STARTER(w/ Stop And Start System) REMOVAL
CAUTION / NOTICE / HINT
Tech Tips
-
Use the same procedure for RHD and LHD vehicles.
-
The procedure listed below is for LHD vehicles.
The necessary procedures (adjustment, calibration, initialization, or registration) that must be performed after parts are removed, installed, or replaced during the starter assembly removal/installation are shown below.
| Replacement Part or Procedure | Necessary Procedure | Effect/Inoperative when not Performed | Link |
|---|---|---|---|
| Disconnect cable from negative battery terminal | Drive the vehicle until stop and start control is permitted (approximately 5 to 60 minutes) | Stop and start system | |
| Memorize steering angle neutral point | LKA/LDA system | ||
| Parking support brake system* | |||
| Pre-collision system | |||
| Adaptive high beam system | |||
Lighting system (EXT) |
|||
| Variable gear ratio steering system | |||
| Parking assist monitor system | |||
| Panoramic view monitor system | |||
| Initialize rear door sunshade system | Rear door sunshade system | ||
| Initialize power trunk lid system | Power trunk lid system |
Click here Click here
Note
After the engine switch is turned off, the navigation system requires approximately a minute to record various types of memory and settings. As a result, after turning the engine switch off, wait a minute or more before disconnecting the cable from the negative (-) battery terminal.
| System Name | See Procedure |
|---|---|
| Vehicle enrolled in lexus enform system or safety connect system | 6 minutes |
| Vehicle not enrolled in lexus enform system and safety connect system | 1 minute |
Note
This procedure includes the removal of small-head bolts. Refer to Small-Head Bolts of Basic Repair Hint to identify the small-head bolts.
PROCEDURE
-
PRECAUTION
Note
After turning the engine switch off, waiting time may be required before disconnecting the cable from the negative (-) battery terminal. Therefore, make sure to read the disconnecting the cable from the negative (-) battery terminal notices before proceeding with work.
-
REMOVE LUGGAGE COMPARTMENT MAT SUB-ASSEMBLY
-
REMOVE LUGGAGE COMPARTMENT FLOOR MAT
-
DISCONNECT CABLE FROM NEGATIVE BATTERY TERMINAL
Note
When disconnecting the cable, some systems need to be initialized after the cable is reconnected.
-
REMOVE ENGINE ASSEMBLY WITH TRANSMISSION
-
REMOVE CONVERTER ASSEMBLY RH
-
DISCONNECT FRONT FRAME ASSEMBLY (for AWD)
-
REMOVE FRONT ENGINE MOUNTING INSULATOR (for AWD)
-
REMOVE FRONT NO. 1 ENGINE MOUNTING BRACKET RH (for AWD)
-
DISCONNECT NO. 2 ENGINE WIRE
-
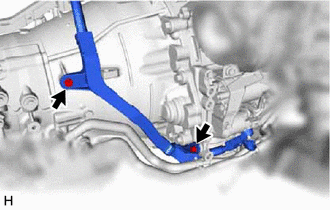
Remove the 2 bolts and disconnect the No. 2 engine wire.
-
-
REMOVE FLYWHEEL HOUSING SIDE STAY
-
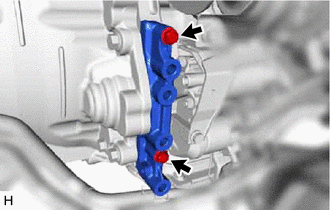
Remove the 2 bolts and flywheel housing side stay.
-
-
REMOVE STARTER COVER
-
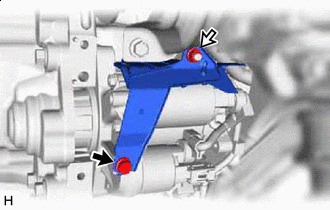

Bolt 
Nut Remove the bolt, nut and starter cover.
-
-
REMOVE STARTER ASSEMBLY
-
for 2WD:
-
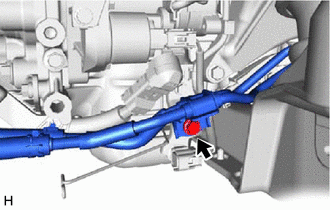
Remove the bolt and disconnect the oil cooler tube.
-
-
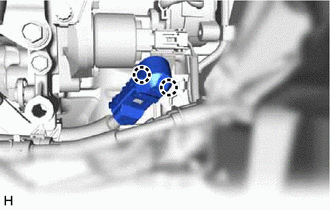
Detach the claw and open the terminal cover.
-
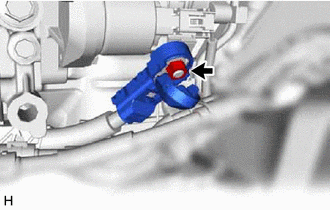
Remove the nut and disconnect the No. 2 engine wire from the terminal B.
-

Connector Bolt Disconnect the connector and detach the clamp.
-
Remove the 2 bolts and starter assembly.
-