SLIDING ROOF HOUSING(for Sliding Roof) REMOVAL
CAUTION / NOTICE / HINT
The necessary procedures (adjustment, calibration, initialization or registration) that must be performed after parts are removed and installed, or replaced during sliding roof glass sub-assembly, sliding roof housing sub-assembly, sliding roof drive gear sub-assembly or sliding roof drive cable sub-assembly removal/installation are shown below.
| Replaced Part or Performed Procedure | Necessary Procedure | Effect/Inoperative Function when Necessary Procedure not Performed | Link |
|---|---|---|---|
| Disconnect cable from negative battery terminal | Memorize steering angle neutral point | LKA/LDA System | |
| Intelligent clearance sonar system*1 | |||
| Pre-Crash Safety System | |||
| Lighting System (EXT)
|
|||
| Adaptive High Beam System | |||
| Drive the vehicle until stop and start control is permitted (approximately 15 to 60 minutes) | Stop and start system | ||
| Memorize steering angle neutral point | Parking Assist Monitor System (w/ Parallel Parking Assist Function) | ||
| Parking Assist Monitor System (w/o Parallel Parking Assist Function) | |||
| Panoramic View Monitor System | |||
| Initialize back door lock | Power door lock control system | ||
| Reset back door close position | Power back door system | ||
|
Initialize Sliding Roof System |
|
Click here Click here
CAUTION:
Some of these service operations affect the SRS airbag system. Read the precautionary notices concerning the SRS airbag system before servicing.
PROCEDURE
-
REMOVE SLIDING ROOF SIDE GARNISH LH
-
Disengage the 2 claws to remove the sliding roof side garnish LH.
-
-
REMOVE SLIDING ROOF SIDE GARNISH RH
Tech Tips
Use the same procedure as for the LH side.
-
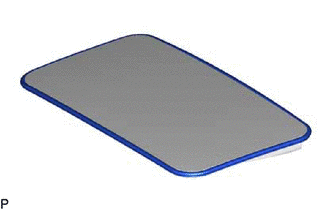
REMOVE SLIDING ROOF GLASS SUB-ASSEMBLY
-
Move the sliding roof glass sub-assembly to the fully closed position.
-
Using a T25 "TORX" socket wrench, remove the 4 screws and sliding roof glass sub-assembly.
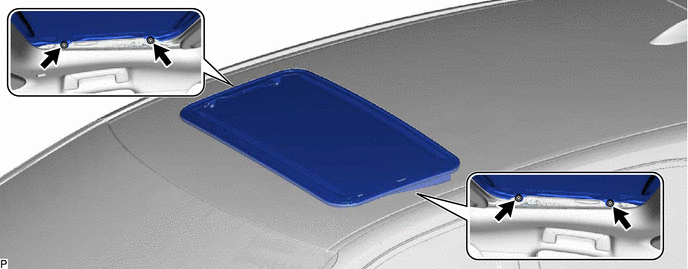
Note
To prevent the sliding roof glass sub-assembly and sliding roof drive gear sub-assembly from becoming misaligned, move the sliding roof glass sub-assembly (sliding roof drive cable sub-assembly) to the fully closed position before removing.
-
-
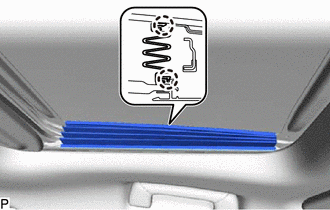
REMOVE SLIDING ROOF WEATHERSTRIP
-
Remove the sliding roof weatherstrip from the sliding roof panel sub-assembly.
-
-
REMOVE CURTAIN SHIELD AIRBAG ASSEMBLY LH
-
REMOVE CURTAIN SHIELD AIRBAG ASSEMBLY RH
Tech Tips
Use the same procedure as for the LH side.
-
DISCONNECT SLIDING ROOF DRAIN HOSE
-
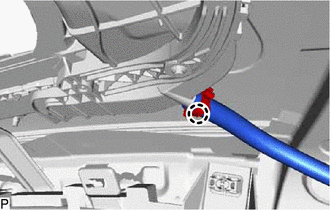
for Clamp Type:
-
Disengage the claw and disconnect the sliding roof drain hose.
Tech Tips
Use the same procedure for the other 3 sliding roof drain hoses.
-
-
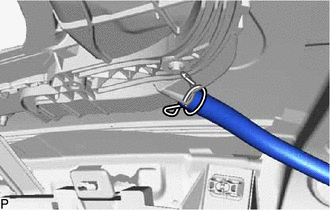
for Clip Type:
-
Expand the clip and disconnect the sliding roof drain hose.
Tech Tips
Use the same procedure for the other 3 sliding roof drain hoses.
-
-
-
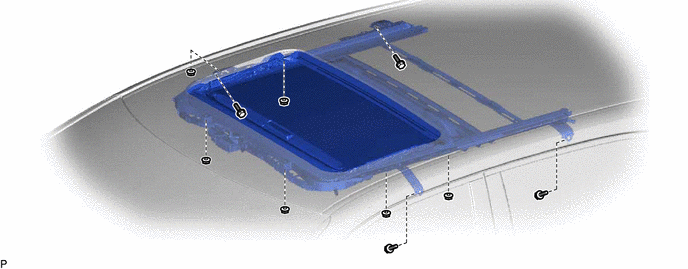
REMOVE SLIDING ROOF HOUSING ASSEMBLY (for Type A)
-
Remove the 4 bolts, 6 nuts and sliding roof housing assembly.
-
-
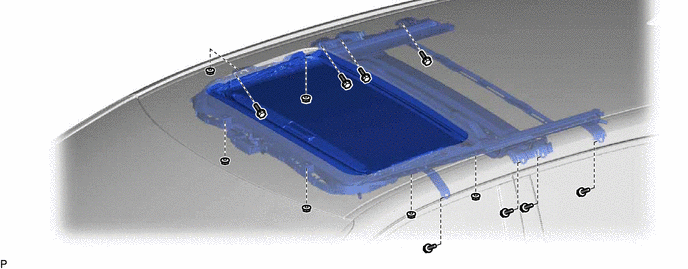
REMOVE SLIDING ROOF HOUSING ASSEMBLY (for Type B)
-
Remove the 8 bolts, 6 nuts and sliding roof housing assembly.
-