TELEPHONE MICROPHONE ASSEMBLY INSTALLATION
PROCEDURE
-
INSTALL TELEPHONE MICROPHONE ASSEMBLY
-
for LHD:
-
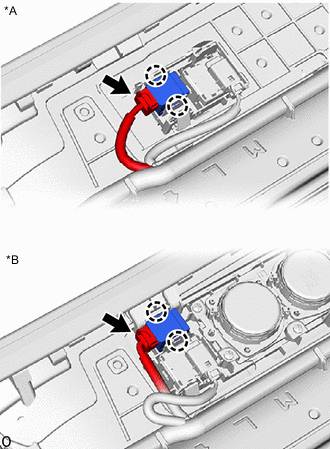
*A for 12 Speakers *B for 24 Speakers Attach the claw and install the telephone microphone assembly.
-
Connect the connector.
-
-
for RHD:
-
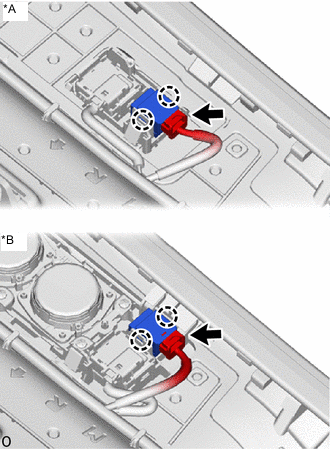
*A for 12 Speakers *B for 24 Speakers Attach the claw and install the telephone microphone assembly.
-
Connect the connector.
-
-
-
INSTALL ROOF HEADLINING ASSEMBLY
-
INSTALL NO. 2 TELEPHONE MICROPHONE ASSEMBLY (for ERA-GLONASS)
-
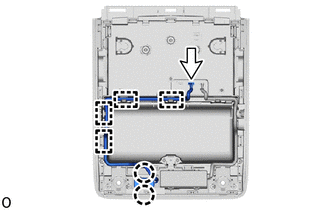
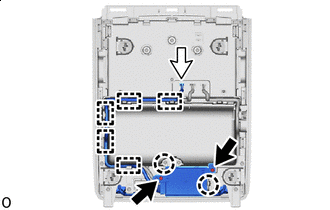
Attach the claw and install the No. 2 telephone microphone assembly.
-
Attach the guide.
-
Connect the connector.
-
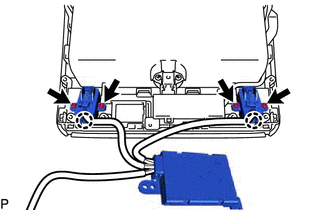
Attach the claw and install the theft warning ultrasonic sensor to the map light assembly with the 4 screws.
-
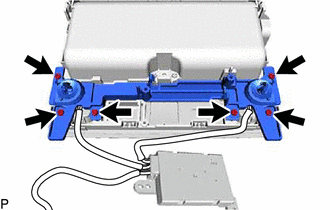
Install the cover with the 6 screws.
-

Screw 
Connector Connect the connector.
-
Attach the claw and clamp.
-
Install the 2 screws.
-
-
INSTALL MAP LIGHT ASSEMBLY (for ERA-GLONASS)
-
INSTALL CABLE TO NEGATIVE BATTERY TERMINAL
-
INSTALL LUGGAGE COMPARTMENT MAT SUB-ASSEMBLY
-
INSPECT SRS WARNING LIGHT
-
INSPECT FRONT SEAT ASSEMBLY
-
INSPECT REAR SEAT ASSEMBLY (for Power Seat)
-
INSPECT SEAT HEATER SYSTEM (w/ Seat Heater System)
-
INSPECT CLIMATE CONTROL SEAT SYSTEM (w/ Climate Control Seat System)
-
INSPECT SEAT VIBRATION SYSTEM (w/ Refresh Seat)
-
INSPECT SEAT BELT WARNING SYSTEM