AIR CONDITIONING UNIT REMOVAL
-
DISCHARGE REFRIGERANT FROM REFRIGERATION SYSTEM
-
DISCONNECT CABLE FROM NEGATIVE BATTERY TERMINAL
Note
When disconnecting the cable, some systems need to be initialized after the cable is reconnected Click here.
-
REMOVE WINDSHIELD WIPER MOTOR AND LINK ASSEMBLY
-
REMOVE NO.1 ENGINE UNDER COVER (w/ Under Cover and Intercooler)
-
DRAIN ENGINE COOLANT
-
for 1KD-FTV: Click here
-
for 2KD-FTV: Click here
-
for 1TR-FE: Click here
-
for 2TR-FE: Click here
-
for 5L-E: Click here
-
for 1GD-FTV: Click here
-
-
REMOVE INTERCOOLER ASSEMBLY (w/ Intercooler)
-
for 1KD-FTV: Click here
-
for 2KD-FTV: Click here
-
for 1GD-FTV: Click here
-
-
DISCONNECT COOLER REFRIGERANT SUCTION PIPE A
-
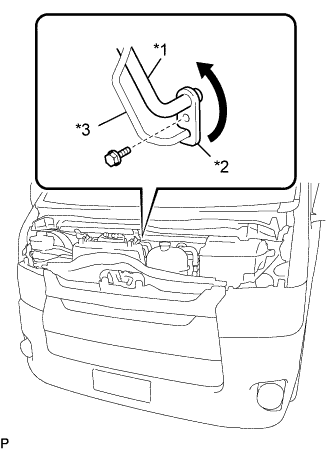
Text in Illustration *1 Cooler Refrigerant Suction Pipe A *2 Hook Connector *3 Cooler Refrigerant Liquid Pipe B Remove the bolt, and slide the hook connector.
-
Disconnect the cooler refrigerant suction pipe A.
-
Remove the O-ring from the cooler refrigerant suction pipe A.
Note
Seal the openings of the disconnected parts using vinyl tape to prevent moisture and foreign matter from entering.
-
-
DISCONNECT COOLER REFRIGERANT LIQUID PIPE B
-
Disconnect the cooler refrigerant liquid pipe B.
-
Remove the O-ring from the cooler refrigerant liquid pipe B.
Note
Seal the openings of the disconnected parts using vinyl tape to prevent moisture and foreign matter from entering.
-
-
DISCONNECT HEATER WATER HOSE OUTLET
-
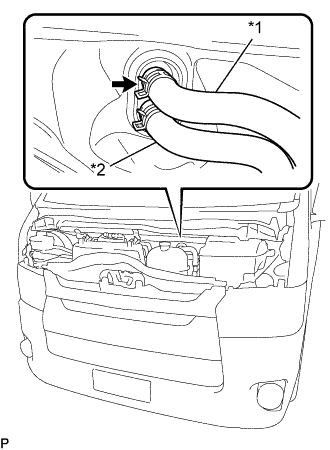
Text in Illustration *1 Heater Outlet Water Hose *2 Heater Water Inlet Hose A Using pliers, grip the claws of the clip and slide the clip to disconnect the heater outlet water hose.
-
-
DISCONNECT HEATER WATER HOSE INLET A
Tech Tips
Disconnection of the heater water outlet hose A is the same as for the heater water inlet hose A.
-
REMOVE INSTRUMENT PANEL ASSEMBLY
-
REMOVE STEERING COLUMN ASSEMBLY
-
REMOVE AIR DUCT NO.1
-
Remove the clip.
-
Release the 2 claws and remove the air duct No.1.
-
-
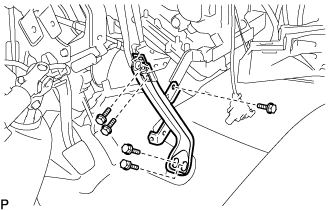
DISCONNECT PARKING BRAKE CONTROL HANDLE SUB-ASSEMBLY
-
Remove the 2 bolts and disconnect the parking brake control handle sub-assembly.
-
-
REMOVE INSTRUMENT PANEL TO FLOOR BRACE SUB-ASSEMBLY
-
Remove the 5 bolts and the instrument panel to floor brace sub-assembly.
-
-
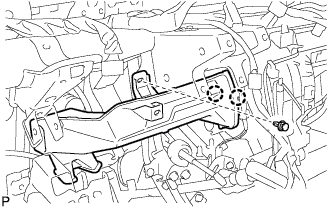
REMOVE INSTRUMENT PANEL REINFORCEMENT ASSEMBLY
-
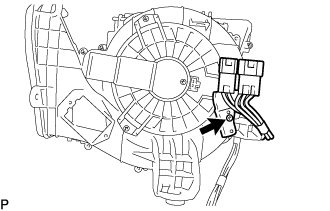
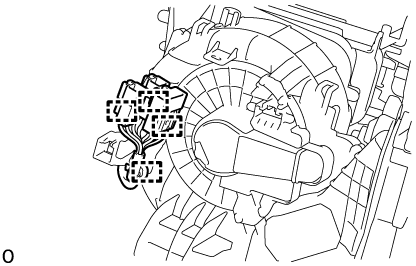
Remove the clamps and connectors, and then disconnect the wire harness.
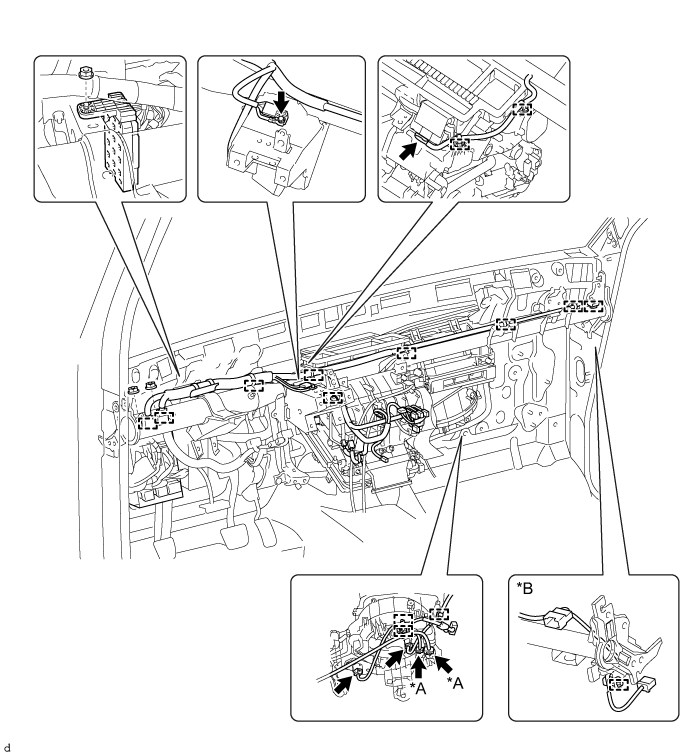
Text in Illustration *A w/ PTC *B for Wide Body -
Remove the bolts, nuts and junction blocks.
-
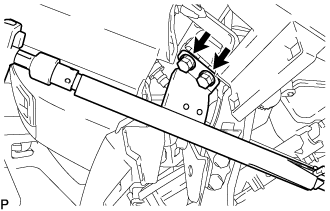
Remove the 2 caps and 2 bolts.
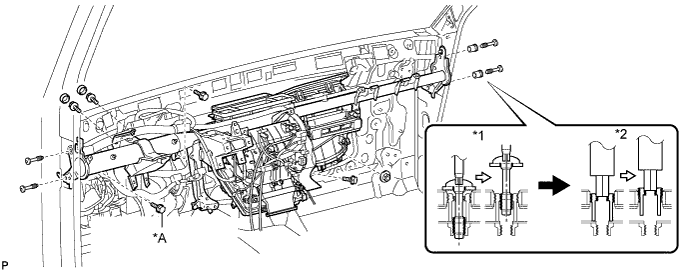
Text in Illustration *A for Manual Transmission - - *1 ''Torx'' Bolt *2 Collar -
Remove the 2 bolts and nut. (AUTOMATIC TRANSMISSION)
-
Remove the 3bolts and nut. (MANUAL TRANSMISSION)
-
Using a "Torx" socket wrench (T40), remove the 4 "Torx" bolts.
Tech Tips
The "Torx" bolts on the passenger side can be removed with the collar for adjustment.
-
Using a hexagon wrench 12 mm, remove the 2 collars and instrument panel reinforcement assembly.
-
-
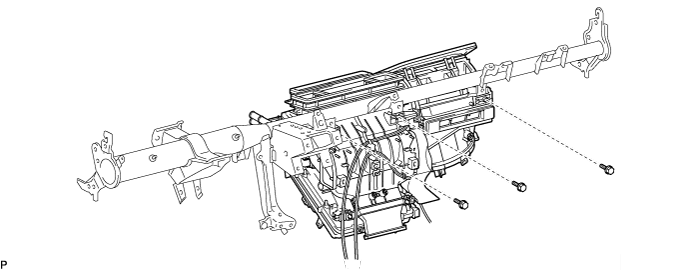
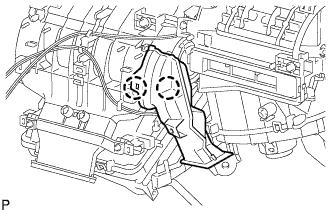
REMOVE AIR CONDITIONER UNIT ASSEMBLY
-
Remove the 3 bolts and air conditioner unit assembly.
-
-
REMOVE AIR DUCT NO.2
-
Release the 2 claws and remove the air duct No.2.
-
-
REMOVE AIR CONDITIONING RADIATOR ASSEMBLY
-
for LHD, w/ PTC:
-
Remove the screw and then disconnect the wire harness.
-
-
for RHD, w/ PTC:
-
Detach the clamp.
-
-

Remove the 3 screws and air conditioning radiator assembly.
-