CAMSHAFT TIMING CONTROL MOTOR(for Bank 1) REMOVAL
CAUTION / NOTICE / HINT
The necessary procedures (adjustment, calibration, initialization, or registration) that must be performed after parts are removed, installed, or replaced during the cam timing control motor with EDU assembly RH removal/installation are shown below.
| Replaced Part or Performed Procedure | Necessary Procedure | Effect/Inoperative Function when Necessary Procedure not Performed | Link |
|---|---|---|---|
| cam timing control motor with EDU assembly RH | Inspection after repair |
|
|
Note
This procedure includes the removal of small-head bolts. Refer to Small-Head Bolts of Basic Repair Hint to identify the small-head bolts.
PROCEDURE
-
REMOVE INTAKE AIR SURGE TANK ASSEMBLY WITH INTERCOOLER
-
REMOVE CAM TIMING CONTROL MOTOR WITH EDU ASSEMBLY RH
-
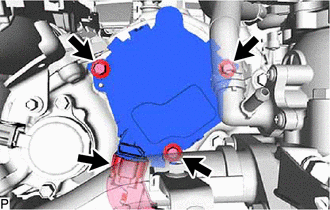
Disconnect the cam timing control motor with EDU assembly RH connector.
-
Remove the 3 bolts and cam timing control motor with EDU assembly RH from the No. 2 timing gear cover assembly.
Note
If the cam timing control motor with EDU assembly RH has been struck or dropped, replace it.
-
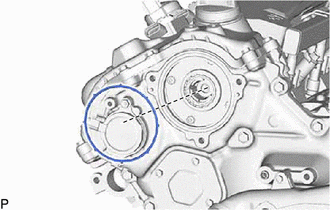
Remove the cam timing control motor O-ring RH from the No. 2 timing gear cover assembly.
-