PARKING BRAKE CABLE (for 4WD and Pre-Runner) REMOVAL
-
PRECAUTION
Note
After turning the ignition switch off, waiting time may be required before disconnecting the cable from the battery terminal. Therefore, make sure to read the disconnecting the cable from the battery terminal notice before proceeding with work Click here.
-
DISCONNECT CABLE FROM NEGATIVE BATTERY TERMINAL
CAUTION:
Wait at least 90 seconds after disconnecting the cable from the negative (-) battery terminal to disable the SRS system.
Note
When disconnecting the cable, some systems need to be initialized after the cable is reconnected Click here.
-
REMOVE REAR WHEEL
-
REMOVE REAR BRAKE DRUM SUB-ASSEMBLY
-
Release the parking brake lever, and remove the drum.
Tech Tips
If the drum cannot be removed easily, perform the following procedures.
-
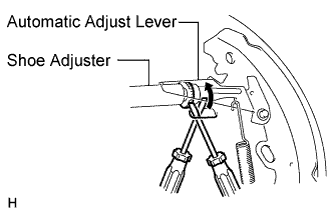
Remove the hole plug (adjust) and insert a screwdriver into the hole on the backing plate, and hold the automatic adjust lever away from the adjuster.
-
Using another screwdriver, compress the shoe adjuster by turning the adjusting wheel.
-
-
REMOVE CONSOLE BOX ASSEMBLY
-
REMOVE NO. 1 PARKING BRAKE CABLE ASSEMBLY
-
Disconnect the No. 1 parking brake cable from the parking brake lever Click here.
-
Remove the 2 bolts and No. 1 heat insulator.
-
Remove the No. 1 clip and pin from the No. 3 parking brake cable.
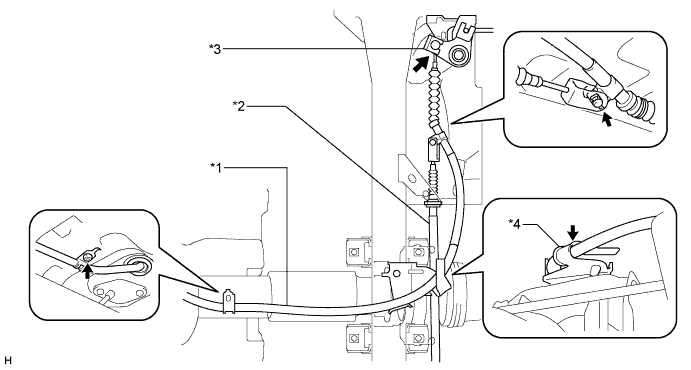
Text in Illustration *1 No. 1 Parking Brake Cable *2 No. 3 Parking Brake Cable *3 Parking Brake Equalizer *4 Cable Support Bracket -
Disconnect the No. 1 parking brake cable from the No. 3 parking brake cable.
-
Disconnect the No. 1 parking brake cable from the parking brake equalizer.
-
Remove the bolt holding the No. 1 parking brake cable.
-
Remove the No. 1 parking brake cable clamp from the No. 1 parking brake cable.
-
Remove the No. 1 parking brake cable from the cable support bracket.
-
Remove the No. 1 parking brake cable.
-
-
REMOVE NO. 2 PARKING BRAKE CABLE ASSEMBLY
-
Disconnect the No. 2 parking brake cable from the parking brake shoe lever RH and backing plate RH.
-
Disconnect the No. 2 parking brake cable from the parking brake shoe lever Click here.
Tech Tips
Use the same procedure described for the LH side.
-
Remove the 2 bolts and disconnect the No. 2 parking brake cable from the backing plate.
-
-
Disconnect the No. 2 parking brake cable from the parking brake equalizer.
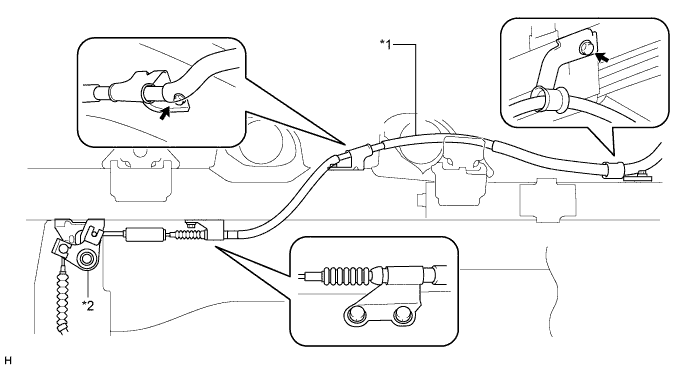
Text in Illustration *1 No. 2 Parking Brake Cable *2 Parking Brake Equalizer -
Remove the 4 bolts and No. 2 parking brake cable.
-
-
REMOVE NO. 3 PARKING BRAKE CABLE ASSEMBLY
-
Disconnect the No. 3 parking brake cable from the parking brake shoe lever LH and backing plate LH.
-
Disconnect the No. 3 parking brake cable from the parking brake shoe lever Click here.
-
Remove the 2 bolts and disconnect the No. 3 parking brake cable from the backing plate.
-
-
Remove the No. 3 clip.
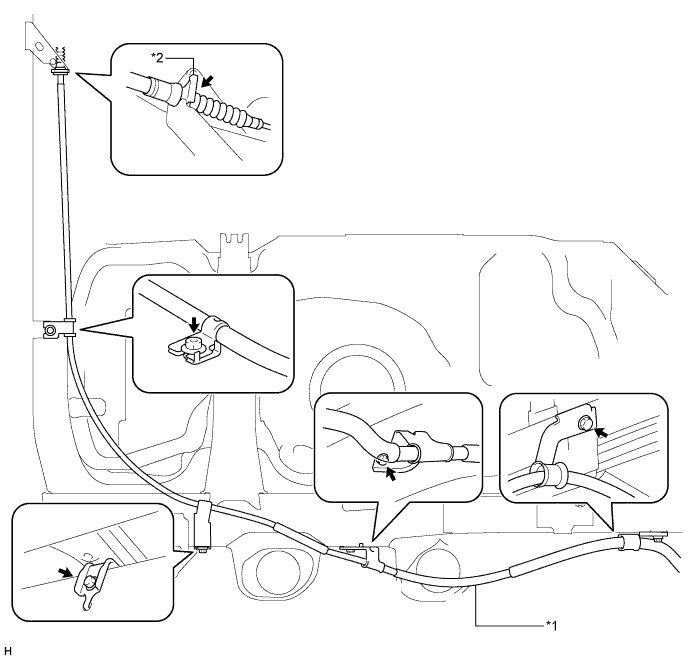
Text in Illustration *1 No. 3 Parking Brake Cable *2 No. 3 Clip -
Remove the 3 bolts, nut and No. 3 parking brake cable.
-