GLOW PLUG CONTROLLER REMOVAL

-
PRECAUTION
Note
After turning the ignition switch off, waiting time may be required before disconnecting the cable from the battery terminal. Therefore, make sure to read the disconnecting the cable from the battery terminal notice before proceeding with work Click here.
-
DISCONNECT CABLE FROM NEGATIVE BATTERY TERMINAL
Note
When disconnecting the cable, some systems need to be initialized after the cable is reconnected Click here.
-
DISCONNECT CABLE FROM POSITIVE BATTERY TERMINAL
-
REMOVE BATTERY CLAMP SUB-ASSEMBLY
-
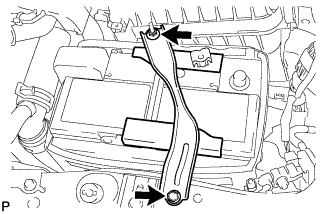
Remove the bolt and loosen the nut.
-
Detach the hook of the battery clamp sub-assembly from the battery carrier, and then remove the battery clamp sub-assembly.
-
-
REMOVE BATTERY INSULATOR
-
REMOVE BATTERY
-
REMOVE AIR CLEANER CAP SUB-ASSEMBLY
-
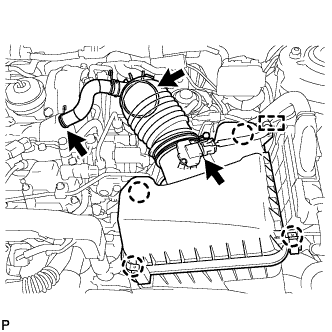
Detach the clamp and disconnect the mass air flow meter connector.
-
Slide the clamp and disconnect the PCV hose from the cylinder head cover sub-assembly.
-
Slide the clamp and disconnect the air cleaner hose assembly from the turbocharger sub-assembly.
-
Detach the 4 clamps and remove the air cleaner cap sub-assembly.
-
-
REMOVE AIR CLEANER FILTER ELEMENT SUB-ASSEMBLY
-
REMOVE AIR CLEANER CASE SUB-ASSEMBLY
-
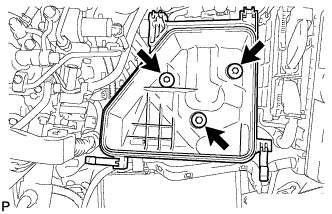
Remove the 3 bolts and air cleaner case.
-
-
REMOVE NO. 1 AIR CLEANER INLET
-

Remove the clip.
-
Detach the 2 claws and remove the No. 1 air cleaner inlet.
-
-
REMOVE NO. 2 AIR CLEANER INLET
-
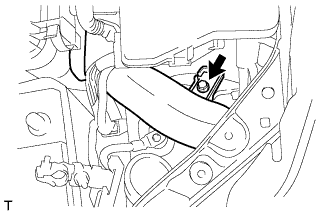
Remove the bolt and No. 2 air cleaner inlet
-
-
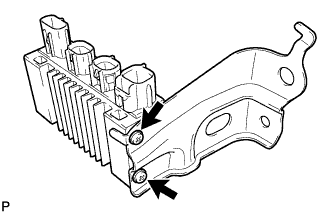
REMOVE GLOW PLUG CONTROLLER ASSEMBLY
-

Remove the 2 bolts and glow plug controller assembly.
-
Disconnect the 4 connectors.
-
-
REMOVE NO. 1 GLOW PLUG CONTROLLER BRACKET
-
Remove the 2 screws and No. 1 glow plug controller bracket from the glow plug controller.
-