HEATER WATER PUMP (for 2GR-FXE) REMOVAL

-
PRECAUTION
Note
After turning the power switch off, waiting time may be required before disconnecting the cable from the auxiliary battery terminal. Therefore, make sure to read the disconnecting the cable from the auxiliary battery terminal notice before proceeding with work Click here.
-
REMOVE LUGGAGE COMPARTMENT FLOOR MAT
-
Remove the luggage compartment floor mat.
-
-
REMOVE LUGGAGE COMPARTMENT TRIM COVER LH
-
Remove the luggage compartment trim cover LH.
-
-
DISCONNECT CABLE FROM AUXILIARY BATTERY NEGATIVE TERMINAL
Note
When disconnecting the cable, some systems need to be initialized after the cable is reconnected Click here.
-
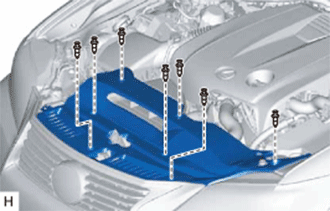
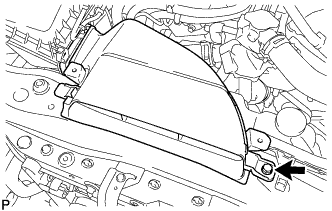
REMOVE ENGINE ROOM SIDE COVER
-
Remove the 4 clips and engine room side cover.
-
-
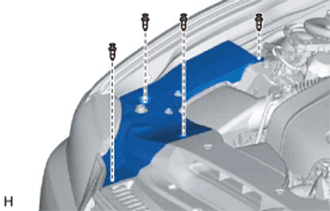
REMOVE COOL AIR INTAKE DUCT SEAL
-
Remove the 7 clips and cool air intake duct seal.
-
-
REMOVE V-BANK COVER SUB-ASSEMBLY
-
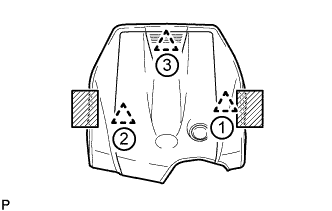
Place both hands on the sides of the cover as shown in the illustration, lift the cover to detach the 2 clips near the front in the order shown in the illustration, and then lift the cover further to detach the rear clip and remove the cover.
Text in Illustration 
Areas to place hands when lifting cover Note
If the cover is lifted rearward or forward and to the right or left at the same time, the cover may be damaged.
-
-
REMOVE ENGINE UNDER COVER
-
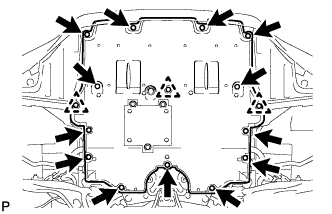
Remove the 13 screws, 3 clips and engine under cover.
-
-
DRAIN ENGINE COOLANT
CAUTION:
Do not remove the radiator cap or reservoir tank cap while the engine and radiator are still hot. Pressurized hot engine coolant and steam may be released and cause serious burns.
-
Loosen the radiator drain cock plug.
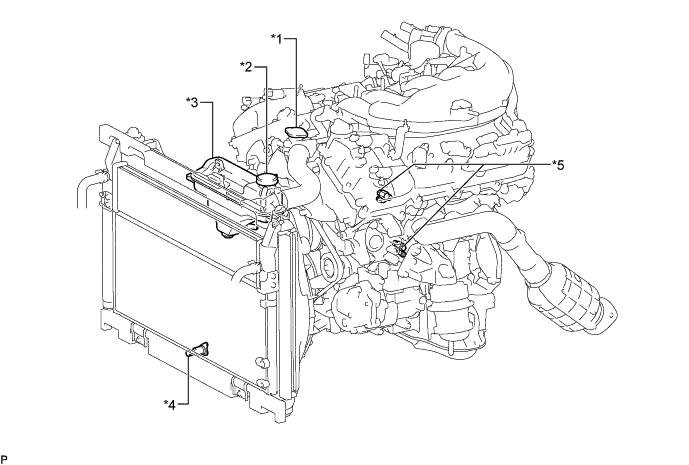
Text in Illustration *1 Radiator Cap *2 Reservoir Tank Cap *3 Radiator Reservoir Tank *4 Radiator Drain Cock Plug *5 Cylinder Block Drain Cock Plug - - -
Remove the reservoir tank cap and drain the coolant.
Tech Tips
Collect the coolant in a container and dispose of it according to the local regulations.
-
Loosen the 2 cylinder block drain cock plugs and drain the coolant from the engine.
-
-
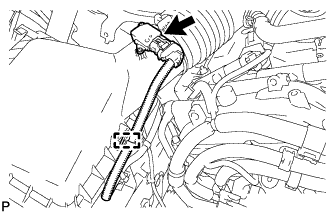
REMOVE NO. 1 AIR CLEANER INLET
-
Remove the bolt and No. 1 air cleaner inlet.
-
-
REMOVE AIR CLEANER CAP WITH AIR CLEANER HOSE
-
Disconnect the mass air flow meter connector.
-
Disconnect the clamp from the air cleaner.
-

Disconnect the VSV hose.
-
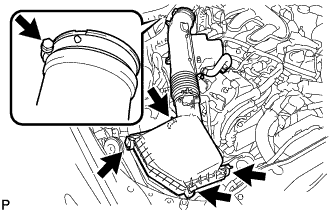
Disconnect the 4 clamps.
-
Remove the hose clamp and air cleaner cap with air cleaner hose.
-
-
REMOVE AIR CLEANER FILTER ELEMENT SUB-ASSEMBLY
-
REMOVE AIR CLEANER CASE SUB-ASSEMBLY
-
Remove the 2 bolts, 2 clamps and air cleaner case sub-assembly.
Note
When removing the air cleaner case sub-assembly, be careful not to lose the grommet on the underside of the air cleaner case.
-
-
REMOVE OIL PUMP MOTOR CONTROLLER
-
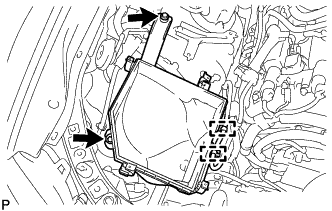
REMOVE HEATER ACCESSORY ASSEMBLY
-
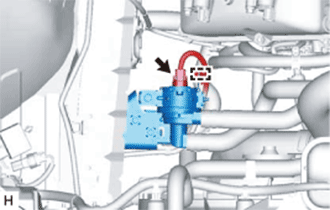
Detach the clamp and disconnect the connector.
-
Detach the 3 clamps and remove the bolt.
-
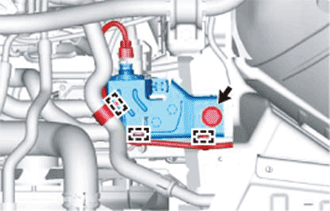
Using pliers, grip the claws of the clip and slide the clip.
-
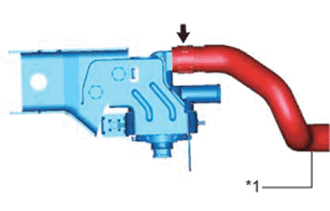
Disconnect the heater water outlet hose C.
Text in Illustration *1 Heater Water Outlet Hose C -
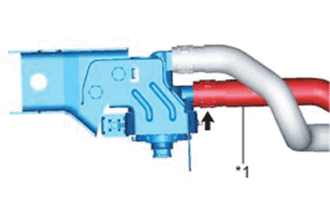
Using pliers, grip the claws of the clip and slide the clip.
-
Disconnect the heater water inlet hose C and remove the heater accessory assembly (heater water pump).
Text in Illustration *1 Heater Water Inlet Hose C
-