FRONT SEAT OUTER BELT ASSEMBLY REMOVAL

Tech Tips
-
Use the same procedure for the RH side and LH side.
-
The procedure listed below is for the LH side.
-
PRECAUTION
CAUTION:
Be sure to read Precaution thoroughly before servicing Click here.
Note
After turning the power switch off, waiting time may be required before disconnecting the cable from the auxiliary battery terminal. Therefore, make sure to read the disconnecting the cable from the auxiliary battery terminal notices before proceeding with work Click here.
-
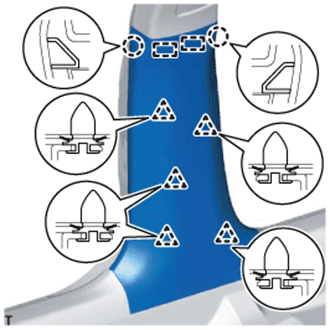
REMOVE FRONT DOOR SCUFF PLATE LH
-
Place your hands on the inner portion of the front door scuff plate LH and detach the 2 claws labeled A, 6 claws labeled B and 2 claws labeled C in the order shown in the illustration.
-
Raise the front door scuff plate LH to detach the 4 clips on the outer side and remove it.
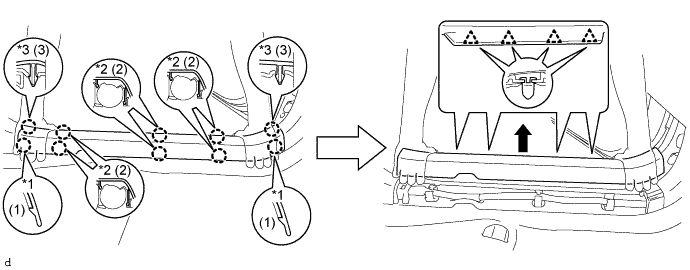
Text in Illustration *1 Claw A *2 Claw B *3 Claw C - -
-
-
REMOVE REAR DOOR SCUFF PLATE LH
-
Place your hands on the inner portion of the rear door scuff plate LH and detach the 2 claws labeled A, 6 claws labeled B and 2 claws labeled C in the order shown in the illustration.
-
Raise the rear door scuff plate LH to detach the 4 clips on the outer side and remove it.
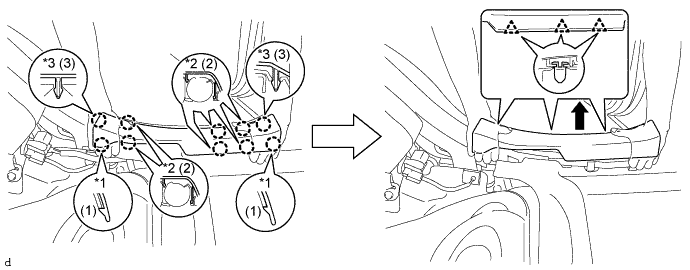
Text in Illustration *1 Claw A *2 Claw B *3 Claw C - -
-
-
REMOVE LUGGAGE COMPARTMENT FLOOR MAT
-
Remove the luggage compartment floor mat.
-
-
REMOVE LUGGAGE COMPARTMENT TRIM COVER LH
-
Remove the luggage compartment trim cover LH.
-
-
DISCONNECT FRONT SEAT OUTER BELT ASSEMBLY LH
-
Detach the 6 hooks and remove the seat belt anchor cover cap LH.
-
Operate the power seat switch assembly and move the front seat assembly so that the nut for the anchor of the front seat outer belt assembly LH can be removed.
-
Remove the nut and disconnect the anchor of the front seat outer belt assembly LH.
-
-
DISCONNECT CABLE FROM AUXILIARY BATTERY NEGATIVE TERMINAL
CAUTION:
Wait at least 90 seconds after disconnecting the cable from the negative (-) auxiliary battery terminal to disable the SRS system.
-
REMOVE LOWER CENTER PILLAR GARNISH LH
-
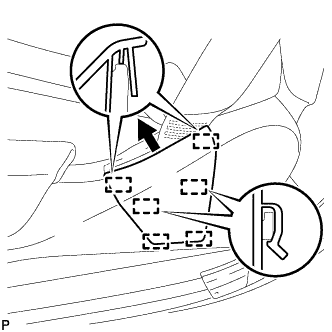
Pull both sides of the lower center pillar garnish LH outward to detach the 2 claws.
-
Detach the 5 clips and 2 guides and remove the lower center pillar garnish LH.
-
-
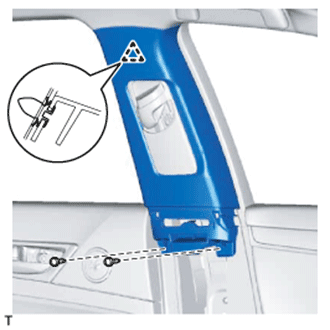
REMOVE UPPER CENTER PILLAR GARNISH LH
-
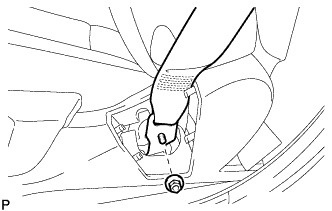
Remove the 2 screws.
-
Detach the clip.
-
Pass the front seat outer belt floor anchor through the center pillar garnish, and remove the center pillar garnish LH.
-
-
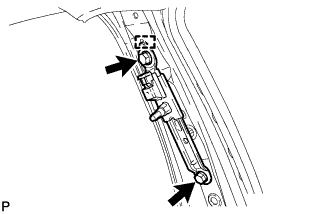
REMOVE FRONT SEAT OUTER BELT ASSEMBLY LH
-
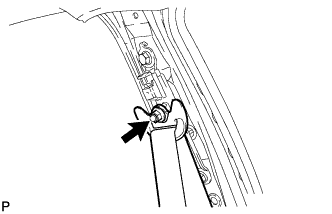
Remove the nut and disconnect the shoulder anchor of the front seat outer belt assembly.
-
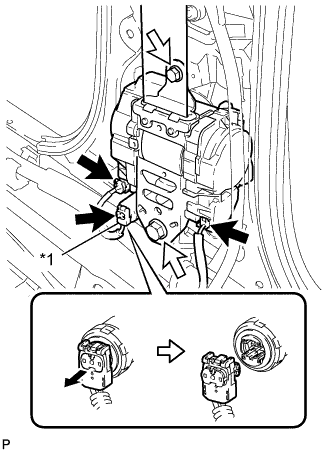
Text in Illustration *1 Pretensioner Connector Using a screwdriver, pull out the locking button in the direction shown by the arrow in the illustration to release the lock, and disconnect the pretensioner connector as shown in the illustration.
Tech Tips
Tape the screwdriver tip before use.
-
Disconnect the connector (w/o Pre-crash Safety System) or 2 connectors (w/ Pre-crash Safety System).
-
Remove the 2 bolts and front seat outer belt assembly LH.
-
-
REMOVE FRONT SEAT BELT RETRACTOR COVER LH
-
REMOVE FRONT SHOULDER BELT ANCHOR ADJUSTER ASSEMBLY
-
Remove the 2 bolts.
-
Disengage the guide and remove the front shoulder belt anchor adjuster assembly.
-