STEREO COMPONENT AMPLIFIER REMOVAL

-
PRECAUTION
Note
After turning the engine switch off, waiting time may be required before disconnecting the cable from the battery terminal. Therefore, make sure to read the disconnecting the cable from the battery terminal notice before proceeding with work Click here.
-
DISCONNECT CABLE FROM NEGATIVE BATTERY TERMINAL
Note
When disconnecting the cable, some systems need to be initialized after the cable is reconnected Click here.
-
REMOVE LUGGAGE COMPARTMENT FLOOR MAT
-
Remove the luggage compartment floor mat.
-
-
REMOVE LUGGAGE COMPARTMENT TRIM COVER LH
-
Remove the luggage compartment trim cover.
-
-
REMOVE LUGGAGE COMPARTMENT TRIM COVER RH
-
Remove the luggage compartment trim cover.
-
-
REMOVE SIDE TRIM BOX LH
-
Remove the side trim box.
-
-
REMOVE SIDE TRIM BOX
-
Remove the side trim box.
-
-
REMOVE LUGGAGE COMPARTMENT SIDE TRAY (w/ Spare Tire)
-
Remove the luggage compartment side tray.
-
-
REMOVE LUGGAGE COMPARTMENT TRIM BOX (w/o Spare Tire)
-
Remove the luggage compartment trim box.
-
-
REMOVE SPARE WHEEL COVER TRAY
-
w/o Spare Tire:
-
Remove the spare wheel cover tray.
-
-
w/ Spare Tire, for Type B:
-
Remove the spare wheel cover tray.
-
-
-
REMOVE ROPE HOOK ASSEMBLY
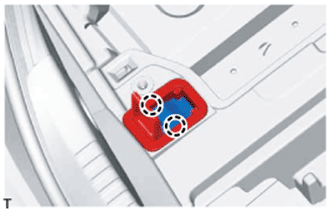
Tech Tips
Use the same procedure for all rope hooks.
-
Detach the 2 claws and open the cover.
-
Remove the bolt and rope hook.
-
-
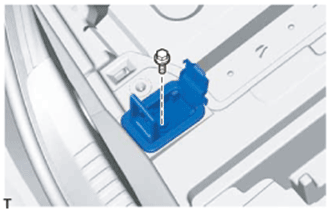
REMOVE REAR LUGGAGE COMPARTMENT TRAY BRACKET LH
-
Remove the clip.
-
Detach the claw and remove the rear luggage compartment tray bracket.
-
-
REMOVE REAR LUGGAGE COMPARTMENT TRAY BRACKET RH
Tech Tips
Use the same procedure described for the LH side.
-
REMOVE REAR FLOOR FINISH PLATE
-
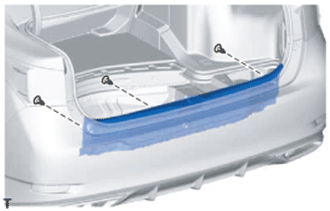
Remove the 3 clips.
-

Detach the 6 clips and remove the rear floor finish plate.
-
-
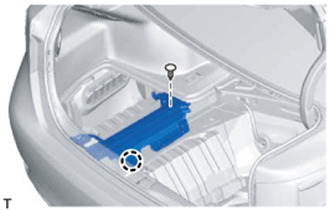
REMOVE ROPE HOOK

Tech Tips
Use the same procedure for both rope hooks.
-
Rotate the rope hook in the direction indicated by the arrow in the illustration to remove the rope hook.
-
-
REMOVE FRONT LUGGAGE COMPARTMENT TRIM COVER
-
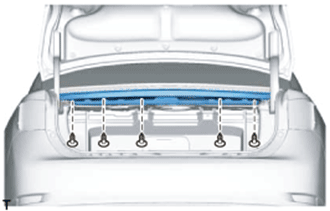
Remove the 5 clips and rear luggage compartment trim cover.
-
-
REMOVE LUGGAGE COMPARTMENT TRIM COVER INNER RH
-
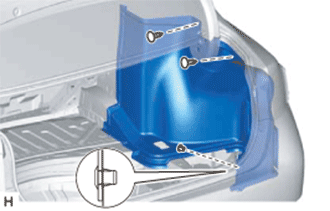
Using a clip remover, remove the 3 clips and luggage compartment trim inner cover.
-
-
REMOVE STEREO COMPONENT AMPLIFIER ASSEMBLY WITH BRACKET
-
Disconnect all the connectors.
-
Remove the 3 nuts and stereo component amplifier assembly with bracket.
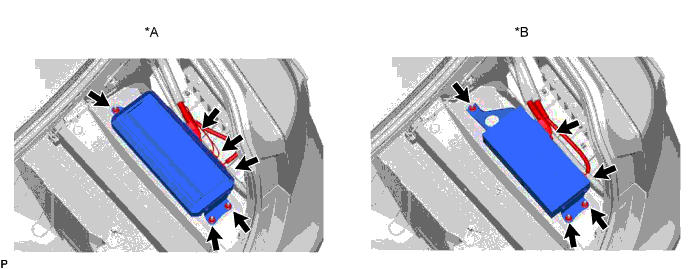
Text in Illustration *A w/ Mark Levinson Speaker System *2 w/o Mark Levinson Speaker System
-
-
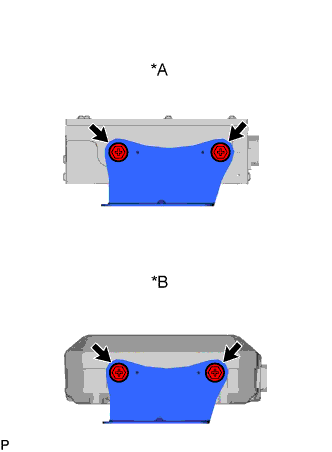
REMOVE NO. 1 AMPLIFIER BRACKET
-
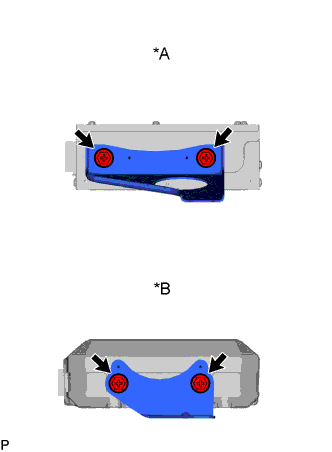
Text in Illustration *A w/o Mark Levinson Speaker System *B w/ Mark Levinson Speaker System Remove the 2 screws and No. 1 amplifier bracket.
-
-
REMOVE NO. 2 AMPLIFIER BRACKET
-
Text in Illustration *A w/ Mark Levinson Speaker System *B w/o Mark Levinson Speaker System Remove the 2 screws and No. 2 amplifier bracket.
-