NAVIGATION ECU REMOVAL
PROCEDURE
-
REMOVE NO. 1 METER HOOD CLUSTER
-
REMOVE NO. 2 METER HOOD CLUSTER
-
REMOVE INSTRUMENT CLUSTER FINISH PANEL ASSEMBLY
-
REMOVE UPPER INSTRUMENT CENTER CLUSTER FINISH PANEL
-
REMOVE RADIO AND DISPLAY RECEIVER ASSEMBLY WITH BRACKET
-
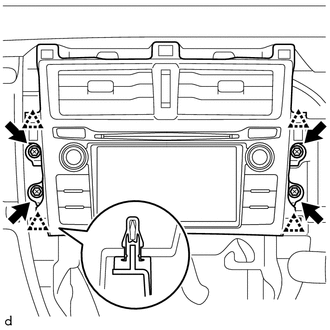
Remove the 4 screws.
-
Disengage the 4 clips and pull the radio and display receiver assembly with bracket toward the rear of the vehicle.
-
Disconnect each connector and remove the radio and display receiver assembly with bracket.
-
-
REMOVE ANTENNA CORD SUB-ASSEMBLY
-
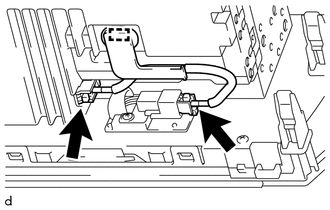
Disconnect the 2 connectors.
-
Disengage the clamp to remove the antenna cord sub-assembly.
-
-
REMOVE NO. 1 NAVIGATION WIRE
-
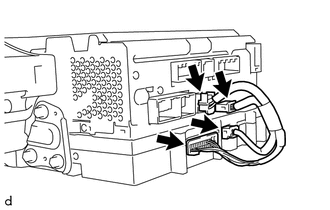
Disconnect the 4 connectors to remove the No. 1 navigation wire.
-
-
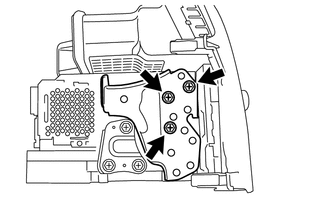
REMOVE NO. 1 RADIO BRACKET
-

Remove the 3 screws and No. 1 radio bracket.
-
-
REMOVE NO. 2 RADIO BRACKET
-
Remove the 3 screws and No. 2 radio bracket.
-
-
REMOVE NO. 1 RADIO RECEIVER BRACKET
-
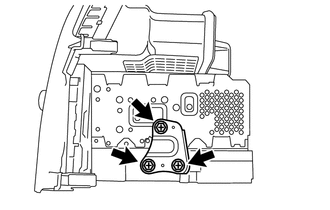
Remove the 3 screws and No. 1 radio receiver bracket.
-
-
REMOVE NO. 2 RADIO RECEIVER BRACKET
-

Remove the 3 screws and No. 2 radio receiver bracket.
-
-
REMOVE NAVIGATION ECU