REAR DOOR SPEAKER INSTALLATION
PROCEDURE
-
INSTALL REAR SPEAKER ASSEMBLY
-
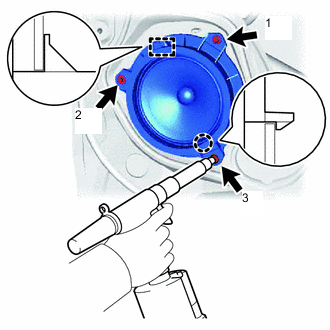
Engage the guide and claw to temporarily install the rear speaker assembly.
-
Using an air riveter or a hand riveter, install the rear speaker assembly with 3 new rivets.
Tech Tips
Install the new strike rivets in the order shown in the illustration.
Note
-
Do not touch the cone part of the rear speaker assembly.
-
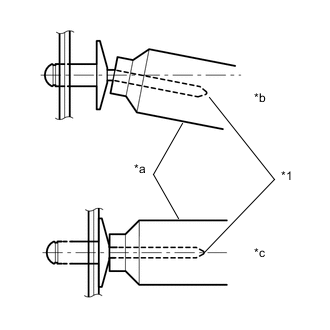
Do not pry the rivet with the riveter, as this will cause damage to the riveter and mandrel.
Text in Illustration *1 Mandrel *a Riveter *b Incorrect *c Correct -
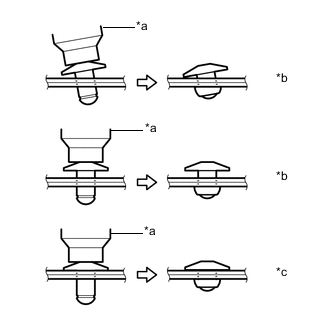
Confirm that the rivets are seated properly against the rear speaker assembly.
Text in Illustration *a Riveter *b Incorrect *c Correct -
Do not tilt the riveter when installing the rivet onto the rear speaker assembly.
-
Do not leave any space between the rivet head and rear speaker assembly.
-
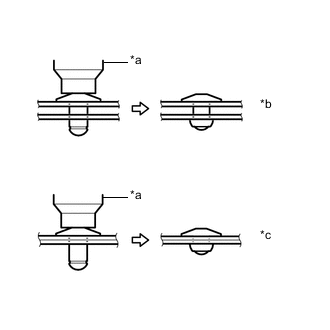
Do not leave any clearance between the rear speaker assembly and door. Firmly hold the 2 items together while installing the rivets.
Text in Illustration *a Riveter *b Incorrect *c Correct
-
-
Connect the connector.
-
-
INSTALL REAR DOOR TRIM BOARD SUB-ASSEMBLY
-
INSTALL REAR DOOR ARMREST BASE UPPER PANEL (w/ Power Window)
-
INSTALL REAR DOOR ARMREST BASE UPPER PANEL (w/o Power Window)
-
INSTALL REAR DOOR WINDOW REGULATOR HANDLE ASSEMBLY (w/o Power Window)
-
INSTALL REAR DOOR FRAME GARNISH