CONTROL VALVE ASSEMBLY (for Front Side) REMOVAL

CAUTION:
Be sure to read Precaution thoroughly before servicing Click here.
Note
-
Before removal, make sure to disable vehicle height control by pressing the height control OFF switch and confirming that the height control OFF indication is displayed on the meter.
-
Check the safety of your surroundings and use caution when disconnecting each height control valve air tube as the air in each pneumatic cylinder will be discharged and the vehicle body will lower.
-
This operation takes out the air from the front shock absorber, therefore never rotate the lower part of the absorber by turning the steering wheel etc.
-
PRECAUTION (w/ Navigation System for HDD)
Note
After the power switch is turned off, the display and navigation module display (HDD navigation system) records various types of memory and settings. As a result, after turning the power switch off, make sure to wait for the time specified in the following table before disconnecting the cable from the negative (-) battery terminal.
Waiting Time before Disconnecting Cable from Negative (-) Battery Terminal Specification Waiting Time w/o Telematics transceiver 60 sec. w/ Telematics transceiver 120 sec. -
REMOVE REAR DECK FLOOR BOX
-

Remove the 3 clips and the rear deck floor box.
-
-
DISCONNECT CABLE FROM NEGATIVE BATTERY TERMINAL
Note
When disconnecting the cable, some systems need to be initialized after the cable is reconnected Click here.
-
REMOVE ENGINE ROOM SIDE COVER
-
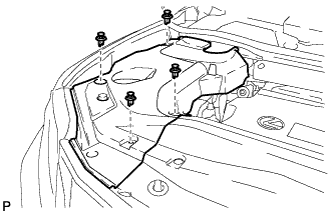
Remove the 4 clips and engine room side cover.
-
-
REMOVE ENGINE ROOM SIDE COVER LH
-
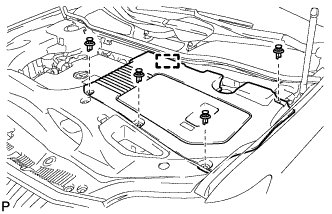
Remove the 4 clips.
-
Disengage the guide and remove the engine room side cover LH.
-
-
REMOVE COOL AIR INTAKE DUCT SEAL
-
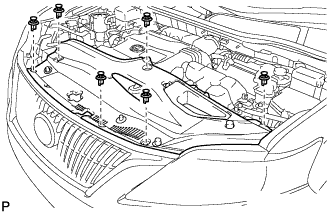
Remove the 6 clips and cool air intake duct seal.
-
-
REMOVE HOOD CENTER CUSHION
-
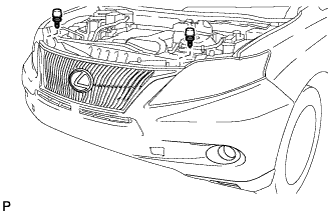
Remove the 2 hood center cushions.
-
-
REMOVE FRONT BUMPER ASSEMBLY
-
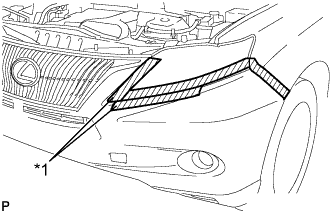
Text in Illustration *1 Protective Tape Put protective tape around the front bumper assembly.
Tech Tips
Use the same procedure for the RH side and LH side.
-
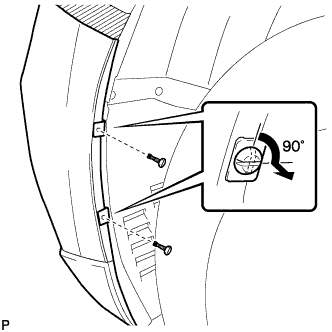
Using a screwdriver, turn the pins 90 degrees and remove the 2 pin hold clips.
Tech Tips
Use the same procedure for the RH side and LH side.
-
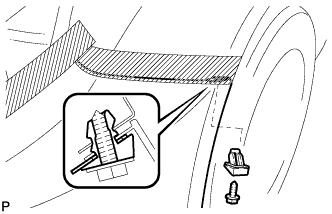
Remove the screw and front bumper seal bracket.
Tech Tips
Use the same procedure for the RH side and LH side.
-
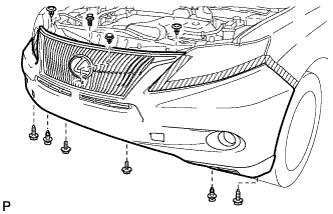
Remove the 2 bolts and 2 screws.
-
Using a clip remover, remove the 6 clips.
-
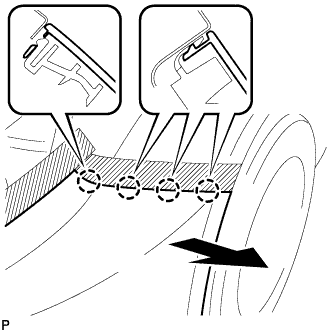
Disengage the 4 claws and remove the front bumper assembly.
Tech Tips
Use the same procedure for the RH side and LH side.
-
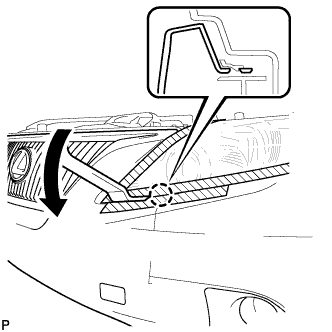
Using a moulding remover, disengage the claw.
Tech Tips
Use the same procedure for the RH side and LH side.
-
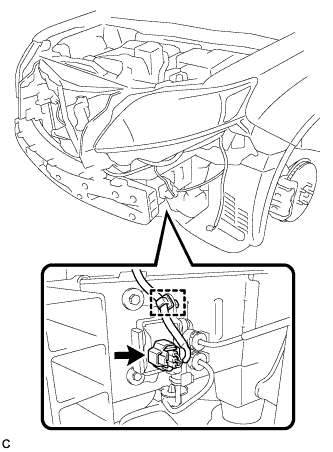
Disconnect the fog light connector.
-
Disconnect the No. 1 ultrasonic sensor connector. (w/ LEXUS Parking Assist-sensor System)
-
Disconnect the headlight cleaner hose.
Note
Prepare a drain pan or a piece of cloth in case washer fluid leaks.
-
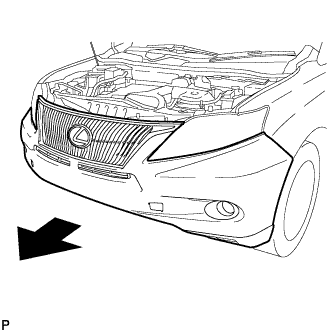
Remove the front bumper assembly as shown in the illustration.
-
-
REMOVE NO. 1 HEIGHT CONTROL VALVE SUB-ASSEMBLY
-
Disconnect the connector and disengage the clamp.
-

Remove the 3 holders and disconnect the 3 height control tubes.
Tech Tips
For the disconnecting procedure of the tube (type 3), refer to Precaution of the suspension control system Click here.
-
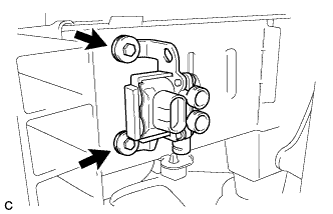
Remove the 2 bolts and No. 1 height control valve sub-assembly.
-