OIL COOLER REMOVAL

-
PRECAUTION (w/ Air Suspension)
CAUTION:
Be sure to read Precaution thoroughly before servicing Click here.
-
REMOVE NO. 1 ENGINE UNDER COVER
-
DRAIN HYBRID TRANSAXLE FLUID
-

Text in Illustration *1 Filler Plug Using a hexagon socket wrench 10 mm, remove the filler plug and gasket.
-
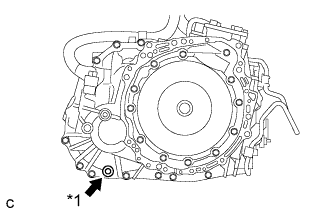
Text in Illustration *1 Drain Plug Using a hexagon socket wrench 10 mm, remove the drain plug and gasket.
-
Using a hexagon socket wrench 10 mm, install the drain plug and a new gasket.
- Torque:
- 39 N*m { 398 kgf*cm, 29 ft.*lbf }
-
-
REMOVE ENGINE ROOM SIDE COVER LH
-
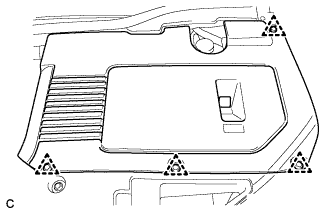
Remove the 4 clips and engine room side cover LH.
-
-
REMOVE ENGINE ROOM SIDE COVER
-
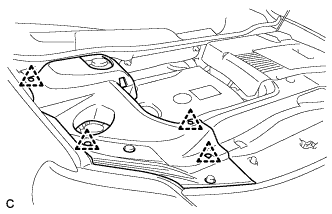
Remove the 4 clips and engine room side cover.
-
-
REMOVE COOL AIR INTAKE DUCT SEAL
-
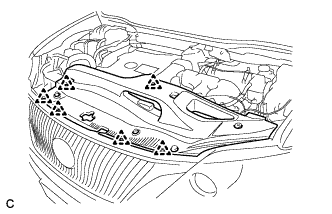
Remove the 6 clips and cool air intake duct seal.
-
-
REMOVE HOOD CENTER CUSHION
-
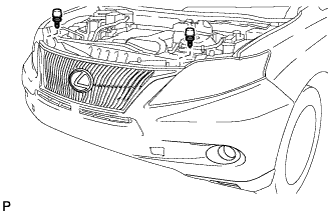
Remove the 2 hood center cushions.
-
-
REMOVE FRONT BUMPER ASSEMBLY
-
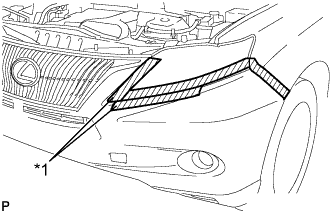
Text in Illustration *1 Protective Tape Put protective tape around the front bumper assembly.
Tech Tips
Use the same procedure for the RH side and LH side.
-
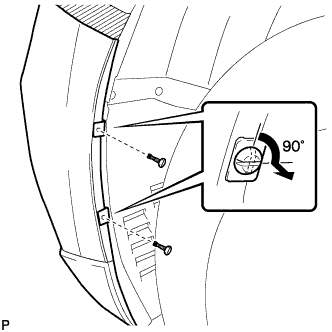
Using a screwdriver, turn the pins 90 degrees and remove the 2 pin hold clips.
Tech Tips
Use the same procedure for the RH side and LH side.
-
Remove the screw and front bumper seal bracket.
Tech Tips
Use the same procedure for the RH side and LH side.
-
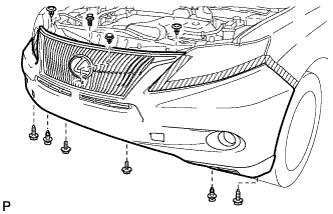
Remove the 2 bolts and 2 screws.
-
Using a clip remover, remove the 6 clips.
-
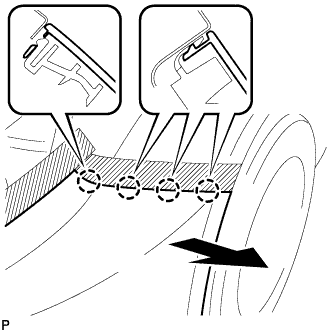
Disengage the 4 claws and remove the front bumper assembly.
Tech Tips
Use the same procedure for the RH side and LH side.
-
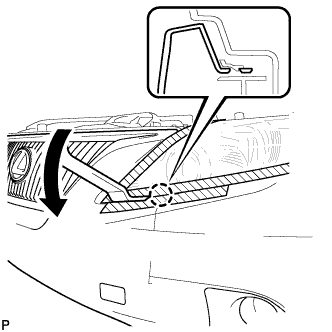
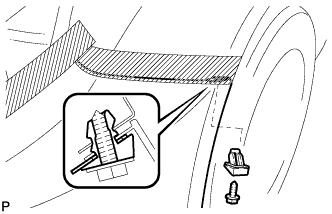
Using a moulding remover, disengage the claw.
Tech Tips
Use the same procedure for the RH side and LH side.
-
Disconnect the fog light connector.
-
Disconnect the No. 1 ultrasonic sensor connector. (w/ LEXUS Parking Assist-sensor System)
-
Disconnect the headlight cleaner hose.
Note
Prepare a drain pan or a piece of cloth in case washer fluid leaks.
-
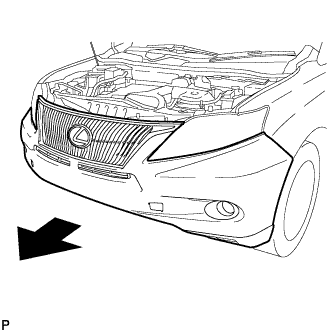
Remove the front bumper assembly as shown in the illustration.
-
-
SEPARATE INVERTER WATER PUMP ASSEMBLY
-
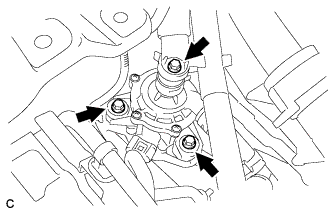
Remove the 3 bolts.
-
Disconnect the connector and clamp, and separate the inverter water pump assembly.
-
-
REMOVE FRAME SIDE RAIL PLATE SUB-ASSEMBLY
-
Using a transmission jack, hold the front frame.
Note
Be sure to position the transmission jack to properly support the front frame.
-
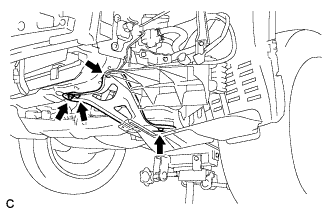
Remove the 3 bolts, nut and frame side rail plate sub-assembly.
-
-
REMOVE OIL COOLER WITH BRACKET ASSEMBLY
-
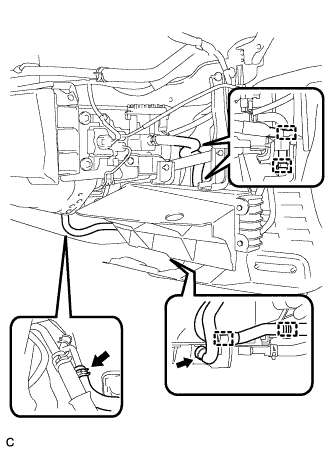
Disconnect the 4 clamps and 2 oil cooler hoses from the oil cooler with bracket assembly.
-
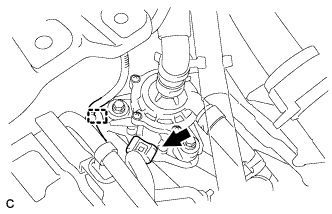
Remove the bolt, nut and oil cooler with bracket assembly.
-
-
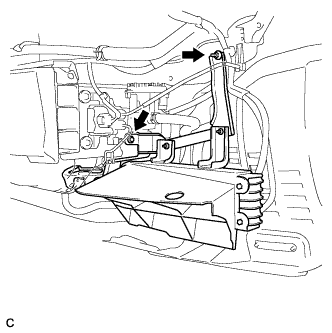
REMOVE AIR DUCT
-

Remove the 3 bolts and air duct.
-