FRONT SEAT ASSEMBLY (for Manual Seat) REMOVAL

Note
Wear protective gloves. Sharp areas on the parts may injure your hands.
Tech Tips
-
Use the same procedure for the LH side and RH side.
-
The procedure listed below is for the LH side.
-
DISCONNECT CABLE FROM NEGATIVE BATTERY TERMINAL
CAUTION:
Wait at least 90 seconds after disconnecting the cable from the negative (-) battery terminal to disable the SRS system.
Note
-
w/ Navigation System (for HDD):
After the ignition switch is turned off, the HDD navigation system requires approximately a minute to record various types of memory and settings. As a result, after turning the ignition switch off, wait a minute or more before disconnecting the cable from the negative (-) battery terminal.
-
When disconnecting the cable, some systems need to be initialized after the cable is reconnected Click here.
-
-
REMOVE FRONT SEAT REAR INNER TRACK COVER
-
Lift up the seat track adjusting handle and move the seat to the foremost position.
-
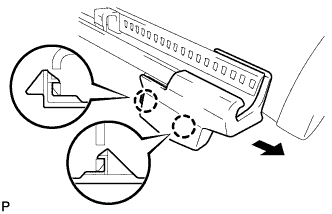
Using a screwdriver, detach the 2 claws and remove the cover.
Tech Tips
Tape the screwdriver tip before use.
-
-
REMOVE FRONT SEAT REAR OUTER TRACK COVER
-
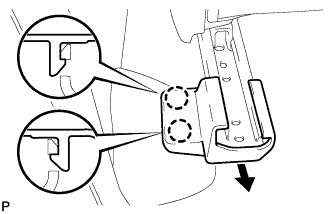
Using a screwdriver, detach the 2 claws and remove the cover.
Tech Tips
Tape the screwdriver tip before use.
-
-
REMOVE FRONT SEAT INNER TRACK BRACKET COVER
-
Lift up the seat track adjusting handle and move the seat to the rearmost position.
-
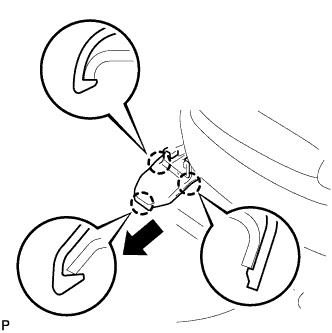
Using a screwdriver, detach the 3 claws and remove the cover.
Tech Tips
Tape the screwdriver tip before use.
-
-
REMOVE FRONT SEAT OUTER TRACK BRACKET COVER
-
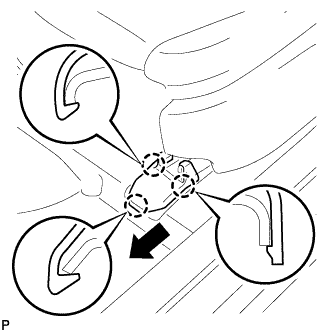
Using a screwdriver, detach the 3 claws and remove the cover.
Tech Tips
Tape the screwdriver tip before use.
-
-
REMOVE FRONT SEAT ASSEMBLY
-
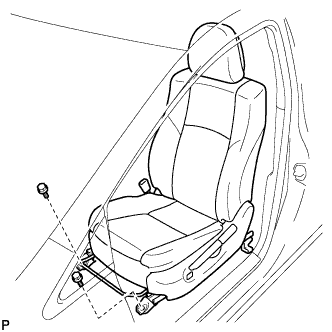
Remove the 2 bolts.
-
Lift up the seat track adjusting handle and move the seat to the foremost position.
-
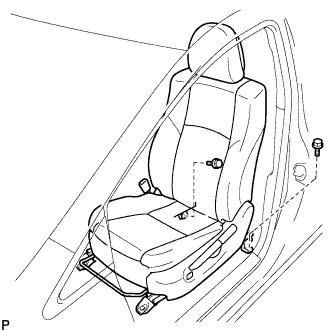
Remove the 2 bolts.
-
Lift up the seat track adjusting handle and move the seat to the center position. Also, operate the reclining adjuster release handle and move the seatback to the upright position.
-
Disconnect the connectors under the seat.
-

Remove the front seat assembly as shown in the illustration.
Note
-
Make sure the seatback does not contact the shift lever knob.
-
Be careful not to damage the vehicle body.
Tech Tips
Remove the seat assembly through the door frame so that it passes under the steering wheel.
-
-