RADIO ANTENNA CORD INSTALLATION

-
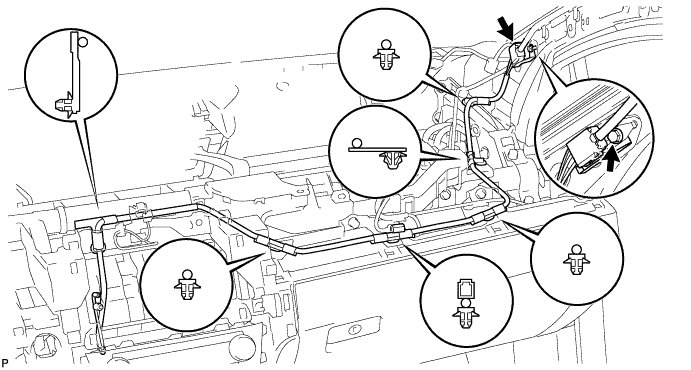
INSTALL ANTENNA CORD SUB-ASSEMBLY (for LHD)
-
for Connector Type:
-
Attach the 6 clamps.
-
Connect the connector.
-
Install the antenna cord with the bolt.
- Torque:
- 8.4 N*m { 85 kgf*cm, 73 in.*lbf }

-
-
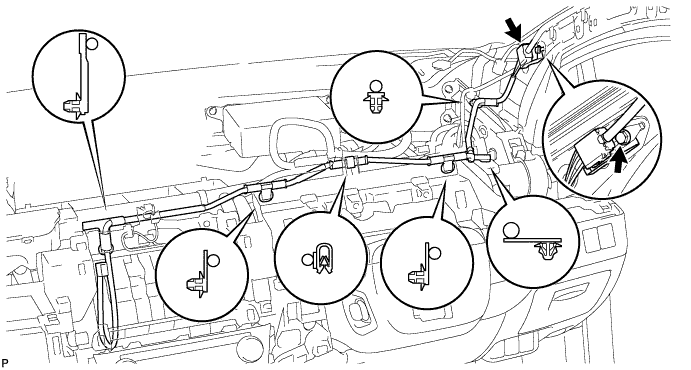
for Plug Type:
-
Attach the 6 clamps.
-
Connect the connector.
-
Install the antenna cord with the bolt.
- Torque:
- 8.4 N*m { 85 kgf*cm, 73 in.*lbf }
-
-
-
INSTALL ANTENNA CORD SUB-ASSEMBLY (for RHD)
-
for Connector Type:
-
Attach the 6 clamps.
-
Connect the connector.
-
Install the antenna cord with the bolt.
- Torque:
- 8.4 N*m { 85 kgf*cm, 73 in.*lbf }
-
-
for Plug Type:
-
Attach the 6 clamps.
-
Connect the connector.
-
Install the antenna cord with the bolt.
- Torque:
- 8.4 N*m { 85 kgf*cm, 73 in.*lbf }

-
-
-
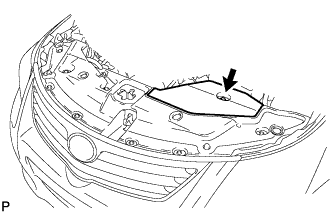
INSTALL DEFROSTER NOZZLE ASSEMBLY
-
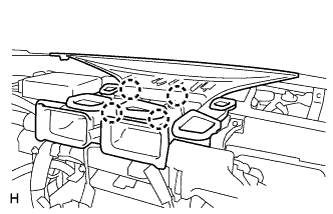
Attach the 4 claws to install the defroster nozzle assembly.
-
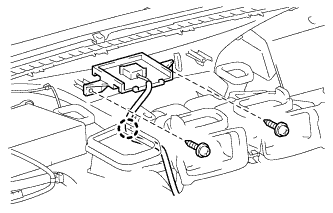
w/ Navigation System:
Install the navigation antenna assembly.
-
Attach the claw to install the navigation antenna assembly.
-
Install the 2 screws.
-
-
-
INSTALL UPPER INSTRUMENT PANEL SUB-ASSEMBLY
-
Install the upper instrument panel Click here.
-
-
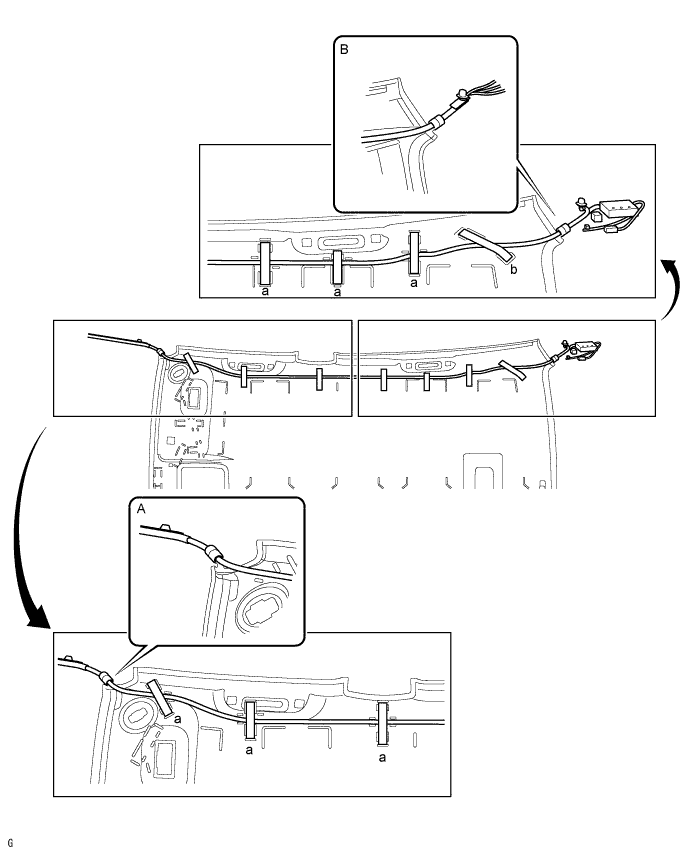
INSTALL AMPLIFIER ANTENNA ASSEMBLY (for Sedan)
-
Align the marking tape on the antenna cord with the roof headlining tabs shown in A and B, and wrap tape around the cord to install it.
-
Starting from the front of the vehicle, attach the antenna cord to the roof headlining with tape at the 6 marked locations labeled "a".
-
While adjusting the slack of the antenna cord, attach the antenna cord to the roof headlining with tape at the marked location labeled "b".
-
-
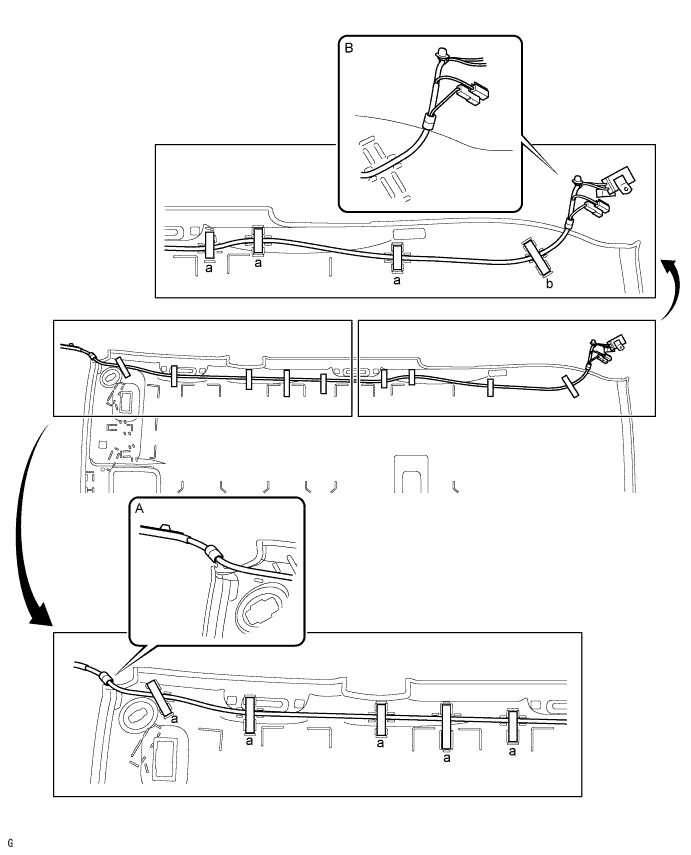
INSTALL AMPLIFIER ANTENNA ASSEMBLY (for Wagon)
-
w/o Panorama Roof:
-
Align the marking tape on the antenna cord with the roof headlining tabs shown in A and B, and wrap tape around the cord to install it.
-
Starting from the front of the vehicle, attach the antenna cord to the roof headlining with tape at the 8 marked locations labeled "a".
-
While adjusting the slack of the antenna cord, attach the antenna cord to the roof headlining with tape at the marked location labeled "b".
-
-
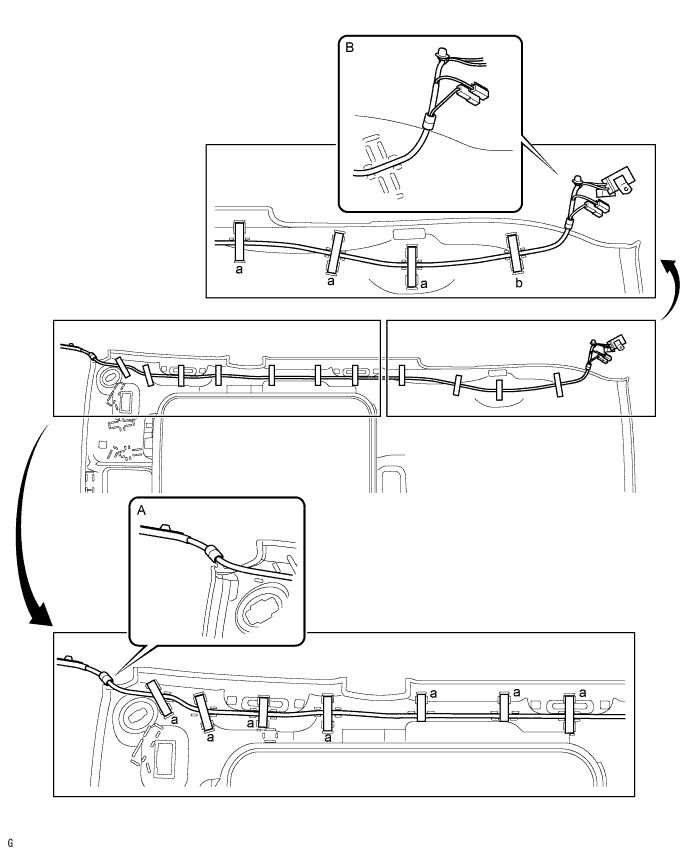
w/ Panorama Roof:
-
Align the marking tape on the antenna cord with the roof headlining tabs shown in A and B, and wrap tape around the cord to install it.
-
Starting from the front of the vehicle, attach the antenna cord to the roof headlining with tape at the 10 marked locations labeled "a".
-
While adjusting the slack of the antenna cord, attach the antenna cord to the roof headlining with tape at the marked location labeled "b".
-
-
-
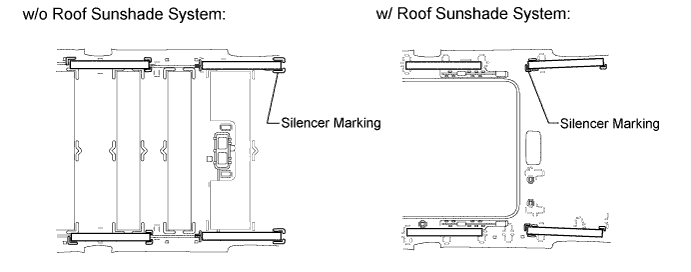
INSTALL NO. 6 ROOF SILENCER PAD (for Sedan)
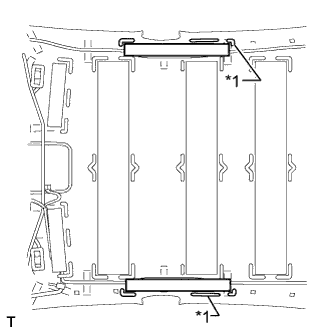
Text in Illustration *1 Silencer Marking
-
Align the No. 6 roof silencer pads with the silencer markings on the roof headlining and install the 2 No. 6 roof silencer pads using double-sided tape as shown in the illustration.
-
-
INSTALL NO. 6 ROOF SILENCER PAD (for Wagon)
-
Align the No. 6 roof silencer pads with the silencer markings on the roof headlining and install the 4 No. 6 roof silencer pads using double-sided tape as shown in the illustration.
-
-
INSTALL ROOF HEADLINING ASSEMBLY
-
for Sedan:
Install the roof headlining Click here.
-
for Wagon:
Install the roof headlining Click here.
-
-
CONNECT CABLE TO NEGATIVE BATTERY TERMINAL
Note
When disconnecting the cable, some systems need to be initialized after the cable is reconnected Click here.
-
INSTALL ENGINE ROOM SIDE COVER
-
Install the engine room side cover with the clip.
-
-
CHECK SRS WARNING LIGHT
-
Check the SRS warning light Click here.
-