REAR COIL SPRING INSTALLATION

-
INSTALL REAR UPPER COIL SPRING INSULATOR LH
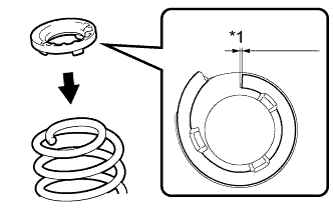
Text in Illustration *1 10 mm or less
-
Install the rear upper coil spring insulator to the rear coil spring.
Note
Install the rear upper coil insulator so that the dimension between the stopper and upper end of the rear coil spring is 10 mm (0.394 in.) or less.
-
-
INSTALL REAR LOWER COIL SPRING INSULATOR LH
-
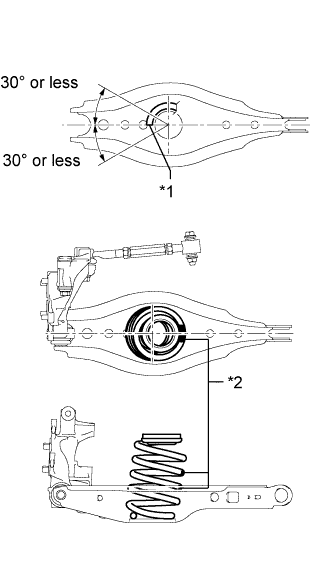
INSTALL REAR COIL SPRING LH
-
Install the rear coil spring to the rear No. 2 suspension arm.
Text in Illustration *1 End of Coil *2 Identification Mark Note
-
Install the rear coil spring so that the identification marks are positioned as shown in the illustration.
-
Install the rear coil spring so that its end is within the range shown in the illustration.
-
-
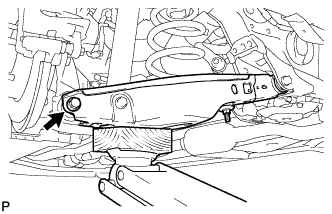
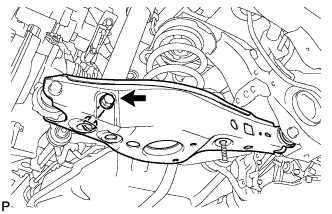
Using a jack and wooden block, raise the vehicle gradually to install the rear No. 2 suspension arm to the rear axle carrier. Then temporarily install the bolt and nut.
-
-
TEMPORARILY INSTALL REAR SHOCK ABSORBER ASSEMBLY LH
-
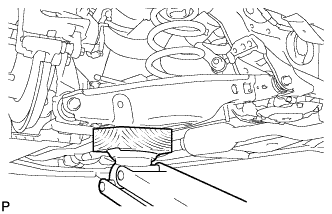
Support the rear No. 2 suspension arm assembly LH with a jack using a wooden block to avoid damage.
-
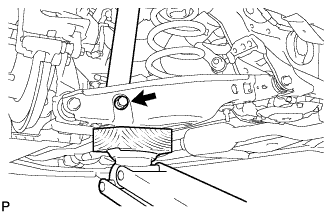
Temporarily install the rear shock absorber assembly to the rear No. 2 suspension arm with the bolt and nut.
-
-
TEMPORARILY INSTALL REAR NO. 2 SUSPENSION ARM ASSEMBLY LH
-
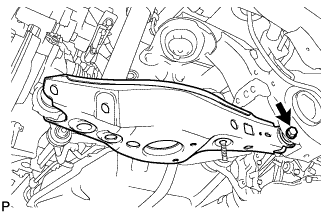
Temporarily install the rear No. 2 suspension arm to the suspension member with the bolt and nut.
-
-
STABILIZE SUSPENSION
-
Install the rear wheel.
- Torque:
- 103 N*m { 1050 kgf*cm, 76 ft.*lbf }
-
Lower the vehicle and bounce it up and down several times to stabilize the rear suspension.
-
Remove the rear wheel.
-
-
TIGHTEN REAR SHOCK ABSORBER ASSEMBLY LH
-
Tighten the bolt on the rear shock absorber (lower side).
- Torque:
- 90 N*m { 918 kgf*cm, 66 ft.*lbf }
Note
Since a stopper nut is used, tighten the bolt.
-
-
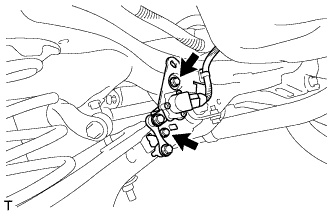
TIGHTEN REAR NO. 2 SUSPENSION ARM ASSEMBLY LH
-
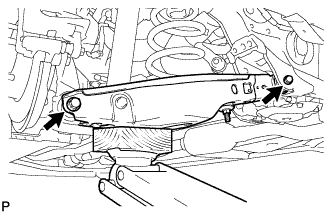
Tighten the bolts of the suspension arm.
- Torque:
- 90 N*m { 918 kgf*cm, 66 ft.*lbf }
Note
Since a stopper nut is used, tighten the bolt.
-
-
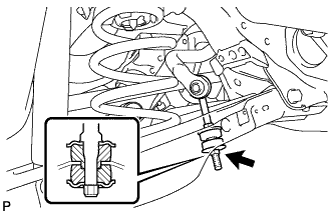
INSTALL REAR STABILIZER LINK ASSEMBLY LH
-
Temporarily install a new rear stabilizer link and 2 new rear stabilizer cushions to the rear No. 2 suspension arm with the 2 nuts.
-
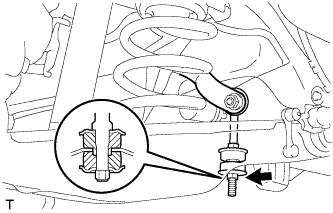
Install the upper nut.
- Torque:
- 95 N*m { 969 kgf*cm, 70 ft.*lbf }
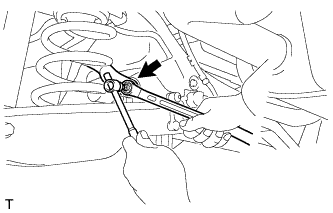
Tech Tips
If the ball joint turns together with the nut, use a 6 mm hexagon wrench to hold the stud.
-
Tighten the lower nut.
- Torque:
- 30 N*m { 306 kgf*cm, 22 ft.*lbf }
-
-
INSTALL REAR HEIGHT CONTROL SENSOR SUB-ASSEMBLY (for HID Headlight)
-
Install the rear height control sensor with the 2 bolts.
- Torque:
- 14 N*m { 143 kgf*cm, 10 ft.*lbf }
-
Connect the connector.
-
-
INSPECT AND ADJUST REAR WHEEL ALIGNMENT
-
Inspect and adjust the rear wheel alignment Click here.
-
-
CONNECT CABLE TO NEGATIVE BATTERY TERMINAL
Note
When disconnecting the cable, some systems need to be initialized after the cable is reconnected Click here.
-
ADJUST HEADLIGHT ASSEMBLY
-
for Halogen Headlight:
Adjust the headlight assembly Click here.
-
for HID Headlight:
Adjust the headlight assembly Click here.
-