ROOF SUNSHADE INSTALLATION

-
INSTALL NO. 1 ROOF WINDOW GLASS SUB-ASSEMBLY
-
Set the No. 1 roof window glass on the vehicle while being careful of the guide pins and windshield outside moulding as shown in the illustration.
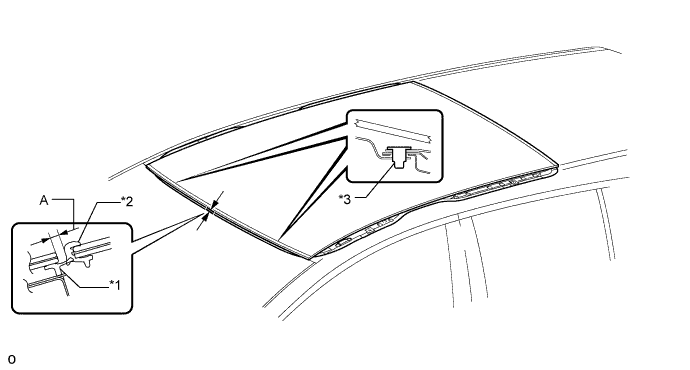
Text in Illustration *1 Windshield Outside Moulding *3 Guide Pin *2 Front Moon Roof Moulding - - Standard Area Specified Condition A 4 mm (0.157 in.) Note
-
If the No. 1 roof window glass is not as shown in the illustration, remove it and set it on the vehicle again.
-
If shims are present, do not remove or adjust them.
-
-
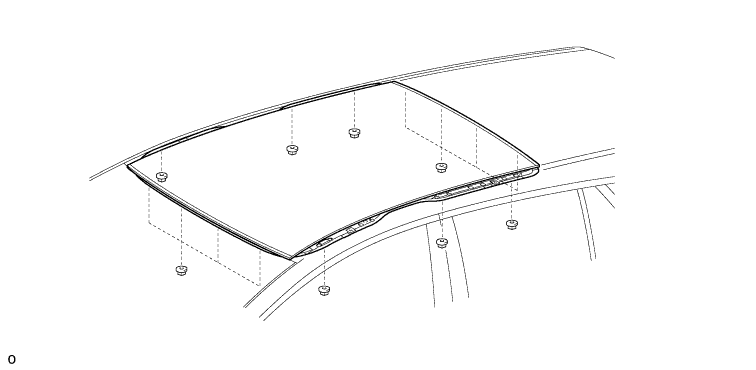
Install the glass with the 14 nuts.
- Torque:
- 9.3 N*m { 95 kgf*cm, 82 in.*lbf }
-
-
INSTALL SLIDING ROOF HOUSING SUB-ASSEMBLY
-
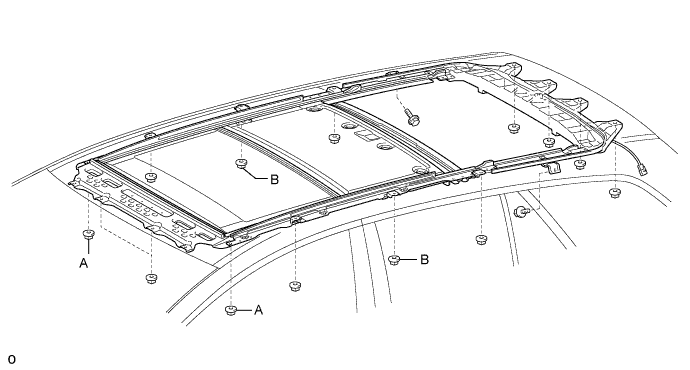
Temporarily install the sliding roof housing with the 4 nuts labeled A and B.
- Torque:
- 5.5 N*m { 56 kgf*cm, 49 in.*lbf }
Note
Temporarily install the nuts labeled A first, and then temporarily install the nuts labeled B.
-
Install the 10 nuts and 2 bolts, and tighten the 4 nuts labeled A and B.
- Torque:
- 5.5 N*m { 56 kgf*cm, 49 in.*lbf }
-
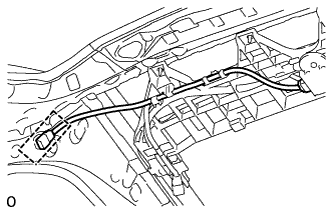
Attach the connector wire clamp.
-
-
CHECK FOR WATER LEAKS
-
Adjust the No. 1 roof window glass sub-assembly and check for water leaks.
-
If there are any leaks, readjust the No. 1 roof window glass sub-assembly.
-
-
INSTALL CURTAIN SHIELD AIRBAG ASSEMBLY LH
-
Install the curtain shield airbag assembly LH Click here.
-
-
INSTALL CURTAIN SHIELD AIRBAG ASSEMBLY RH
Tech Tips
Use the same procedure described for the LH side.
-
INSTALL UPPER ROOF RACK FRAME
-
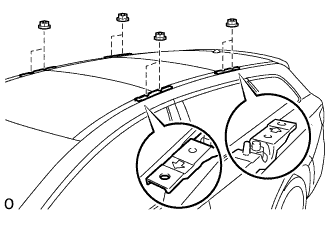
Install the 4 upper roof rack frames with the 8 nuts.
- Torque:
- 17 N*m { 173 kgf*cm, 13 ft.*lbf }
-
-
INSTALL FRONT ROOF SIDE GARNISH LH
-
Install the front roof side garnish LH Click here.
-
-
INSTALL FRONT ROOF SIDE GARNISH RH
Tech Tips
Use the same procedure described for the LH side.
-
CONNECT CABLE TO NEGATIVE BATTERY TERMINAL
Note
When disconnecting the cable, some systems need to be initialized after the cable is reconnected Click here.
-
CHECK SRS WARNING LIGHT
-
Check the SRS warning light Click here.
-