- Click here
INSTALL HEADLIGHT ASSEMBLY
-
Connect each connector.
-
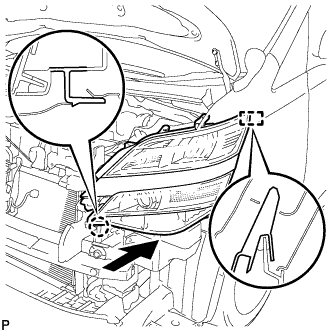
Engage the guide and claw to install the headlight assembly in the direction indicated by the arrow as shown in the illustration.
-
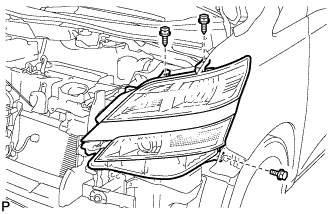
Install the bolt and 2 screws.
5.4 N*m 55 kgf*cm 48 in.*lbf
-
- Click here
INSTALL FRONT BUMPER ASSEMBLY
-
Engage the 2 guides.
-
Connect the connector.
-
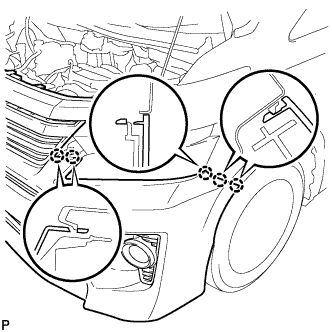
Engage the 5 claws.
Tip:Use the same procedure for the RH side and LH side.
-
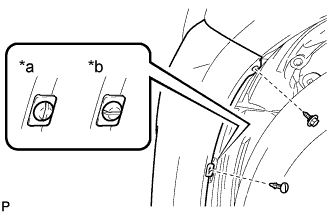
Install the screw and pin hold clip.
Table 1. Text in Illustration *a Correct *b Incorrect Note:Insert the pin hold clip with the slot aligned vertically. Do not rotate the clip after inserting it. After installation, confirm that the slot is aligned vertically.
Tip:Use the same procedure for the RH side and LH side.
-
Install the front bumper assembly with the 4 bolts and 5 clips.
-
- Click here
INSTALL HEADLIGHT COVER LH
-
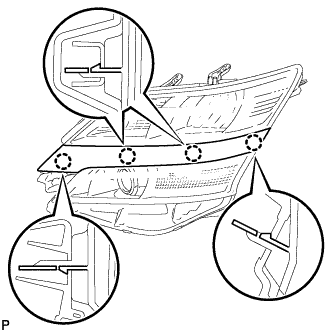
Engage the 4 claws to install the headlight cover LH.
-
- Click here
INSTALL HEADLIGHT COVER RH
Tip:Use the same procedure for the RH side and LH side.
- Click here
INSTALL RADIATOR GRILLE ASSEMBLY
-
Connect the connector.
-
Engage the 6 claws.
-
Install the radiator grille assembly with the 4 screws.
-
- Click here
INSTALL RADIATOR COVER SUB-ASSEMBLY
-
Install the radiator cover sub-assembly with the 4 clips.
-
- Click here
CONNECT CABLE TO NEGATIVE BATTERY TERMINAL
Note:When disconnecting the cable, some systems need to be initialized after the cable is reconnected (Click here).
- Click here
ADJUST HEADLIGHT AIMING
- Click here
ADJUST FOG LIGHT AIMING