TILT ROOF HOUSING INSTALLATION

-
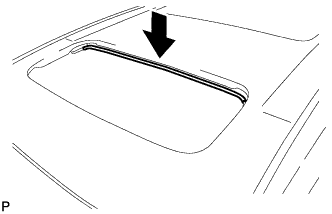
INSTALL TILT ROOF WEATHERSTRIP
-
Install the tilt roof weatherstrip as follows:
-
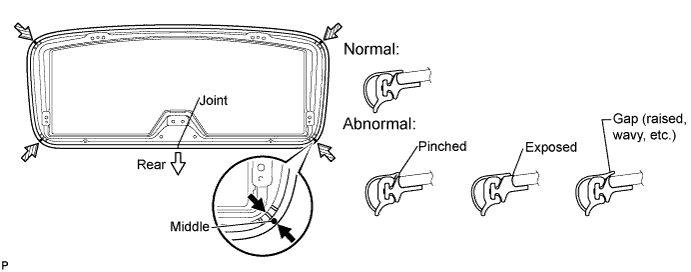
Position the joint of the weatherstrip at the rear center.
-
Align the marks on the weatherstrip with the middle marks at the corners of the tilt roof panel and install the weatherstrip.
-
Install the lip of the weatherstrip firmly.
-
-
-
INSTALL TILT ROOF GLASS PAD
-
Apply new double-sided tape to the tilt roof glass pad.
Tech Tips
After removing the release paper, keep the exposed adhesive free from foreign matter.
-
Install the tilt roof glass pad to the tilt roof hinge sub-assembly.
Tech Tips
Use the same procedure for the LH side and RH side.
-
-
INSTALL TILT ROOF HINGE SUB-ASSEMBLY RH
-

Install the tilt roof hinge sub-assembly RH with the 2 nuts.
- Torque:
- 7.0 N*m { 71 kgf*cm, 62 in.*lbf }
-
-
INSTALL TILT ROOF HINGE SUB-ASSEMBLY LH
Tech Tips
Use the same procedure as for the RH side.
-
INSTALL TILT ROOF GLASS SEAL
-
Apply new double-sided tape to the tilt roof glass seal.
Tech Tips
After removing the release paper, keep the exposed adhesive free from foreign matter.
-
Install the tilt roof glass seal to the tilt roof glass.
-
-
INSTALL TILT ROOF LOCK HANDLE ASSEMBLY
-
Using a socket wrench (Phillips-head bit), install the tilt roof lock handle assembly with the 2 screws.
- Torque:
- 4.0 N*m { 41 kgf*cm, 35 in.*lbf }
-
-
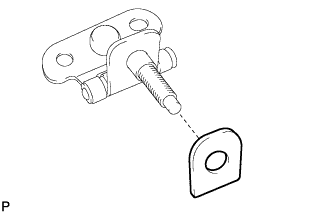
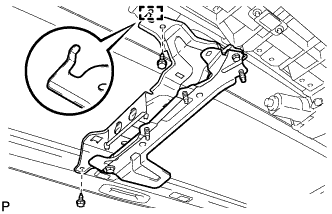
INSTALL TILT ROOF LINK SUB-ASSEMBLY RH
-
Install the tilt roof link sub-assembly RH with the nut.
- Torque:
- 7.0 N*m { 71 kgf*cm, 64 in.*lbf }
-
-
INSTALL TILT ROOF LINK SUB-ASSEMBLY LH
Tech Tips
Use the same procedure as for the RH side.
-
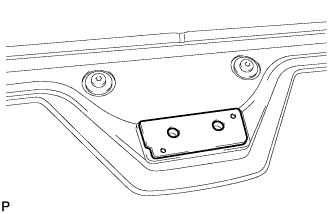
INSTALL TILT ROOF PANEL COVER
-
Install the tilt roof panel cover as shown in the illustration.
-
-
INSTALL TILT ROOF LOCK STRIKER
-

Install the tilt roof lock striker with the 3 bolts.
- Torque:
- 5.4 N*m { 55 kgf*cm, 48 in.*lbf }
-
-
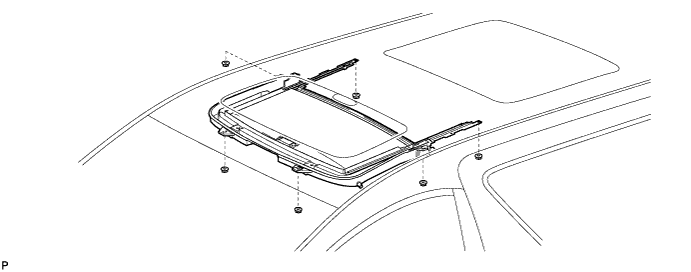
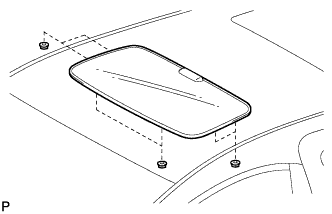
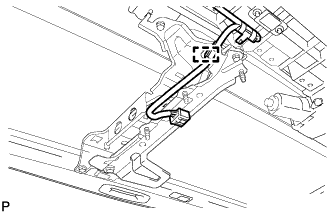
INSTALL TILT ROOF HOUSING SUB-ASSEMBLY
-
Install the tilt roof housing sub-assembly with the 6 nuts.
- Torque:
- 7.4 N*m { 75 kgf*cm, 66 in.*lbf }
-
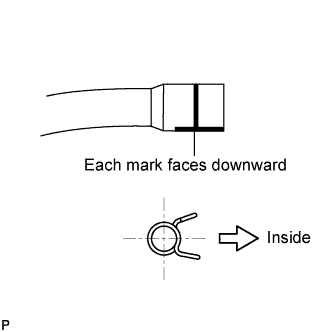
Connect the 4 sliding roof drain hoses so that each mark faces downward as shown in the illustration.
Note
Be sure to install the drain hoses properly to prevent entry of water.
-
-
INSTALL TILT ROOF PANEL ASSEMBLY
-
Temporarily install the tilt roof panel assembly with the 6 nuts.
-
Perform a level check.
-
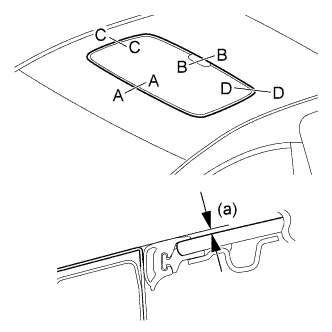
Check the difference in level for "a" in the illustration between the roof panel and the upper surface of the weatherstrip when the tilt roof glass is fully closed.
Standard Area Measurement A - A - 1.3 + 1.5 mm (- 0.0511 + 0.0590 in.)
- 1.3 - 1.5 mm (- 0.0511 - 0.0590 in.)
B - B - 1.3 + 1.5 mm (- 0.0511 + 0.0590 in.)
- 1.3 - 1.5 mm (- 0.0511 - 0.0590 in.)
C - C - 1.3 + 1.5 mm (- 0.0511 + 0.0590 in.)
- 1.3 - 1.5 mm (- 0.0511 - 0.0590 in.)
D - D - 1.3 + 1.5 mm (- 0.0511 + 0.0590 in.)
- 1.3 - 1.0 mm (- 0.0511 - 0.0393 in.)
Tech Tips
"+" represents the condition that the glass is above the panel level. "-" represents the condition that the glass is below the panel level.
-
-
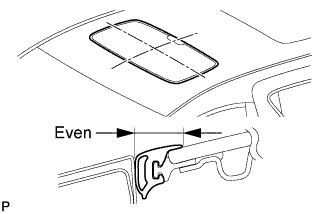
Perform a gap check.
-
Check the gap between the roof panel and roof glass.
Note
The gap must be even all around.
-
-
After adjusting the tilt roof glass, install the tilt roof panel assembly with the 6 nuts.
- Torque:
- 7.4 N*m { 75 kgf*cm, 66 in.*lbf }
-
-
INSPECT FOR WATER LEAK
-
After adjusting the tilt roof panel assembly, inspect for water leaks.
-
If there are any leaks, readjust the tilt roof panel assembly.
-
-
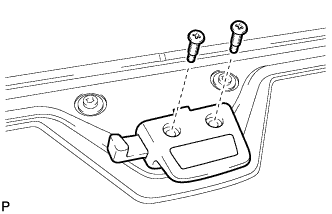
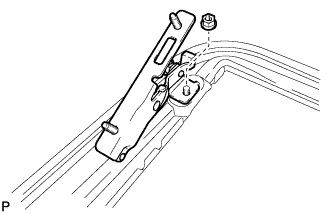
INSTALL TELEVISION BRACKET (for LH Side)
-
Engage the guide and install the television bracket with the 2 screws.
-
Engage the clamp.
-
-
INSTALL TELEVISION BRACKET (for RH Side)
-

Engage the guide and install the television bracket with the 2 screws and nut.
-
-
INSTALL ROOF HEADLINING ASSEMBLY
-
Install the roof headlining assembly Click here.
-