- Click here
INSTALL NO. 1 ION GENERATOR SUB-ASSEMBLY (for Front Side)
-
Install the No. 1 ion generator sub-assembly with the 3 screws.
2.8 N*m 29 kgf*cm 25 in.*lbf -
Engage the clamp.
-
Connect the connector.
-
- Click here
INSTALL AIR DUCT SUB-ASSEMBLY (for Front Side)
-
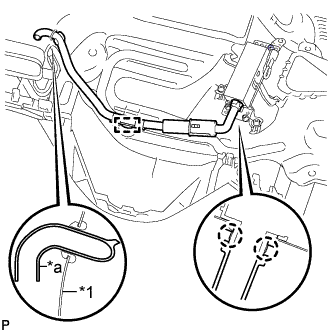
Engage the 2 claws and clamp to install the air duct sub-assembly.
Table 1. Text in Illustration *1 Instrument Panel Duct Sub-assembly *a End of Air Duct Sub-assembly -
Insert the end of the air duct sub-assembly to the instrument panel duct sub-assembly as shown in the illustration.
-
- Click here
INSTALL UPPER INSTRUMENT PANEL SUB-ASSEMBLY (for Front Side)
- Click here
INSTALL NO. 2 ION GENERATOR SUB-ASSEMBLY (for Rear Side)
-
Install the No. 2 ion generator sub-assembly with the 4 screws.
-
Engage the clamp.
-
Connect the connector.
-
- Click here
INSTALL REAR AIR DUCT SUB-ASSEMBLY (for Rear Side)
-
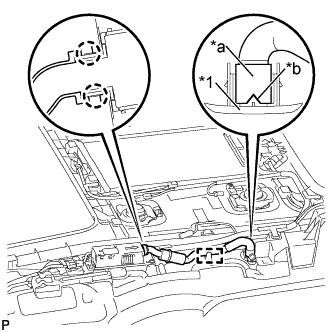
Engage the 2 claws and clamp to install the rear air duct sub-assembly.
Table 2. Text in Illustration *1 Roof Headlining Holder Cover *a End of Rear Air Duct Sub-assembly *b Cutout -
Attach the end of the rear air duct sub-assembly to the roof headlining holder cover as shown in the illustration.
Note:Attach the rear air duct sub-assembly to the roof headlining holder cover with the cutout of the duct facing the RH side of the vehicle.
-
- Click here
INSTALL ROOF HEADLINING ASSEMBLY (for Rear Side)