OCCUPANT DETECTION SENSOR (for Power Seat) REMOVAL

-
REMOVE COWL SIDE TRIM BOARD (for RHD)
Tech Tips
Use the same procedure for the LH side and RH side Click here.
-
REMOVE COWL SIDE TRIM BOARD (for LHD)
-
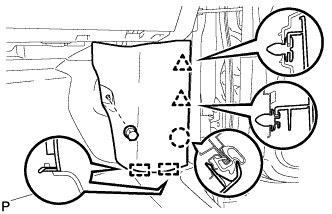
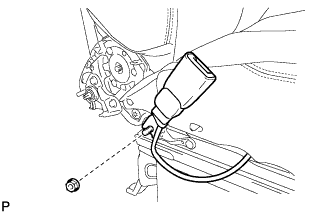
Remove the clip.
-
Disengage the 2 clips, claw and 2 guides, and remove the cowl side trim board RH.
-
-
REMOVE FRONT DOOR SCUFF PLATE
Tech Tips
Use the same procedure for the LH side and RH side Click here.
-
REMOVE NO. 3 FLOOR CARPET MOULDING
-
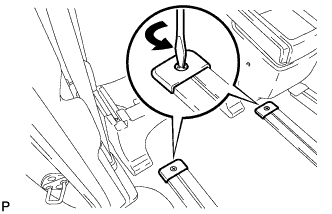
Using a screwdriver, turn the clip 90° counterclockwise to release the 2 locks, and remove the 2 No. 3 floor carpet mouldings.
-
-
REMOVE FRONT SEAT LEG COVER
-
Operate the slide power seat switch knob and move the seat to the foremost position.
-
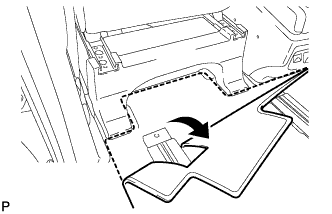
Turn back the floor carpet.
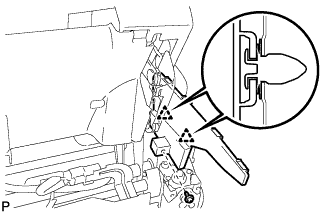
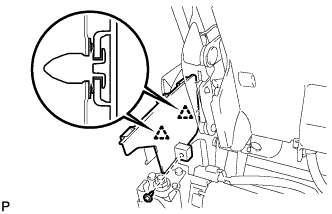
-
Disengage the 6 claws and guide, and remove the front seat leg cover LH.
-
-
REMOVE FRONT SEAT HEADREST ASSEMBLY
-
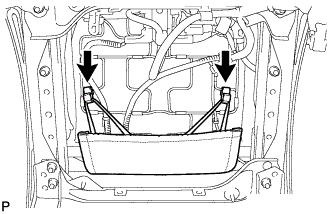
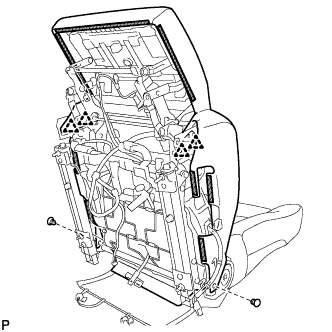
REMOVE FRONT SEAT ASSEMBLY
-
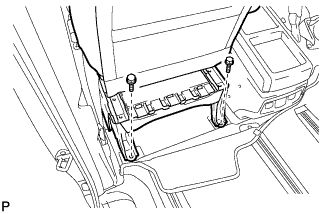
Remove the 2 bolts on the rear side of the seat.
-
Operate the slide power seat switch knob and move the seat to the rearmost position.
-
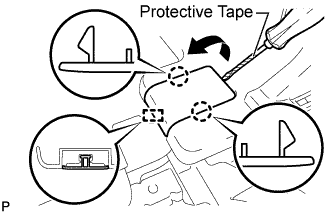
Using a screwdriver wrapped with protective tape, disengage the 2 claws and guide, and open the cover.
-
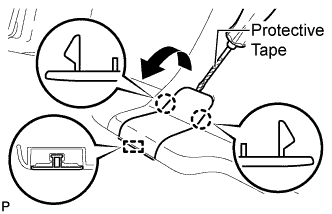
Using a screwdriver wrapped with protective tape, disengage the 2 claws and guide, and open the cover.
-
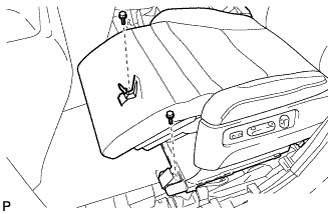
Remove the 2 bolts on the front side of the seat.
-
Operate the slide power seat switch knob and move the seat to the center position. Also, operate the reclining power seat switch knob and move the seatback to the upright position.
-
Operate the front seat power seat switch assembly to fully raise the ottoman.
-
Disconnect the cable from the negative (-) battery terminal.
CAUTION:
Wait at least 90 seconds after disconnecting the cable from the negative (-) battery terminal to disable the SRS system.
Note
When disconnecting the cable, some systems need to be initialized after the cable is reconnected Click here.
-
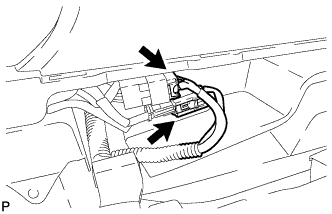
Disconnect the 2 connectors.
-

Remove the front seat assembly.
Note
Be careful not to damage the vehicle body.
-
-
REMOVE FRONT SEAT LEG ASSEMBLY
-
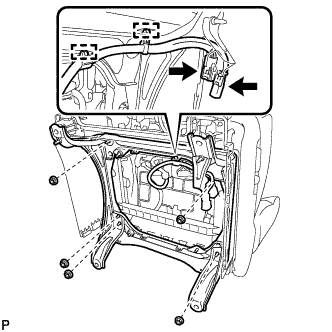
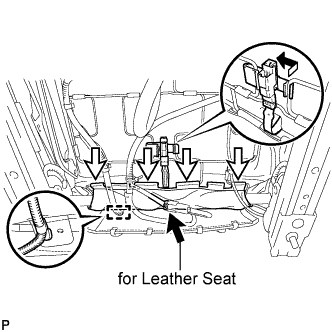
Disconnect the 2 connectors.
-
Disengage the 2 clamps.
-
Remove the 5 nuts and the front seat leg assembly.
-
-
REMOVE LOWER FRONT SEAT LEG COVER
-
Remove the lower front seat leg cover.
-
-
REMOVE RECLINING POWER SEAT SWITCH KNOB
-
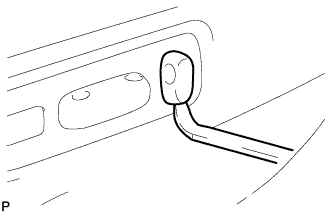
Using a moulding remover, remove the reclining power seat switch knob.
-
-
REMOVE SLIDE POWER SEAT SWITCH KNOB
-
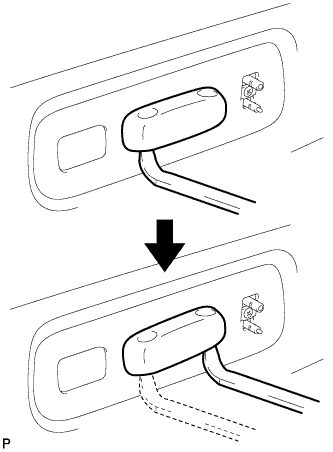
Using a moulding remover, remove the slide power seat switch knob as shown in the illustration.
-
-
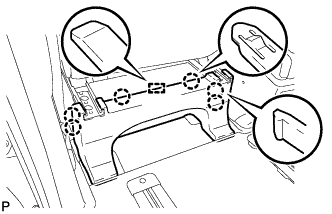
REMOVE FRONT SEAT CUSHION SHIELD
-
Disengage the 2 hooks.
-

Remove the 3 screws.
-
Disengage the 8 claws and 2 guides.
-
Disengage the 2 clamps from the front seat cushion shield.
-
Disconnect the connector and remove the front seat cushion shield and No. 2 reclining adjuster inside cover LH.
-
-
REMOVE FRONT SEAT INNER CUSHION SHIELD
-
Remove the 2 screws.
-
Disengage the 7 claws, clip and 2 guides and remove the front seat inner cushion shield and No. 2 reclining adjuster inside cover RH.
-
-
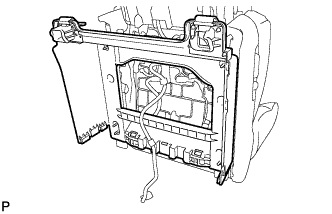
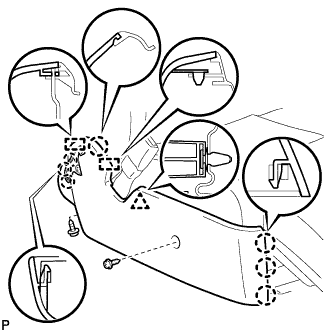
REMOVE FRONT SEAT INNER BELT ASSEMBLY
-
Disconnect each connector.
-
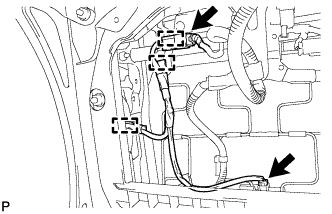
Disengage each clamp.
-
Remove the nut and the front seat inner belt assembly.
-
-
REMOVE NO. 1 FRONT SEAT INNER CUSHION SHIELD LH
-
Remove the screw.
-
Disengage the 2 clips and remove the No. 1 front seat inner cushion shield LH.
-
-
REMOVE NO. 1 FRONT SEAT INNER CUSHION SHIELD RH
-
Remove the screw.
-
Disengage the 2 clips and remove the No. 1 front seat inner cushion shield RH.
-
-
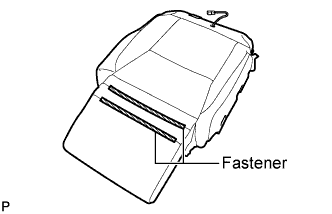
REMOVE SEPARATE TYPE FRONT SEAT CUSHION COVER WITH PAD
-
Disengage the clamp.
-
Disengage the 4 hooks.
-
Disconnect the occupant detection sensor connector.
-
for Leather Seat:
-
Disconnect the connector.
-
-
Using a clip remover, remove the 2 clips.
-
Disengage the 4 clips.
-
Disengage the 8 hooks and remove the separate type front seat cushion cover with pad.
-
-
REMOVE OCCUPANT DETECTION SENSOR (SEPARATE TYPE FRONT SEAT CUSHION PAD)
-
Disengage the 2 fasteners.
-
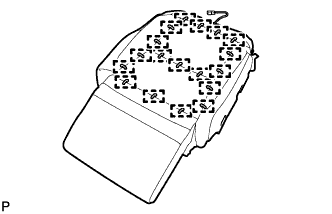
Remove the 18 hog rings and the occupant detection sensor (separate type front seat cushion pad) from the separate type front seat cushion cover.
-