SLIDE DOOR LOCK REMOVAL

-
PRECAUTION
Note
After turning the engine switch off, waiting time may be required before disconnecting the cable from the negative (-) battery terminal. Therefore, make sure to read the disconnecting the cable from the negative (-) battery terminal notices before proceeding with work Click here.
-
DISCONNECT CABLE FROM NEGATIVE BATTERY TERMINAL
Note
When disconnecting the cable, some systems need to be initialized after the cable is reconnected Click here.
-
REMOVE REAR DOOR TRIM BOARD SUB-ASSEMBLY
-
Move the door inside handle knob to the lock position.
-
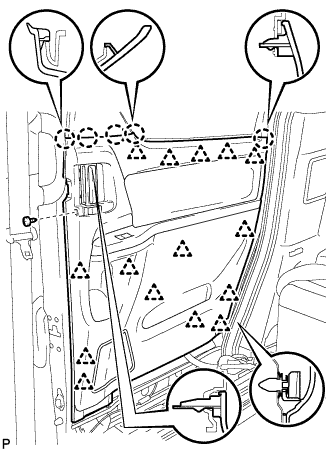
Using a T25 "TORX" socket wrench, remove the screw.
-
Using a clip remover, disengage the 15 clips and 5 claws.
-
Disconnect the connector and remove the rear door trim board sub-assembly.
-
-
REMOVE SLIDE DOOR WINDOW GARNISH (w/o Navigation System for HDD)
-
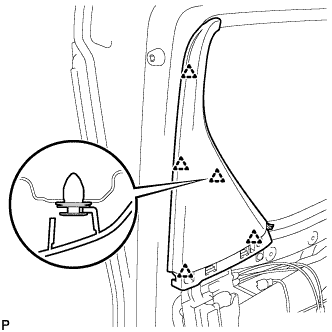
Disengage the 5 clips and remove the slide door window garnish.
-
-
REMOVE SLIDE DOOR WINDOW GARNISH (w/ Navigation System for HDD)
-

Disconnect the connector.
-
Disengage the 5 clips and remove the slide door window garnish.
-
-
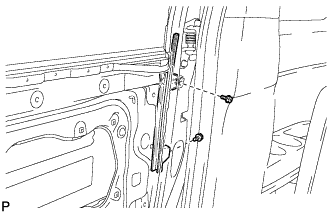
REMOVE REAR DOOR FRONT WINDOW GUIDE
-
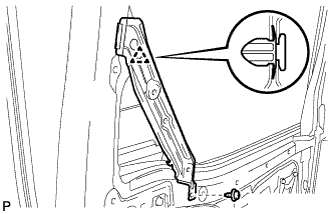
Remove the screw.
-
Disengage the clip and remove the rear door front window guide.
-
-
REMOVE REAR DOOR GLASS WEATHERSTRIP INNER WITH GARNISH
-
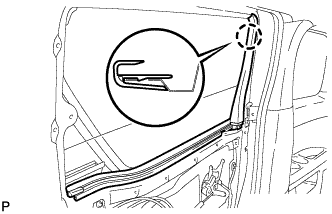
Disengage the claw and remove the rear door glass weatherstrip inner with garnish.
-
-
REMOVE SLIDE DOOR LOCK REMOTE CONTROL SUB-ASSEMBLY
w/o Power Slide Door: Click here
w/ Power Slide Door: Click here
-
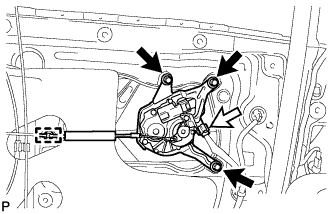
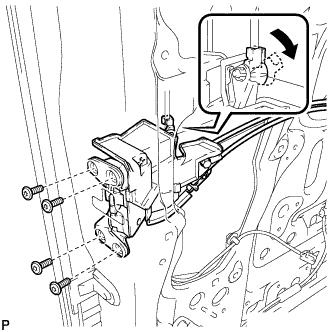
REMOVE REAR DOOR LOCK ACTUATOR ASSEMBLY
-
Remove the 3 screws.
-
Remove the rear door lock actuator assembly as shown in the illustration.
-
-
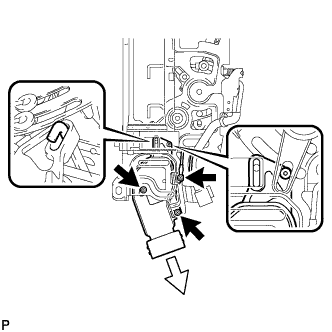
REMOVE SLIDE DOOR LOCK RELEASE MOTOR ASSEMBLY (w/ Power Slide Door)
-
Disengage the clamp.
-
Disconnect the connector.
-
Remove the 3 screws and remove the slide door lock release motor assembly.
-
-
REMOVE REAR DOOR SCUFF PLATE
-
Captain type rear seat:
-
Disengage the 9 claws, 9 clips and 2 guides, and remove the rear door scuff plate RH.
-
-
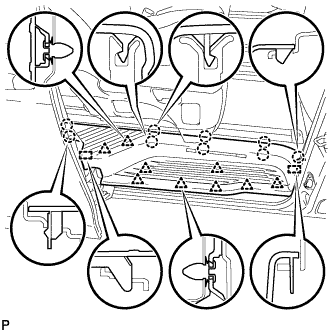
Tip-up type rear seat:
-
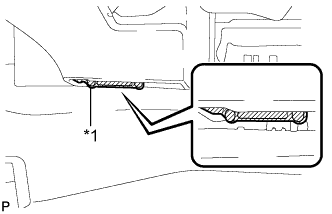
Text in Illustration *1 Protective Tape Apply protective tape to the bottom of the seat as shown in the illustration.
-
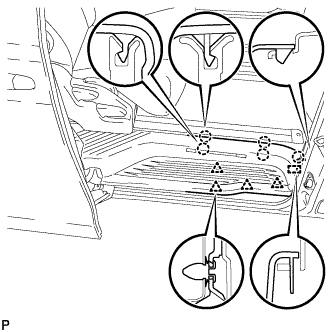
Using the slide lever, slide the rear No. 1 seat to the rearmost position.
-
Disengage the 4 clips, 5 claws and guide on the front side of the scuff plate as shown in the illustration.
Note
To prevent damage to the scuff plate, make sure not to use excessive force when disengaging the clips, claws and guide.
-
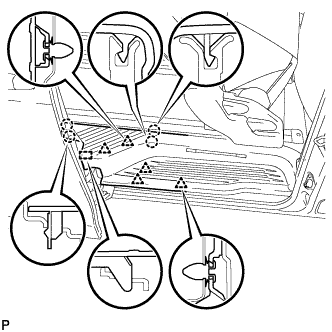
Using the reclining lever or foot-operated walk-in pedal, tip up the rear No. 1 seat and slide it to the foremost position.
-
Disengage the 5 clips, 4 claws and guide on the rear side of the scuff plate as shown in the illustration, and remove the rear door scuff plate RH.
Note
To prevent damage to the scuff plate, make sure not to use excessive force when disengaging the clips, claws and guide.
-
-
-
REMOVE SIDE STEP SUPPORT REAR
-
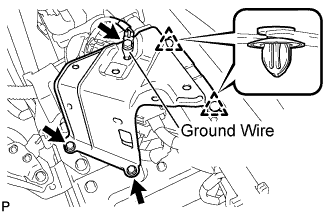
Remove the bolt and disconnect the ground wire.
-
Remove the 2 bolts.
-
Turn back the floor carpet.
-
Using a clip remover, disengage the 2 clips and remove the rear side step support.
-
-
REMOVE REAR DOOR NO. 1 WIRE
w/o Power Slide Door: Click here
w/ Power Slide Door: Click here
-
REMOVE SLIDE DOOR SERVICE HOLE COVER
-
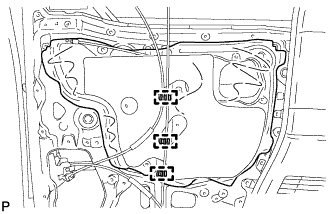
Disengage the 3 clamps.
-
Remove the slide door service hole cover.
Tech Tips
Remove the remaining butyl tape on the door.
-
-
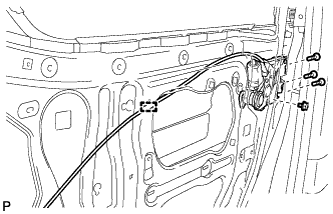
REMOVE REAR DOOR WINDOW GUIDE SUB-ASSEMBLY
-
Remove the 2 bolts and rear door window guide sub-assembly.
-
-
REMOVE SLIDE DOOR FRONT LOCK ASSEMBLY
-
Disconnect the rod.
-
Using a T30 "TORX" socket wrench, remove the 4 screws and slide door front lock assembly.
-
-
REMOVE REAR DOOR LOCK ASSEMBLY
-
Disengage the clamp.
-
Remove the bolt.
-
Using a T30 "TORX" socket wrench, remove the 3 screws and rear door lock assembly.
-