GENERATOR INSTALLATION

-
INSTALL GENERATOR ASSEMBLY
-
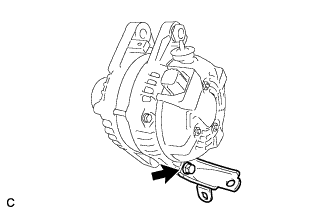
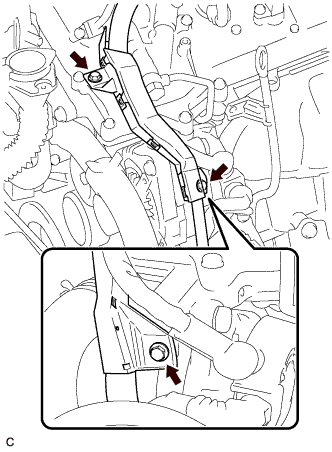
Install the bracket with the bolt.
- Torque:
- 20 N*m { 204 kgf*cm, 15 ft.*lbf }
-
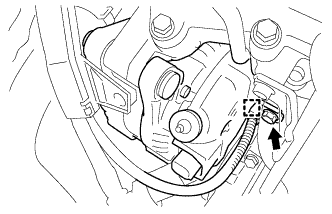
Connect the wire harness clamp.
-
Install the generator assembly to the cylinder block with the bolt.
- Torque:
- 20 N*m { 204 kgf*cm, 15 ft.*lbf }
-
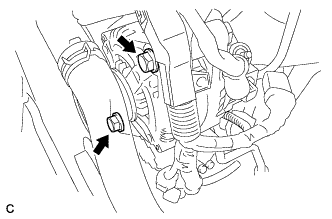
Install the 2 bolts.
- Torque:
- 43 N*m { 438 kgf*cm, 32 ft.*lbf }
-
Connect the generator connector to the generator assembly.
-
Install the generator wire with the nut.
- Torque:
- 9.8 N*m { 100 kgf*cm, 87 in.*lbf }
-
Install the terminal cap.
-
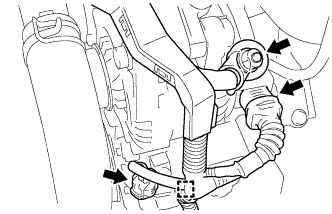
Connect the wire harness clamp.
-
Connect the magnetic clutch connector to the compressor and magnetic clutch.
-
Install the 2 bolts.
- Torque:
- 8.4 N*m { 85 kgf*cm, 74 in.*lbf }
-
-
INSTALL V-RIBBED BELT
Tech Tips
-
INSTALL RADIATOR ASSEMBLY WITH FAN SHROUD AND FAN MOTOR
Tech Tips
-
INSTALL FRONT BUMPER ASSEMBLY
-
CONNECT CABLE TO NEGATIVE BATTERY TERMINAL
-
Connect the cable to the negative (-) battery terminal.
Note
When disconnecting the cable, some systems need to be initialized after the cable is reconnected Click here.
-
-
INSTALL REAR ENGINE UNDER COVER RH
-
INSTALL NO. 1 ENGINE UNDER COVER
-
INSTALL FRONT WHEEL RH
-
CHARGE WITH REFRIGERANT
-
Perform vacuum purging using a vacuum pump.
-
Charge with refrigerant HFC-134a (R134a).
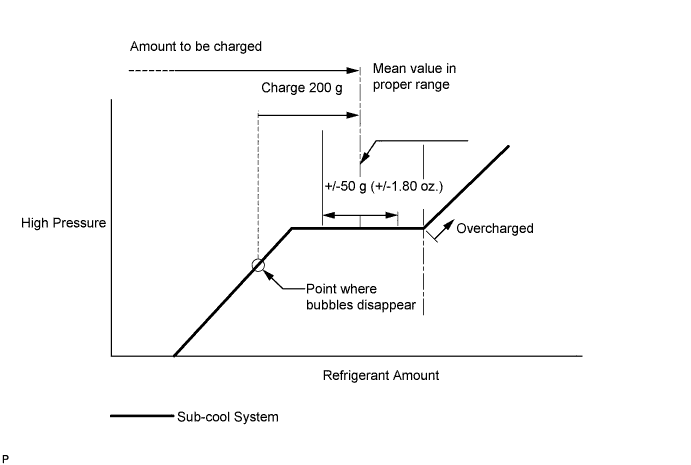
w/o No. 2 Air Conditioning Tube 780 to 880 g (27.5 to 31.0 oz.) w/ No. 2 Air Conditioning Tube 700 to 800 g (24.7 to 28.2 oz.) - SST
- 09985-20010 ( 09985-02130, 09985-02150, 09985-02090, 09985-02110, 09985-02010, 09985-02050, 09985-02060, 09985-02070, 09985-02140, 09985-02080 )
Note
-
Do not turn the A/C switch on before charging with refrigerant. Doing so will cause the compressor to work without refrigerant, resulting in overheating of the compressor.
-
Approximately 200 g (7.1 oz.) of refrigerant may need to be charged after bubbles disappear. The refrigerant amount should be checked by quantity, not with the sight glass.
Tech Tips
Ensure that sufficient refrigerant is available to recharge the system when using a refrigerant recovery unit. Refrigerant recovery units are not always able to recover 100% of the refrigerant from an A/C system.
-
-
INSTALL V-BANK COVER SUB-ASSEMBLY
-
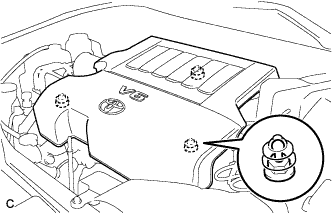
Fit the 3 retainers and install the V-bank cover sub-assembly.
-
-
INSTALL RADIATOR COVER SUB-ASSEMBLY