HARD DISK DRIVE INSTALLATION

-
INSTALL HARD DISK DRIVE
-
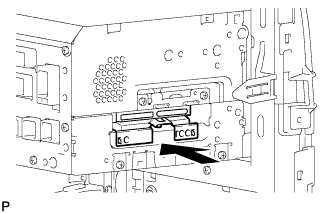
Install the hard disk drive as shown in the illustration.
-
Engage the 2 guides and install the cover with the 2 screws.
-
-
INSTALL NO. 2 RADIO RECEIVER BRACKET
-
Install the No. 2 radio receiver bracket with the 4 screws.
-
-
INSTALL NAVIGATION RECEIVER ASSEMBLY WITH BRACKET
-
w/ Front Center Speaker:
-
Engage the claw to connect the connector as shown in the illustration.
-
-
Connect each connector.
-
Engage the 4 claws.
-
Install the navigation receiver assembly with bracket with the 4 bolts.
-
-
INSTALL AIR CONDITIONING CONTROL ASSEMBLY
-
Connect the connector.
-
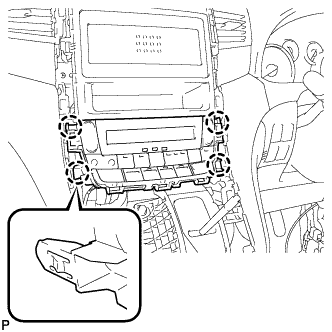
Engage the 4 claws to install the air conditioning control assembly.
-
-
INSTALL CENTER INSTRUMENT CLUSTER FINISH PANEL SUB-ASSEMBLY
-
Connect the connector.
-
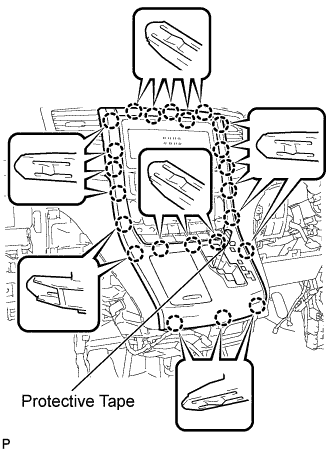
Engage the 23 claws to install the center instrument cluster finish panel sub-assembly.
Note
-
When installing the center instrument cluster finish panel sub-assembly, make sure to press the upper middle part firmly.
-
Make sure that the claws are fully engaged.
-
-
Remove the applied protective tape.
-
Move the shift lever to P.
-
-
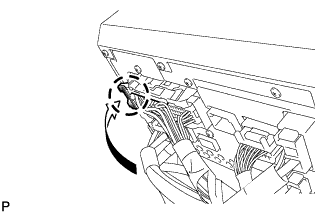
INSTALL SHIFT LEVER KNOB SUB-ASSEMBLY
-
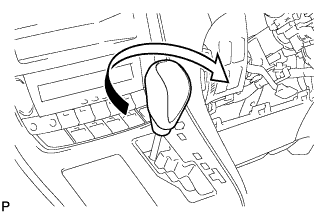
Turn the shift lever knob clockwise to install the shift lever knob sub-assembly.
-
-
CONNECT CABLE TO NEGATIVE BATTERY TERMINAL
Note
When disconnecting the cable, some systems need to be initialized after the cable is reconnected Click here.
-
CHECK HARD DISK DRIVE
-
REPLACED OPERATION