TCM INSTALLATION

-
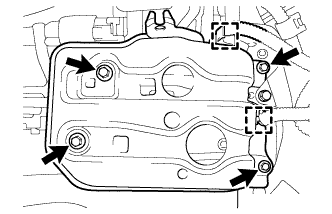
INSTALL TCM
-
Install the TCM to the transaxle.
-
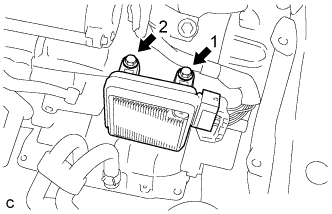
Install and tighten the 2 bolts in the order shown in the illustration.
- Torque:
- 11 N*m { 112 kgf*cm, 8 ft.*lbf }
-
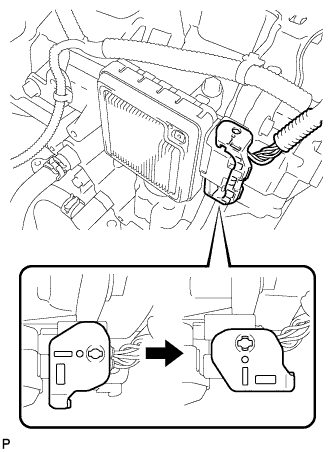
Connect the connector to the TCM.
-
Turn the lock lever and secure the connector with the lock lever.
-
-
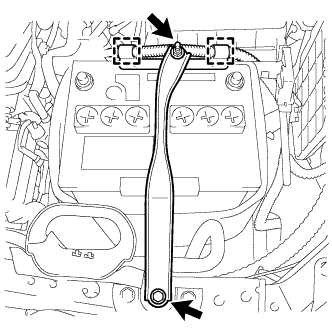
INSTALL BATTERY CARRIER SUPPORT
-
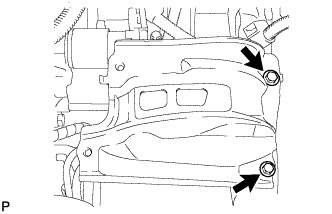
Install the battery carrier support with the 2 bolts.
- Torque:
- 20 N*m { 204 kgf*cm, 15 ft.*lbf }
-
-
INSTALL BATTERY CARRIER
-
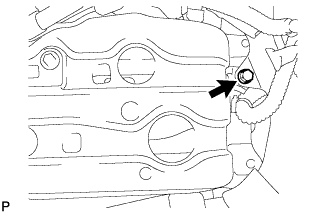
Insert the No. 2 air cleaner inlet to the battery carrier with the bolt.
- Torque:
- 8.0 N*m { 82 kgf*cm, 71 in.*lbf }
-
Install the front bracket with the 4 bolts.
- Torque:
- 20 N*m { 204 kgf*cm, 15 ft.*lbf }
-
Attach the 2 wire harness clamps.
-
-
INSTALL BATTERY
-
Install the battery, battery insulator and battery tray.
-
Install the battery clamp with the bolt and nut.
- Torque:
- Bolt
- 46 N*m { 469 kgf*cm, 34 ft.*lbf }
- Nut
- 4.9 N*m { 50 kgf*cm, 43 in.*lbf }
-
Connect the positive (+) cable to the battery positive (+) terminal.
- Torque:
- 7.6 N*m { 77 kgf*cm, 67 in.*lbf }
-
Connect the 2 wire clamps.
-
-
INSTALL RADIATOR COVER SUB-ASSEMBLY (for ALPHARD)
-
Install the radiator cover sub-assembly with the 4 clips.
-
-
INSTALL RADIATOR COVER SUB-ASSEMBLY (for VELLFIRE)
-
Install the radiator cover sub-assembly with the 4 clips.
-
-
CONNECT CABLE TO NEGATIVE BATTERY TERMINAL
Note
When disconnecting the cable, some systems need to be initialized after the cable is reconnected Click here.
-
CHECK AUTOMATIC TRANSAXLE SYSTEM
Note
If automatic transmission parts have been replaced, refer to the Parts Replacement Compensation Table to determine if any additional operations are necessary Click here.