STARTER INSTALLATION

-
INSTALL STARTER ASSEMBLY
-
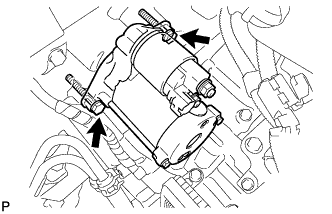
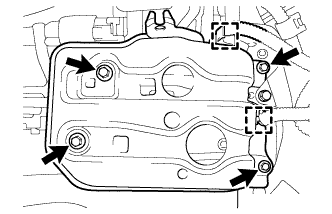
Install the starter with the 2 bolts.
- Torque:
- 37 N*m { 377 kgf*cm, 27 ft.*lbf }
-
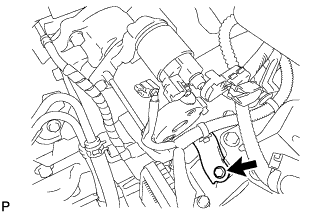
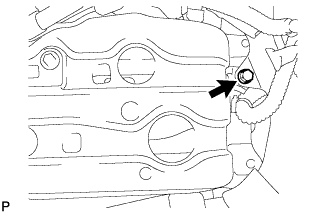
Install the wire harness clamp bracket with the bolt.
-
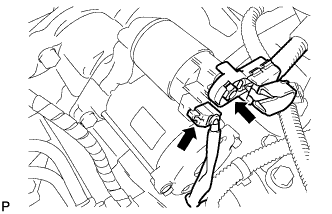
Connect the starter connector.
-
Install the terminal nut and cover the nut with the cap.
- Torque:
- 9.8 N*m { 100 kgf*cm, 87 in.*lbf }
-
-
INSTALL BATTERY CARRIER SUPPORT
-
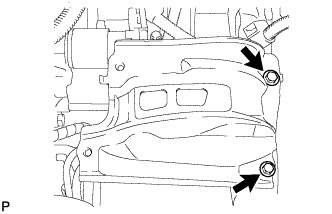
Install the battery carrier support with the 2 bolts.
- Torque:
- 20 N*m { 204 kgf*cm, 15 ft.*lbf }
-
-
INSTALL BATTERY CARRIER
-
Insert the No. 2 air cleaner inlet to the battery carrier with the bolt.
- Torque:
- 8.0 N*m { 82 kgf*cm, 71 in.*lbf }
-
Install the front bracket with the 4 bolts.
- Torque:
- 20 N*m { 204 kgf*cm, 15 ft.*lbf }
-
Attach the 2 wire harness clamps.
-
-
INSTALL BATTERY TRAY
-
INSTALL BATTERY
-
INSTALL BATTERY INSULATOR
-
INSTALL BATTERY CLAMP
-
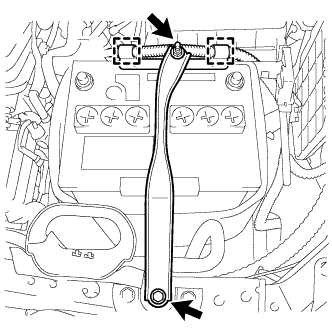
Attach the hook of the battery clamp to the front battery bracket.
-
Temporarily install the nut and bolt.
-
Adjust the battery clamp position.
-
Tighten the nut and bolt.
- Torque:
- Nut
- 4.9 N*m { 50 kgf*cm, 43 in.*lbf }
- Bolt
- 46 N*m { 469 kgf*cm, 34 ft.*lbf }
-
Attach the 2 wire harness clamps.
-
Connect the positive battery terminal to the battery.
-
-
CONNECT CABLE TO NEGATIVE BATTERY TERMINAL
-
Connect the cable to the negative (-) battery terminal.
Note
When disconnecting the cable, some systems need to be initialized after the cable is reconnected Click here.
-
-
INSTALL RADIATOR COVER SUB-ASSEMBLY