OIL PRESSURE SWITCH INSTALLATION

-
INSTALL ENGINE OIL PRESSURE SWITCH ASSEMBLY
-
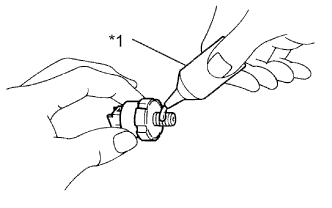
Text in Illustration *1 Adhesive Apply adhesive to 2 or 3 threads of the oil pressure switch assembly.
Adhesive Toyota Genuine Adhesive 1344, Three Bond 1344 or equivalent -
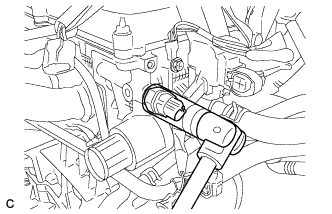
Using a 24 mm deep socket wrench, install the oil pressure switch assembly.
- Torque:
- 15 N*m { 153 kgf*cm, 11 ft.*lbf }
Note
Do not start the engine within 1 hour of installation.
-
Connect the oil pressure switch connector.
-
-
INSTALL BATTERY TRAY
-
Install the battery tray.
-
-
INSTALL BATTERY
-
Install the battery and battery insulator.
-
Install the battery clamp with the bolt and nut.
- Torque:
- Bolt
- 46 N*m { 469 kgf*cm, 34 ft.*lbf }
- Nut
- 4.9 N*m { 50 kgf*cm, 43 in.*lbf }
-
Connect the 2 wire harness clamps.
-
Connect the positive (+) cable to the positive (+) battery terminal.
- Torque:
- 5.4 N*m { 55 kgf*cm, 48 in.*lbf }
-
-
CONNECT CABLE TO NEGATIVE BATTERY TERMINAL
Note
When disconnecting the cable, some systems need to be initialized after the cable is reconnected Click here.
-
INSTALL RADIATOR COVER SUB-ASSEMBLY
-
Install the radiator cover sub-assembly with the 4 clips.
-
-
INSPECT FOR OIL LEAK