ECM REMOVAL

-
REMOVE WINDSHIELD WIPER MOTOR AND LINK ASSEMBLY
-
Remove the windshield wiper motor and link assembly Click here.
-
-
SEPARATE BRAKE MASTER CYLINDER RESERVOIR ASSEMBLY
-
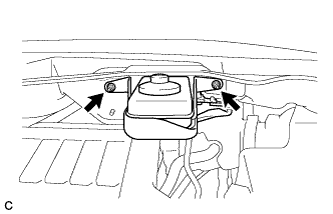
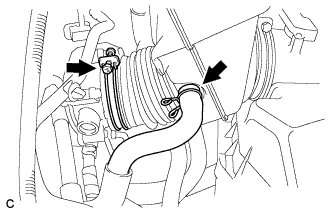
Remove the 2 nuts and separate the brake master cylinder reservoir with bracket from the outer cowl top panel.
-
-
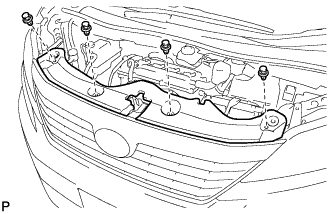
REMOVE COWL TOP PANEL OUTER SUB-ASSEMBLY
-
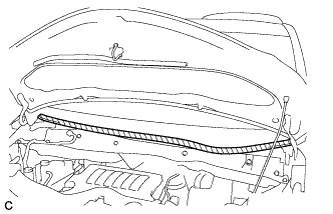
Apply protective tape as shown in the illustration.
Text in Illustration 
Protective Tape -
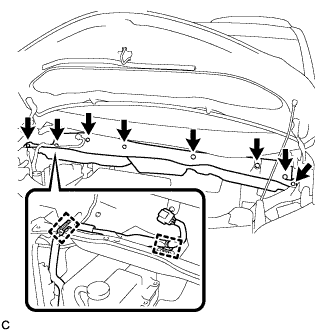
Disconnect the 2 clamps from the outer cowl top panel.
-
Remove the 8 bolts.
-
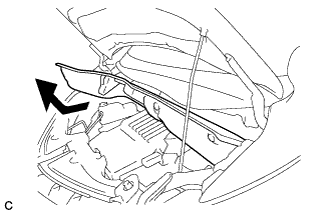
Remove the outer cowl top panel as shown in the illustration.
-
-
REMOVE RADIATOR COVER SUB-ASSEMBLY (for ALPHARD)
-

Using a clip remover, remove the 4 clips and radiator cover sub-assembly.
-
-
REMOVE RADIATOR COVER SUB-ASSEMBLY (for VELLFIRE)
-
Using a clip remover, remove the 4 clips and radiator cover sub-assembly.
-
-
REMOVE V-BANK COVER SUB-ASSEMBLY
-
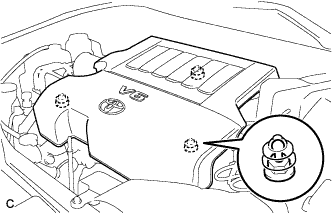
Hold the front of the V-bank cover sub-assembly and raise it to disengage the 2 clips on the front of the cover. Continue to raise the cover to disengage the clip on the rear of the cover and remove the V-bank cover sub-assembly.
Note
Attempting to disengage both front and rear clips at the same time may cause the cover to break.
-
-
DISCONNECT CABLE FROM NEGATIVE BATTERY TERMINAL
-
Disconnect cable from negative battery terminal.
Note
When disconnecting the cable, some systems need to be initialized after the cable is reconnected Click here.
-
-
REMOVE BATTERY CLAMP SUB-ASSEMBLY
-
Disconnect the positive battery terminal from the battery.
-
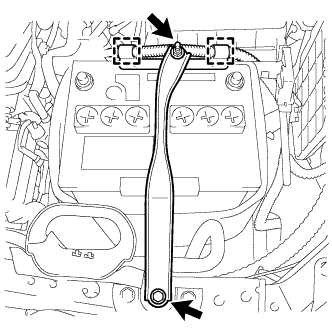
Remove the bolt and loosen the nut.
-
Detach the 2 wire harness clamps.
-
Detach the hook of the battery clamp from the front battery bracket, and then remove the battery clamp.
-
-
REMOVE BATTERY INSULATOR
-
REMOVE BATTERY
-
REMOVE BATTERY TRAY
-
REMOVE BATTERY CARRIER
-
Disconnect the 2 wire clamps.
-
Remove the 4 bolts and battery carrier.
-
-
REMOVE BATTERY CARRIER SUPPORT
-
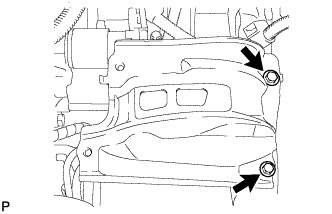
Remove the 2 bolts and battery carrier support.
-
-
REMOVE NO. 1 AIR CLEANER INLET
-
Remove the bolt and No. 1 air cleaner inlet.
-
-
REMOVE NO. 2 AIR CLEANER INLET
-
Remove the bolt and No. 2 air cleaner inlet.
-
-
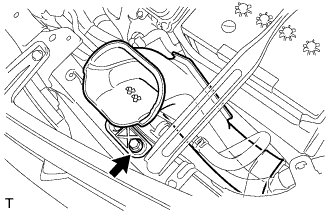
REMOVE AIR CLEANER CAP SUB-ASSEMBLY
-
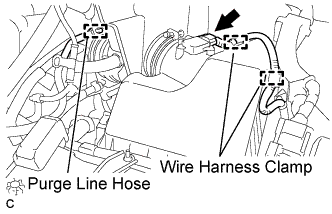
Separate the mass air flow meter connector and 2 wire harness clamps.
-
Separate the purge line hose.
-
Separate the ventilation hose.
-
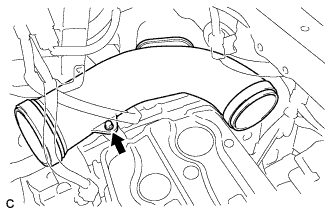
Loosen the hose clamp and separate the air cleaner hose from the throttle body.
-
Release the 2 clamps and remove the air cleaner cap sub-assembly.
-
-
REMOVE AIR CLEANER CASE
-
Remove the air cleaner filter element.
-
Disconnect the wire clamp.
-
Remove the 3 bolts and air cleaner case.
-
-
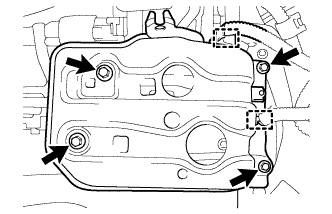
REMOVE ECM
-
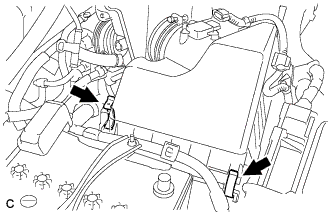
Separate the wire harness clamp.
-
Remove the 3 bolts and separate the ECM with brackets.
-
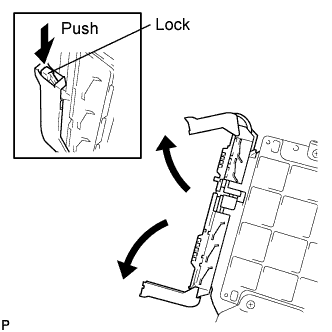
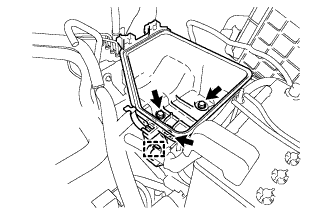
Disconnect the 2 ECM connectors and remove the ECM with brackets.
Note
After disconnecting the connectors, make sure that dirt, water or other foreign matter does not contact the connecting part of the connectors.
-
Push in the locks on the 2 levers, raise the levers, and disconnect the 2 ECM connectors.
-
-
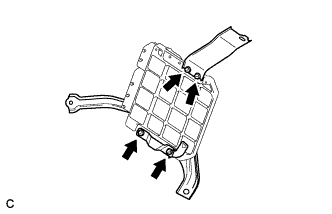
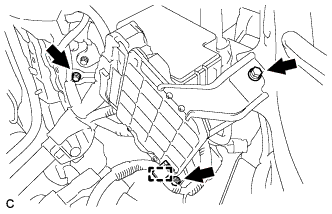
Remove the 4 screws and 2 ECM brackets.
-