WINCH UNIT REMOVAL

-
PRECAUTION
Note
After turning the ignition switch off, waiting time may be required before disconnecting the cable from the battery terminal. Therefore, make sure to read the disconnecting the cable from the battery terminal notice before proceeding with work. Click here.
-
DISCONNECT CABLE FROM NEGATIVE BATTERY TERMINAL
Note
When disconnecting the cable, some systems need to be initialized after the cable is reconnected Click here.
-
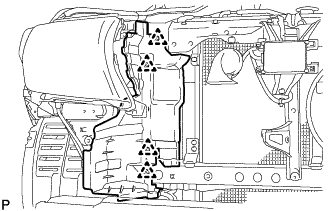
REMOVE FRONT FENDER SPLASH SHIELD SUB-ASSEMBLY LH
-
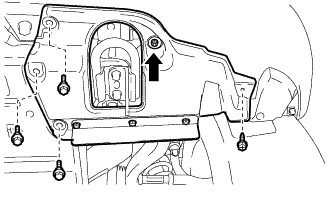
Remove the 3 bolts and screw.
-
Turn the clip indicated by the arrow in the illustration to remove the front fender splash shield sub-assembly LH.
-
-
REMOVE FRONT FENDER SPLASH SHIELD SUB-ASSEMBLY RH
-

Remove the 3 bolts and 2 screws.
-
Turn the clip indicated by the arrow in the illustration to remove the front fender splash shield sub-assembly RH.
-
-
REMOVE UPPER RADIATOR SUPPORT SEAL
-
REMOVE FRONT BUMPER WINCH COVER SUB-ASSEMBLY
-
Detach the 2 claws.
-
Detach the 3 guides and remove front bumper winch cover sub-assembly.
-
-
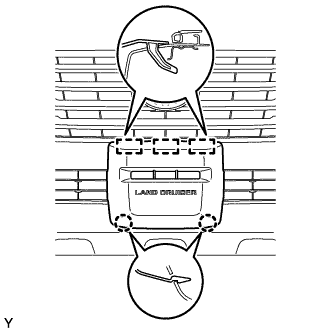
REMOVE RADIATOR GRILLE ASSEMBLY
-

Text in Illustration *1 Protective Tape Put protective tape around the radiator grille assembly.
-
Remove the 3 screws.
-
Detach the 2 clips and 8 claws, and remove the radiator grille assembly.
-
w/ Wide View Front Monitor System:
-
Disconnect the connector.
-
-
-
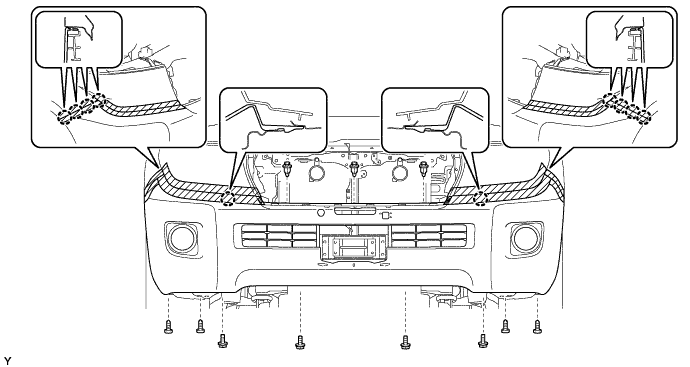
REMOVE FRONT BUMPER COVER
-
Put protective tape around the bumper cover.
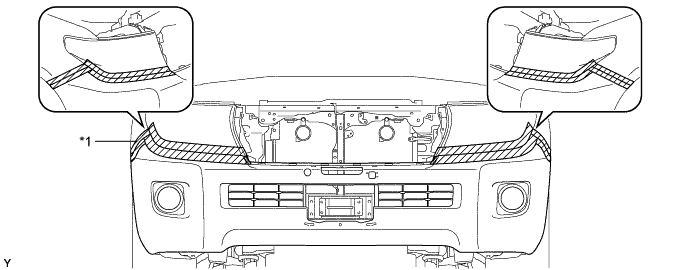
Text in Illustration *1 Protective Tape - - -
Using a T30 "TORX" socket, remove the 6 screws.
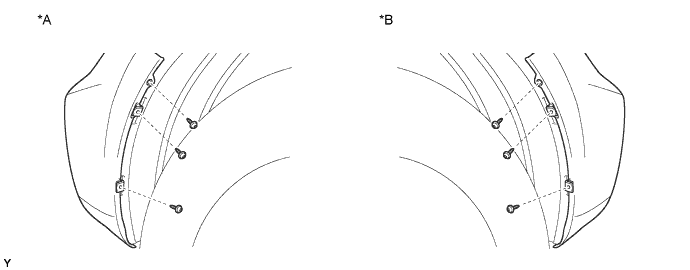
Text in Illustration *A LH Side *B RH Side -
Remove the 3 clips, 4 screws and 4 bolts.
-
Detach the 10 claws.
-
Disconnect the winch control wire connector and remove the front bumper cover.
-
w/ Fog Light:
Disconnect the No. 4 engine room wire connector and remove the front bumper cover.
-
-
REMOVE FRONT BUMPER EXTENSION LH
-
Remove the 3 bolts and front bumper extension LH.
-
-
REMOVE FRONT BUMPER EXTENSION RH
Tech Tips
Use the same procedure described for the LH side.
-
REMOVE HEADLIGHT ASSEMBLY LH
-
for Halogen Headlight:
-
for HID Headlight:
-
-
REMOVE HEADLIGHT ASSEMBLY RH
Tech Tips
Use the same procedure described for the LH side.
-
REMOVE FRONT UPPER CENTER BUMPER RETAINER
-
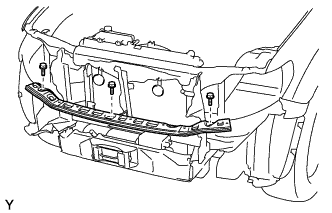
Remove the 3 bolts and front upper center bumper retainer.
-
-
REMOVE RADIATOR SIDE DEFLECTOR LH
-
Using a clip remover, remove the 4 clips, and remove the side deflector.
-
-
REMOVE RADIATOR SIDE DEFLECTOR RH (w/o Oil Cooler)
-
Using a clip remover, remove the 4 clips, and remove the side deflector.
-
-
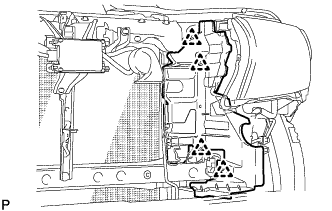
REMOVE TRANSMISSION OIL COOLER AIR DUCT (w/ Oil Cooler)
-
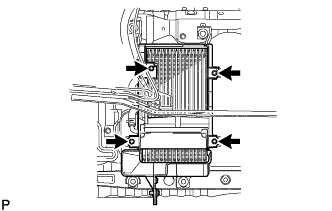
Remove the 4 bolts and oil cooler air duct.
-
-
REMOVE WINCH CONTROL WIRE
-
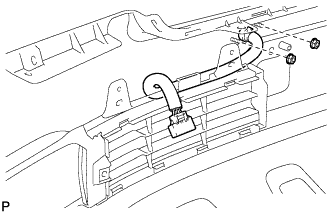
Remove the 2 nuts and winch control wire.
-
-
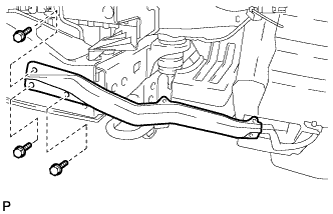
REMOVE WINCH ASSEMBLY
-
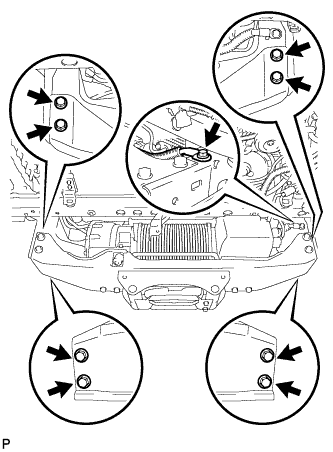
Remove the 9 bolts and mounting bracket.
-
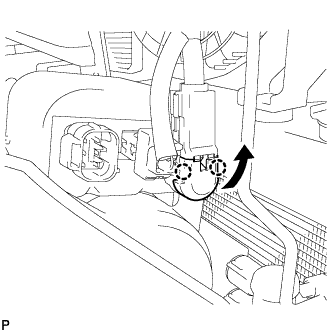
Detach the 2 claws and move the cover in the direction indicated by the arrow shown in the illustration.
-
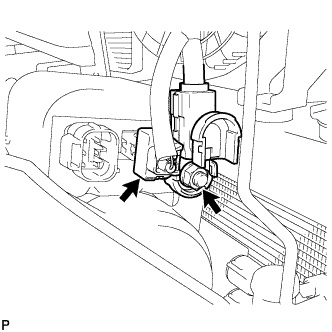
Disconnect the connector.
-
Remove the nut and disconnect the wire.
-
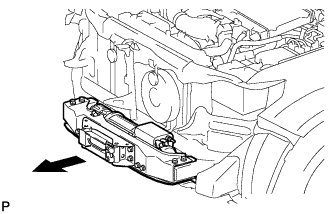
Using a crane or equivalent, remove the winch assembly.
CAUTION:
Be careful as the winch assembly is very heavy.
-