ELECTRICAL KEY OSCILLATOR (for Rear Floor) INSTALLATION

-
INSTALL INDOOR ELECTRICAL KEY OSCILLATOR
-
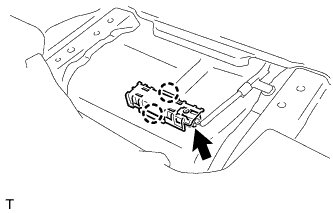
Attach the 2 claws to install the electrical key oscillator.
-
Connect the connector.
-
Install the front floor carpet assembly.
-
-
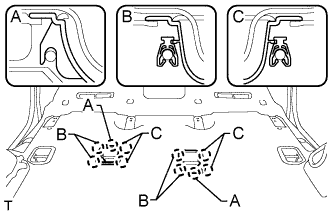
INSTALL REAR NO. 2 SEAT PROTECTOR
-
Attach the 10 claws to install the 2 seat protectors.
-
-
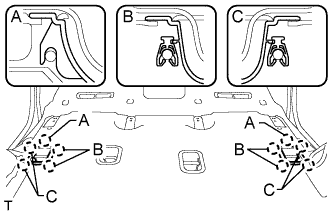
INSTALL REAR NO. 1 SEAT PROTECTOR
-
Attach the 10 claws to install the 2 seat protectors.
-
-
INSTALL FRONT QUARTER TRIM PANEL ASSEMBLY LH
-
Install the front quarter trim panel assembly LH Click here.
-
-
INSTALL FRONT QUARTER TRIM PANEL ASSEMBLY RH
-
Install the front quarter trim panel assembly RH Click here.
-
-
INSTALL REAR NO. 1 SEAT ASSEMBLY LH
-
Install the rear No. 1 seat assembly LH Click here.
-
-
INSTALL REAR NO. 1 SEAT ASSEMBLY RH
-
Install the rear No. 1 seat assembly RH Click here.
-
-
INSTALL REAR NO. 2 SEAT ASSEMBLY LH (for Face to Face Seat Type)
-
Install the rear No. 2seat assembly LH Click here.
-
-
INSTALL REAR NO. 2 SEAT ASSEMBLY RH (for Face to Face Seat Type)
-
Install the rear No. 2seat assembly RH Click here.
-
-
INSTALL REAR NO. 2 SEAT ASSEMBLY LH (except Face to Face Seat Type)
-
Install the rear No. 2 seat assembly LH Click here.
-
-
INSTALL REAR NO. 2 SEAT ASSEMBLY RH (except Face to Face Seat Type)
-
Install the rear No. 2 seat assembly RH Click here.
-
-
CONNECT CABLE TO NEGATIVE BATTERY TERMINAL
Note
When disconnecting the cable, some systems need to be initialized after the cable is reconnected Click here.
-
CHECK SRS WARNING LIGHT
-
Check the SRS warning light Click here.
-