REAR DIFFERENTIAL CARRIER ASSEMBLY REMOVAL

CAUTION / NOTICE / HINT
The necessary procedures (adjustment, calibration, initialization, or registration) that must be performed after parts are removed and installed, or replaced during rear differential carrier assembly removal/installation are shown below.
| Replaced Part or Performed Procedure | Necessary Procedure | Effect/Inoperative Function when Necessary Procedure not Performed | Link |
|---|---|---|---|
| Rear wheel alignment adjustment |
|
|
|
|
Initialize No. 1 headlight ECU sub-assembly LH | Automatic headlight beam level control system |
-
*1: w/ Height Control Sensor
PROCEDURE
-
DRAIN DIFFERENTIAL OIL
-
REMOVE REAR WHEEL
-
REMOVE PROPELLER WITH CENTER BEARING SHAFT ASSEMBLY
-
REMOVE NO. 2 FUEL TANK PROTECTOR
-
REMOVE NO. 1 FUEL TANK PROTECTOR SUB-ASSEMBLY
-
REMOVE REAR STABILIZER BAR
-
REMOVE REAR DRIVE SHAFT ASSEMBLY LH
-
for TMC Made: Click here
-
for TMMT Made: Click here
-
-
REMOVE REAR DRIVE SHAFT ASSEMBLY RH
Tech Tips
Use the same procedure described for the LH side.
-
REMOVE MAIN MUFFLER HEAT INSULATOR
-
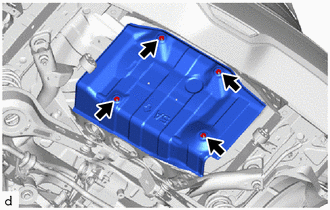
Remove the 4 nuts and main muffler heat insulator from the vehicle body.
-
-
REMOVE REAR DIFFERENTIAL CARRIER ASSEMBLY
-
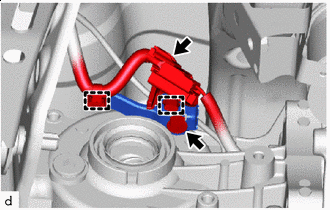
Disengage the 2 wire harness clamps to separate the wire harness.
-
Disconnect the connector.
-
Remove the bolt and wire harness clamp bracket.
-
Remove the breather tube.
-
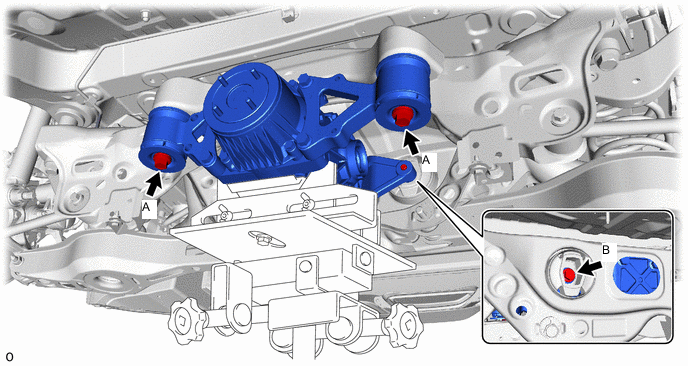
Support the rear differential carrier assembly with a transmission jack.
-
Remove the 2 bolts labeled A and bolt labeled B.
-
Slowly lower the jack and then tilt the rear differential carrier assembly.
-
-
REMOVE REAR NO. 1 DIFFERENTIAL SUPPORT
-
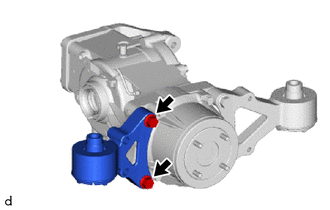
Remove the 2 bolts and rear No. 1 differential support from the rear differential carrier assembly.
-
-
REMOVE REAR NO. 2 DIFFERENTIAL SUPPORT
-
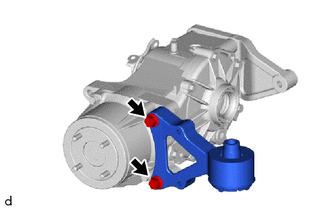
Remove the 2 bolts and rear No. 2 differential support from the rear differential carrier assembly.
-
-
REMOVE REAR DIFFERENTIAL SUPPORT
-
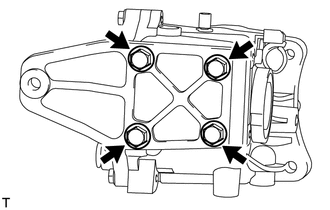
Remove the 4 bolts and rear differential support from the rear differential carrier assembly.
-
-
REMOVE ELBOW TUBE
-
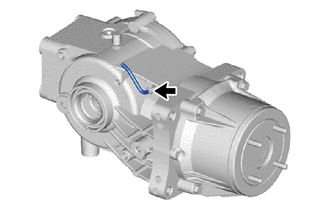
Remove the elbow tube from the rear differential carrier sub-assembly.
-