FRONT SEAT ASSEMBLY REMOVAL
CAUTION / NOTICE / HINT
Tech Tips
-
Use the same procedure for RHD and LHD vehicles.
-
The procedure listed below is for LHD vehicles.
-
Use the same procedure for the driver and front passenger sides.
-
The procedure described below is for the driver side.
PROCEDURE
-
PRECAUTION
Note
-
If the front seat airbag assembly has deployed, replace the front seat airbag assembly, separate type front seatback spring assembly, separate type front seatback pad and separate type front seatback cover with the necessary parts in accordance with the extent of the collision damage.
-
After turning the power switch off, waiting time may be required before disconnecting the cable from the negative (-) auxiliary battery terminal. Therefore, make sure to read the disconnecting the cable from the negative (-) auxiliary battery terminal notices before proceeding with work.
-
-
REMOVE FRONT SEAT HEADREST ASSEMBLY
-
Remove the front seat headrest assembly.
-
-
REMOVE FRONT DOOR SCUFF PLATE
-
REMOVE FRONT SEAT INNER TRACK BRACKET COVER
-

Remove in this Direction Pull in the direction indicated by the arrows in the illustration, disengage the claws to remove the front seat inner track bracket cover.
-
-
REMOVE FRONT SEAT REAR OUTER TRACK COVER
-
Operate the power seat switch knob to set the seat slide position of the front seat assembly to the frontmost position.
-

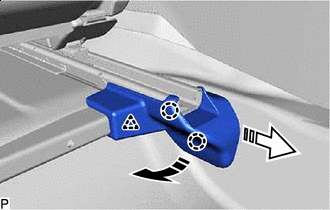
*a Needle-nose Pliers Remove in this Direction Using needle-nose pliers, pinch the clip from the front side of the vehicle, pull in the direction indicated by the arrow in the illustration to disengage the clip and guides, to remove the front seat rear outer track cover.
-
-
REMOVE INNER SEAT TRACK BRACKET COVER
-
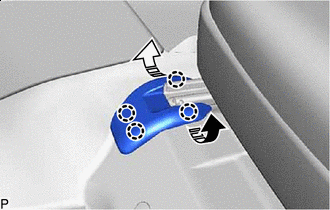
Remove in this Direction (1) 
Remove in this Direction (2) Pull up in the direction indicated by the arrow (1) in the illustration, disengage the claws and clip, pull in the direction indicated by the arrow (2) in the illustration, to remove the inner seat track bracket cover.
-
-
REMOVE FRONT SEAT ASSEMBLY
-
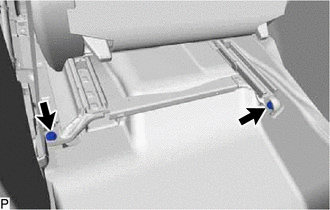
Remove the 2 bolts on the rear side of the front seat assembly.
-
Operate the slide and vertical power seat switch knob to set the seat slide position of the front seat assembly to the rearmost position.
-
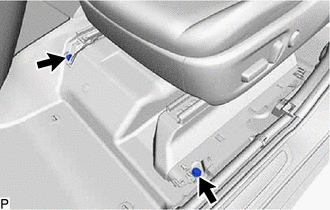
Remove the 2 bolts on the front side of the front seat assembly.
-
Operate the slide and vertical power seat switch knob to set the seat slide position of the front seat assembly to the center position.
-
Operate the slide and vertical power seat switch knob to set the seat cushion height of the front seat assembly to the uppermost position.
-
Operate the reclining power seat switch knob to set the seatback of the front seat assembly to the perpendicular position.
-
Disconnect the cable from the negative (-) auxiliary battery terminal.
CAUTION:
-
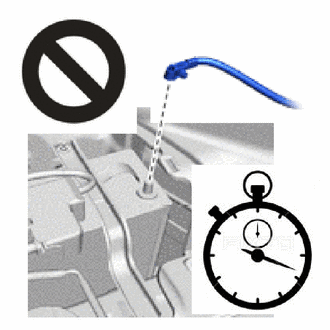
Wait at least 90 seconds after disconnecting the cable from the negative (-) auxiliary battery terminal to disable the SRS system.
-
Before starting work, wait at least 90 seconds after the power switch is turned off and after the cable is disconnected from the negative (-) auxiliary battery terminal (SRS parts are equipped with a backup power source. If work is started within 90 seconds of turning the power switch off and disconnecting the cable from the negative (-) auxiliary battery terminal, SRS parts may deploy).
Note
After turning the power switch off, waiting time may be required before disconnecting the cable from the negative (-) auxiliary battery terminal. Therefore, make sure to read the disconnecting the cable from the negative (-) auxiliary battery terminal notices before proceeding with work.
-
-
Tilt the front seat assembly toward the rear.
Note
Be careful not to damage the front seat assembly and body interior.
-
Disconnect the front seat airbag assembly connector.
-
Push the slider to disengage the primary lock. Continue pushing and slide the slider to disengage the secondary lock and then disconnect the airbag connector.
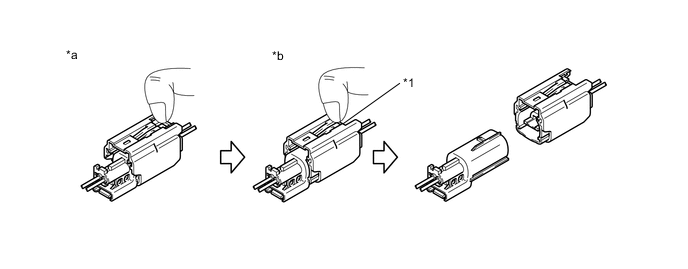
*1 Slider - - *a Push *b Slide
-
-
Disconnect the front seat airbag assembly connector. (for Front Passenger Side)
-
Slide the slider to disconnect the airbag connector.
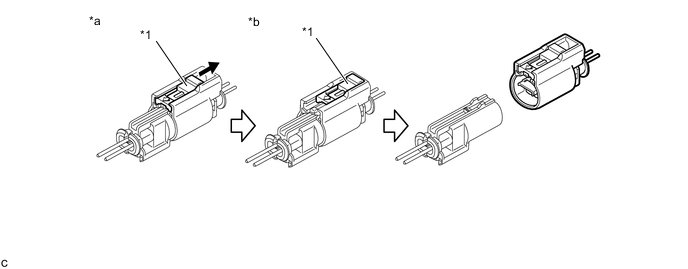
*1 Slider - - *a Push *b Slide
-
-
Disconnect the connectors.
-
Disengage the clamps.
-

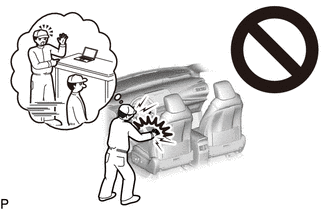
Remove the front seat assembly as shown in the illustration.
Note
-
2 or more people are required when carrying the front seat assembly out of the vehicle.
-
Protect the front seat leg.
-
Be careful not to damage the front seat assembly, body exterior or body interior.
-
-