HV BATTERY REMOVAL

CAUTION / NOTICE / HINT
CAUTION:
-
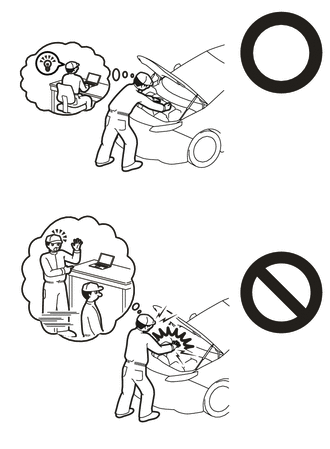
This vehicle has contains high voltage circuits standardized with orange colored wiring and connectors, so follow the instructions in this manual to perform the procedures correctly.
-
If the correct procedures are not followed according to the instructions in this manual, there is a danger of electric shock from the high voltage circuits.
-
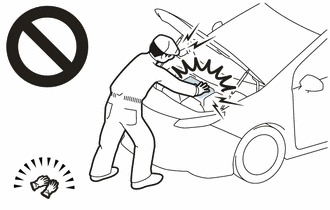
Be sure to wear insulating gloves when working on high voltage wiring or components.
-
If work is performed without wearing insulating gloves, there is a danger of electric shock.
-
Because the EV battery is extremely heavy, make sure to follow the work procedures described in the repair manual.
-
If work is not performed according to the procedures described in the repair manual, there is a danger that the mini crane could drop and components could fall down.
Tech Tips
When disposing of an EV battery, make sure to return it through an authorized collection agent who is capable of handling it safely. If the EV battery is returned via the manufacturer specified route, it will be returned properly and in a safe manner by an authorized collection agent.
PROCEDURE
-
PRECAUTION
Note
-
After turning the power switch off, waiting time may be required before disconnecting the cable from the negative (-) auxiliary battery terminal. Therefore, make sure to read the disconnecting the cable from the negative (-) auxiliary battery terminal notices before proceeding with work.
-
During installation and removal, if the EV battery, battery cooling blower assembly, battery voltage sensor or EV battery junction block assembly is dropped or subjected to a strong impact, replace it with a new one.
-
Check the connection of all connectors inside the EV battery using the following procedure.
-Secure the connector by firmly pushing it in until a clicking sound is heard.
-After connecting the connector, visually inspect it and pull on the connector portion to check that it is securely installed.
-
When performing repairs such as tapping near the EV battery, make sure that metal shavings do not enter the EV battery.
-
Do not touch electrified components (bus bar, terminal portions) with bare hands.
-
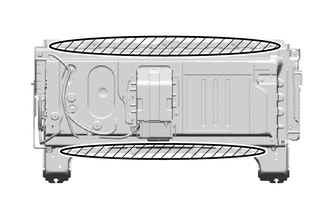
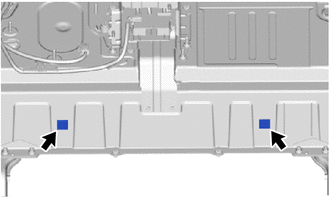
When lifting up the EV battery, hold it by the shaded portions in the illustration.
-
Do not touch the bolts or nuts of the EV battery when there is grease or oil on your hands.
-
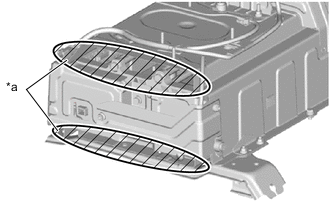
*a Opening Portion To prevent the thermistor from moving out of place, do not put your hands into the opening of the EV battery.
-
When the EV battery is being stored or transported, make sure it remains within 80° of horizontal.
-
Do not stand on the EV battery.
-
Do not allow foreign matter to enter the EV battery.
-
If any bolts, nuts, clips, etc. have fallen into the EV battery, make sure to retrieve them.
-
-
REMOVE SERVICE PLUG GRIP (for EV)
-
REMOVE FC STACK SERVICE PLUG GRIP
-
REMOVE INVERTER COVER
-
REMOVE INVERTER TERMINAL COVER
-
CHECK TERMINAL VOLTAGE
-
INSTALL INVERTER TERMINAL COVER
-
REMOVE REAR FLOOR FINISH PLATE
-
REMOVE ROPE HOOK
-
REMOVE LUGGAGE COMPARTMENT TRIM COVER ASSEMBLY RH
-
Using a clip remover, remove the 3 clips and luggage compartment trim cover assembly RH from the vehicle.
-
-
REMOVE LUGGAGE COMPARTMENT TRIM COVER ASSEMBLY LH
-
REMOVE CHILD RESTRAINT SEAT ANCHOR BRACKET
-
REMOVE NO. 3 BODY MOUNTING BRACKET SUB-ASSEMBLY LH
-
Remove the 2 bolts and No. 3 body mounting bracket sub-assembly LH from the vehicle.
-
-
REMOVE NO. 3 BODY MOUNTING BRACKET SUB-ASSEMBLY RH
-
Disengage the clamp and separate the wire harness from the No. 3 body mounting bracket sub-assembly RH.
-
Remove the 2 nuts and No. 3 body mounting bracket sub-assembly RH from the vehicle.
-
-
REMOVE INDOOR ELECTRICAL KEY OSCILLATOR
-
REMOVE HYDROGEN FUEL CONTROL ECU ASSEMBLY
-
REMOVE BATTERY COOLING BLOWER ASSEMBLY
-
REMOVE NO. 4 EV BATTERY SHIELD PANEL
-
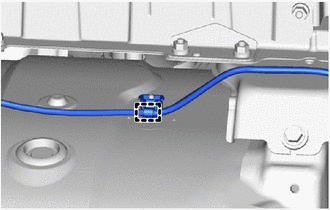
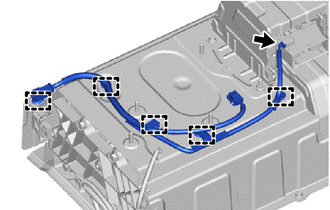
SEPARATE FRAME WIRE
-
REMOVE EV BATTERY
CAUTION:
Be sure to wear insulating gloves.
-
Disengage the clamp and separate the indoor electrical key oscillator wire from the vehicle.
-
Move the disconnected indoor electrical key oscillator wire so that it is on the outer side from the EV battery.
Tech Tips
This is done to prevent damage to the indoor electrical key oscillator wire and connector when the EV battery is pulled out from the rear of the vehicle.
-
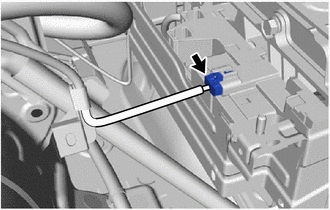
Disconnect the EV battery junction block connector.
-
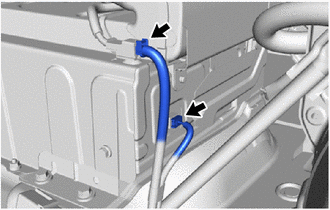
Disconnect the battery voltage sensor connector.
-
Disconnect the No. 2 EV battery pack wire connector.
-
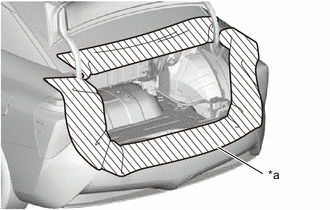
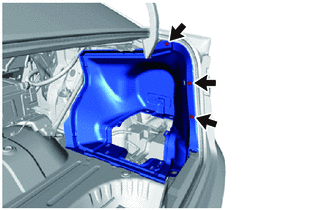
*a Protective Seat To prevent scratches or damage, use protective sheets to protect the vehicle interior and body.
-
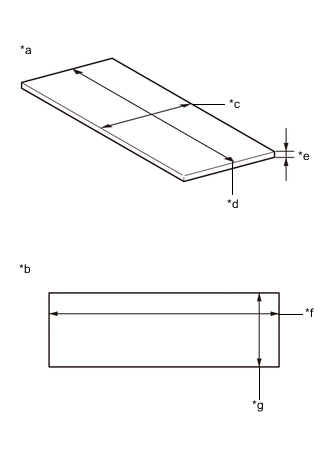
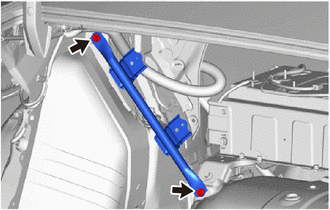
*a Board *b Cardboard *c 110 mm (4.33 in.) *d 570 mm (22.4 in.) *e 10 mm (0.394 in.) *f 790 mm (31.1 in.) *g 350 mm (13.8 in.) Prepare board and cardboard that will be used to pull out the EV battery.
Tech Tips
-
Use board with the dimensions shown in the illustration.
-
The cardboard dimensions are an approximation.
-
-
Remove the 6 bolts.
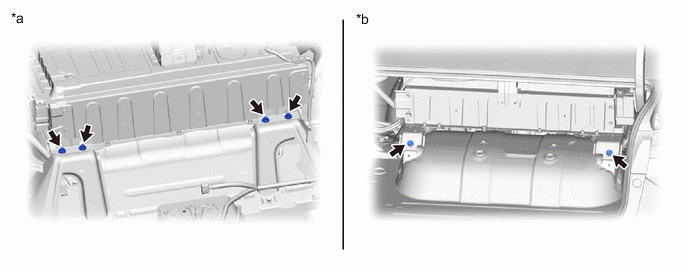
*a Front of the vehicle *b Rear of the vehicle Note
Do not touch the bolts of the EV battery when there is grease or oil on your hands.
-
As shown in the illustration, lift up the EV battery and set the board between the EV battery and the vehicle.
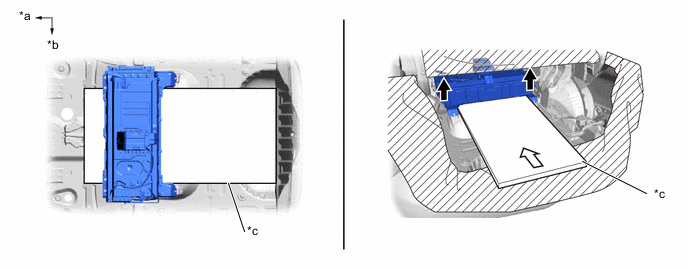
*a Front of the vehicle *b Left of the vehicle *c Board - - 
Hold up 
Insert Note

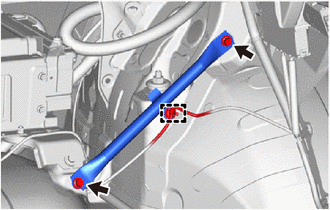
*1 Stud Bolt *2 No. 5 Rear Floor Silencer
-
When sliding in the board, be careful not to damage the stud bolts shown in the illustration.
-
When sliding in the board, be careful that the No. 5 rear floor silencer does not peel off.
-
Make sure not to scratch or damage the vehicle.
-
This procedure must be performed by at least 2 people.
-
-
As shown in the illustration, lift up the EV battery and set the board between the EV battery and vehicle.
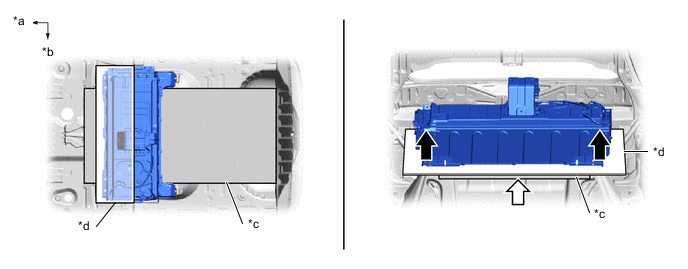
*a Front of the vehicle *b Left of the vehicle *c Board *d Cardboard Hold up Insert Note
-
Make sure not to scratch or damage the vehicle.
-
This procedure must be performed by at least 2 people.
-
-
Pull out the EV battery together with cardboard to the rear of the vehicle as shown in the illustration.
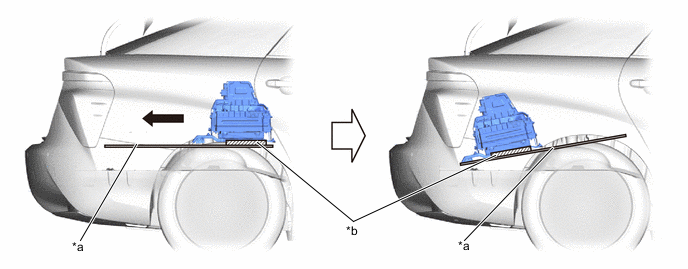
*a Board *b Cardboard Pull it out to the rear of the vehicle. - - Note
-
When pulling out the EV battery to the rear of the vehicle, be careful not to damage the stud bolts.
-
Make sure not to scratch or damage the vehicle.
Tech Tips
When pulling out the EV battery, pull out the EV battery to the rear of the vehicle while tilting the board as shown in the illustration.
-
-
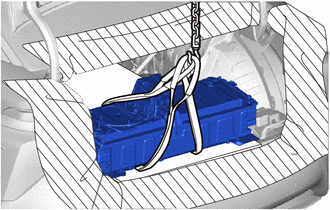
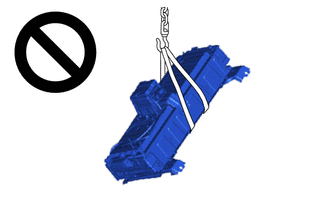
Using an engine sling device and belts, remove the EV battery from the vehicle.
Note
-
Make sure not to scratch or damage the vehicle.
-
This procedure must be performed by at least 2 people.
If the EV battery is dropped or subjected to a strong impact, replace it with a new one.
-
-
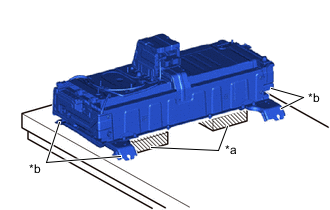
*a Attachment *b Flange Portion Place the EV battery on attachments.
Note
To prevent deformation of the EV battery flange portions, do not allow the flange portions to contact the floor.
If the EV battery is dropped or subjected to a strong impact, replace it with a new one.
-
-
REMOVE HOOK FASTENER
Tech Tips
This procedure is only performed when the hook fastener will be replaced.
-
Remove the 2 hook fasteners from the EV battery.
-
-
REMOVE NO. 1 EV BATTERY LH COVER BRACKET
-
REMOVE NO. 2 EV BATTERY SHIELD PANEL
-
REMOVE BATTERY VOLTAGE SENSOR
-
REMOVE NO. 1 EV BATTERY SHIELD SUB-ASSEMBLY
-
REMOVE EV BATTERY JUNCTION BLOCK ASSEMBLY
-
REMOVE NO. 2 EV BATTERY PACK WIRE
-
Disconnect the No. 2 EV battery pack wire connector.
-
Disengage the 5 clamps to separate the No. 2 EV pack wire from the EV battery.
-