BLACK OUT TAPE(for Front Door) REMOVAL
CAUTION / NOTICE / HINT
The necessary procedures (adjustment, calibration, initialization or registration) that must be performed after parts are removed, installed or replaced during the No. 1 black out tape removal/installation are shown below.
| Replacement Part or Procedure | Necessary Procedures | Effects / Inoperative when not Performed | Link |
|---|---|---|---|
| Disconnect cable from negative battery terminal | Drive the vehicle until stop and start control is permitted (approximately 5 to 60 minutes) | Stop and start system | |
| Memorize steering angle neutral point | Pre-crash safety system |
Tech Tips
-
Use the same procedure for the RH and LH sides.
-
The procedure listed below is for the LH side.
-
Use the same procedure for RHD and LHD vehicles.
-
The procedures listed below are for LHD vehicles.
-
Fully open the front door glass sub-assembly LH before proceeding with work.
PROCEDURE
-
PRECAUTION
CAUTION:
w/ Curtain Shield Airbag:Be sure to read Precaution thoroughly before servicing.
for Type B:
for Type C:
Note
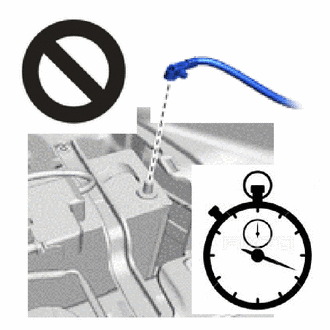
After turning the ignition switch off, waiting time may be required before disconnecting the cable from the negative (-) battery terminal. Therefore, make sure to read the disconnecting the cable from the negative (-) battery terminal notice before proceeding with work.
-
DISCONNECT CABLE FROM NEGATIVE BATTERY TERMINAL
CAUTION:
w/ Curtain Shield Airbag:
-
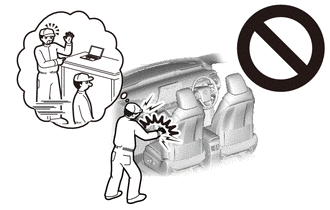
Wait at least 90 seconds after disconnecting the cable from the negative (-) battery terminal to disable the SRS system.
-
If the airbag deploys for any reason, it may cause a serious accident.
Note
When disconnecting the cable, some systems need to be initialized after the cable is reconnected.
-
-
REMOVE FRONT DOOR LOWER FRAME BRACKET GARNISH LH
-
REMOVE FRONT ARMREST ASSEMBLY LH
-
REMOVE POWER WINDOW REGULATOR MASTER SWITCH ASSEMBLY WITH FRONT DOOR ARMREST BASE PANEL (for Driver Side, w/ Power Window)
-
REMOVE POWER WINDOW REGULATOR SWITCH ASSEMBLY WITH FRONT DOOR ARMREST BASE PANEL (for Front Passenger Side, w/ Power Window)
-
REMOVE FRONT DOOR WINDOW REGULATOR HANDLE ASSEMBLY (w/o Power Window)
-
REMOVE FRONT DOOR INSIDE HANDLE BEZEL PLUG LH
-
REMOVE FRONT DOOR TRIM BOARD SUB-ASSEMBLY LH
-
REMOVE OUTER REAR VIEW MIRROR ASSEMBLY LH
-
REMOVE FRONT DOOR SERVICE HOLE COVER LH
-
REMOVE FRONT DOOR GLASS RUN LH
-
REMOVE FRONT DOOR GLASS SUB-ASSEMBLY LH
-
REMOVE FRONT DOOR BELT MOULDING ASSEMBLY LH
-
REMOVE FRONT DOOR CHECK ASSEMBLY LH (for Smart Cab)
-
REMOVE FRONT DOOR WEATHERSTRIP LH (for Smart Cab)
-
REMOVE FRONT DOOR WEATHERSTRIP LH (for Double Cab)
-
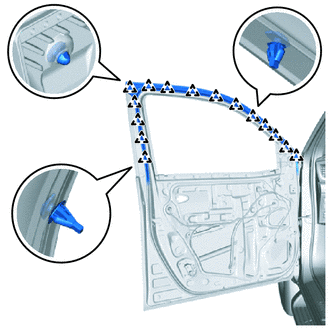
Using a clip remover, detach the clip and remove enough of the upper portion of the front door weatherstrip LH so that the No. 1 black out tape LH can be removed.
-
-
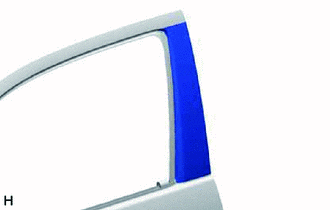
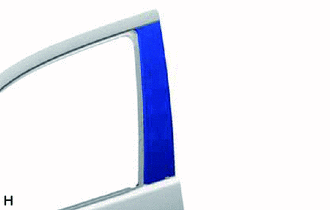
REMOVE NO. 1 BLACK OUT TAPE LH
Tech Tips
When removing the No. 1 black out tape LH, heat the front door panel and No. 1 black out tape LH using a heat light.
Standard Item Temperature Front Door Panel 40 to 60°C (104 to 140°F) No. 1 Black Out Tape LH 20 to 30°C (68 to 86°F) CAUTION:
-
Do not touch the heat light and heated parts.
-
Touching the heat light may result in burns.
-
Touching heated parts for a long time may result in burns.
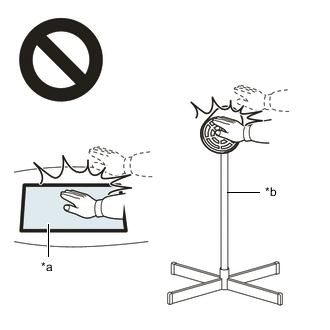
*a Heated Part *b Heat Light
-
for Smart Cab:
-
Pull back an edge of the No. 1 black out tape LH and pull it parallel to the front door panel to remove it.
-
-
for Double Cab:
-
Pull back an edge of the No. 1 black out tape LH and pull it parallel to the front door panel to remove it.
-
-