LANE RECOGNITION CAMERA SENSOR INSTALLATION

CAUTION / NOTICE / HINT
Note
-
If the lane departure warning camera bracket is deformed or damaged, replace it together with the windshield glass.
-
When replacing the windshield glass of a vehicle equipped with a lane departure warning camera, make sure to use a Toyota genuine part. The lane departure warning camera may not be able to be installed due to a missing bracket or the lane departure alert system may not operate properly due to a difference in the transmissivity or black ceramic border.
-
If the lane departure warning camera is dropped, replace it with a new one.
PROCEDURE
-
INSTALL LANE DEPARTURE WARNING CAMERA
-
When using a new lane departure warning camera:
-
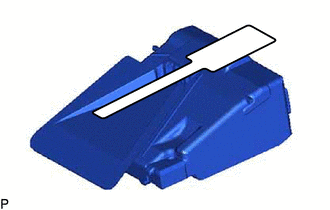
Remove the protective film.
Note
Do not touch the camera lens after removing the protective film.
-
-
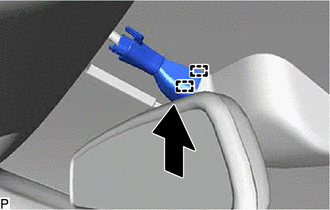
Slide the lane departure warning camera in the direction indicated by the arrow (1) shown in the illustration to engage the 2 guides.
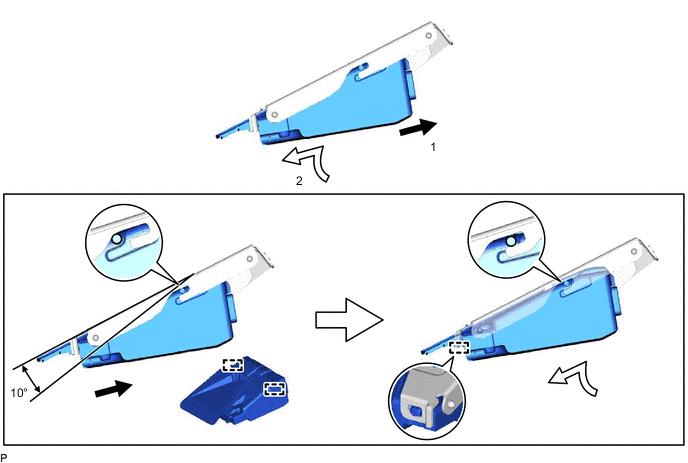
Note
Do not touch the camera lens.
-
Slide the lane departure warning camera in the direction indicated by the arrow (2) shown in the illustration to engage the guide.
-
Connect the connector to install the lane departure warning camera.
-
-
INSTALL LANE DEPARTURE WARNING CAMERA COVER
-
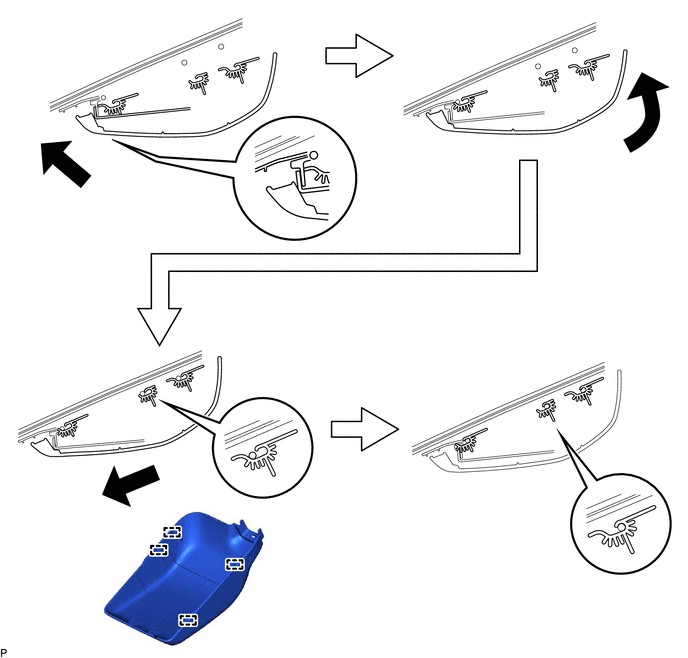
Engage the 4 guides to install the lane departure warning camera cover as shown in the illustration.
-
-
INSPECT LANE DEPARTURE WARNING CAMERA COVER
-
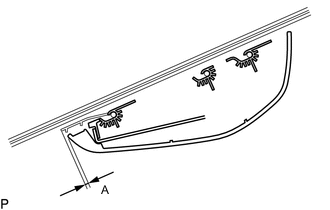
Check the clearance of area A.
Standard Clearance Area Measurement A 0 to 2.0 mm (0 to 0.0787 in.) Tech Tips
If the result is not as specified, the guides are not engaged properly. Reinstall the lane departure warning camera cover.
-
-
INSTALL RAIN SENSOR COVER
-
Engage the 2 guides as shown in the illustration.
-
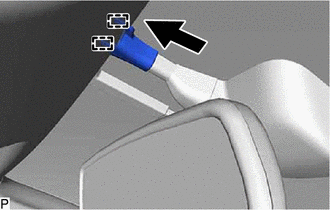
Engage the 2 guides and install the rain sensor cover as shown in the illustration.
-
-
ADJUST LANE DEPARTURE WARNING CAMERA