OIL PUMP REMOVAL
CAUTION / NOTICE / HINT
Note
Do not remove the oil pump or oil pump relief valve from the timing chain cover sub-assembly.
PROCEDURE
-
REMOVE ENGINE AND TRANSAXLE
-
DISCONNECT ENGINE WIRE
-
Disconnect the connectors and clamps securing the engine wire from the engine.
-
-
REMOVE IGNITION COIL ASSEMBLY
-
REMOVE CYLINDER HEAD COVER SUB-ASSEMBLY
-
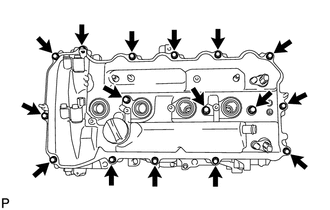
Remove the 16 bolts, 3 seal washers, cylinder head cover sub-assembly and cylinder head cover gasket.
-
Remove the 2 camshaft bearing cap oil hole gaskets from the No. 1 camshaft bearing cap.
-
Remove the gasket from the No. 2 camshaft bearing cap.
-
-
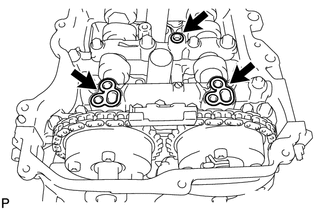
REMOVE SPARK PLUG TUBE GASKET
-
Using a screwdriver, pry out the 4 spark plug tube gaskets.
Note
Be careful not to damage the cylinder head cover sub-assembly.
Tech Tips
Tape the screwdriver tip before use.
-
-
REMOVE CRANKSHAFT POSITION SENSOR
-
REMOVE CRANKSHAFT PULLEY
-
REMOVE ENGINE MOUNTING BRACKET RH
-
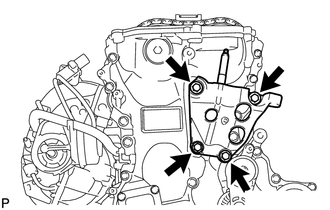
Remove the 4 bolts and engine mounting bracket RH.
-
-
REMOVE V-RIBBED BELT TENSIONER ASSEMBLY
-
REMOVE TIMING CHAIN COVER ASSEMBLY
-
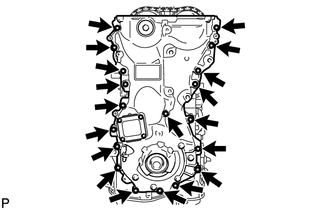
Remove the 17 bolts and 2 nuts.
-
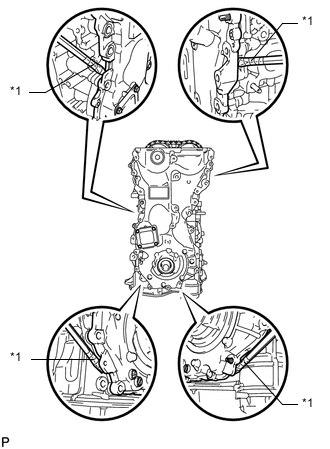
*1 Protective Tape Remove the timing chain cover sub-assembly by prying between the timing chain cover sub-assembly and cylinder head, camshaft housing, cylinder block and stiffening crankcase with a screwdriver as shown in the illustration.
Note
Be careful not to damage the contact surfaces of the cylinder head, camshaft housing, cylinder block, stiffening crankcase and timing chain cover sub-assembly.
Tech Tips
Tape the screwdriver tip before use.
-
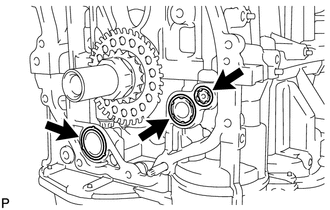
Remove the 2 oil pump gaskets from the stiffening crankcase.
-
Remove the oil hole cover gasket from the stiffening crankcase.
-
-
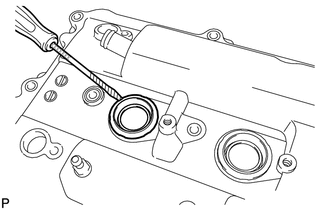
REMOVE TIMING CHAIN COVER OIL SEAL
-
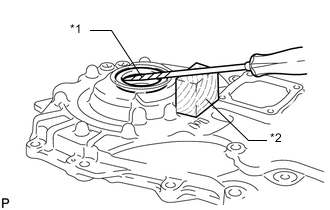
*1 Protective Tape *2 Wooden Block Using a screwdriver and wooden block, pry out the oil seal.
Note
Do not damage the surface of the oil seal press fit hole.
Tech Tips
Tape the screwdriver tip before use.
-