PARKING BRAKE CABLE REMOVAL
CAUTION / NOTICE / HINT
Tech Tips
-
The following procedure is for the No. 1 parking brake cable assembly and No. 3 parking brake cable assembly.
-
Use the same procedure for the No. 3 parking brake cable assembly and No. 2 parking brake cable assembly.
PROCEDURE
-
REMOVE PARKING BRAKE LEVER SUB-ASSEMBLY
-
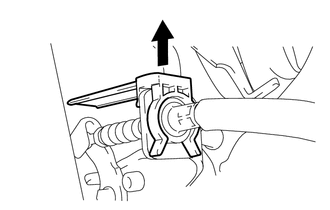
REMOVE PARKING BRAKE CABLE END STOPPER
-
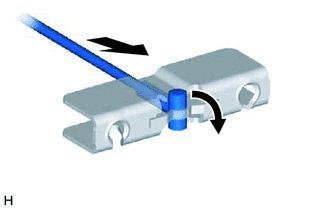
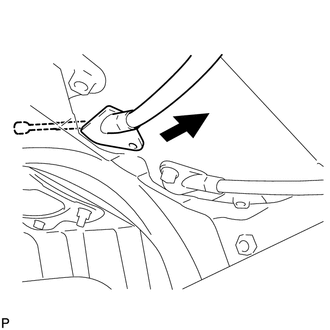
Push the No. 1 parking brake cable assembly and rotate the cable end 90°.
-
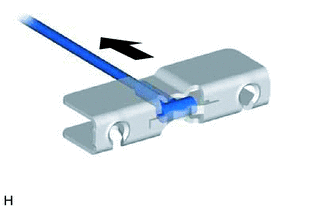
Pull the No. 1 parking brake cable assembly out of the parking brake equalizer.
-
Remove the parking brake cable end stopper.
-
-
REMOVE NO. 1 PARKING BRAKE CABLE ASSEMBLY
-
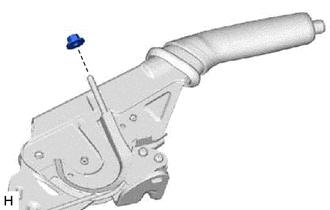
Remove the No. 2 wire adjusting nut.
-
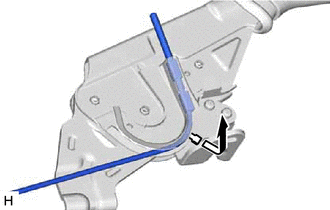
Pull up the parking brake lever sub-assembly claw.
Note
Do not damage the No. 1 parking brake cable assembly.
-
Remove the No. 1 parking brake cable assembly from the parking brake lever sub-assembly.
-
-
REMOVE FRONT EXHAUST PIPE ASSEMBLY
for 1ND-TV: Click here
for 1WW: Click here
-
REMOVE CENTER EXHAUST PIPE ASSEMBLY (for Front Side)
for 1NR-FE: Click here
-
REMOVE FRONT EXHAUST PIPE ASSEMBLY (TWC: Front and Rear Catalyst)
for 1ZR-FAE: Click here
for 1ZR-FE: Click here
for 2ZR-FE: Click here
-
REMOVE FRONT EXHAUST PIPE ASSEMBLY (TWC: Rear Catalyst)
for 8NR-FTS: Click here
-
REMOVE FRONT NO. 1 FLOOR HEAT INSULATOR
-
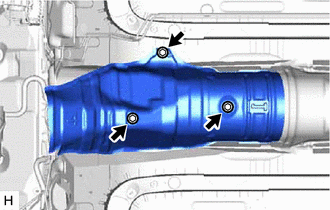
Remove the 3 nuts and front No. 1 floor heat insulator.
-
-
REMOVE FRONT NO. 2 FLOOR HEAT INSULATOR
-
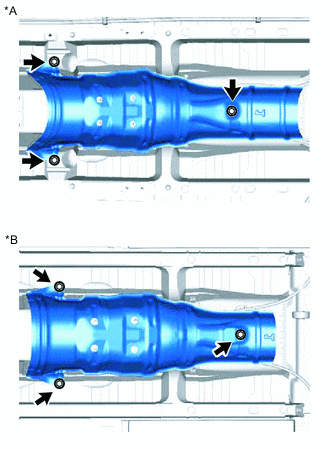
*A for Sedan *B except Sedan Remove the 3 nuts and front No. 2 floor heat insulator.
-
-
REMOVE REAR FLOOR SIDE MEMBER COVER LH (for LH Side)
for Torsion Beam Type Suspension (w/ Cover): Click here
for Double Wishbone Type Suspension: Click here
-
REMOVE REAR FLOOR SIDE MEMBER COVER RH (for RH Side)
for Torsion Beam Type Suspension (w/ Cover): Click here
for Double Wishbone Type Suspension: Click here
-
REMOVE PARKING BRAKE LEVER PROTECTOR (for Double Wishbone Type Suspension)
-
Remove the parking brake lever protector.
-
-
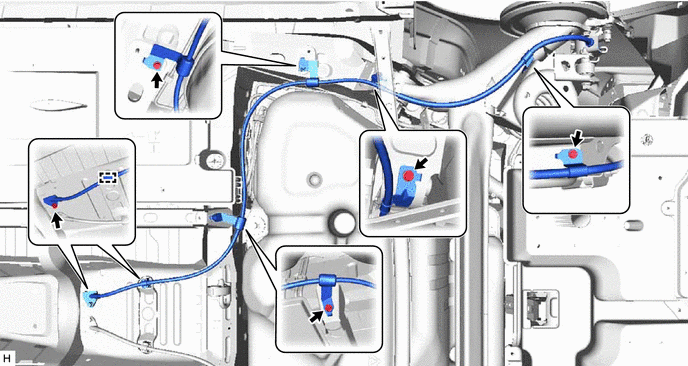
REMOVE NO. 3 PARKING BRAKE CABLE ASSEMBLY (for Torsion Beam Type Suspension)
-
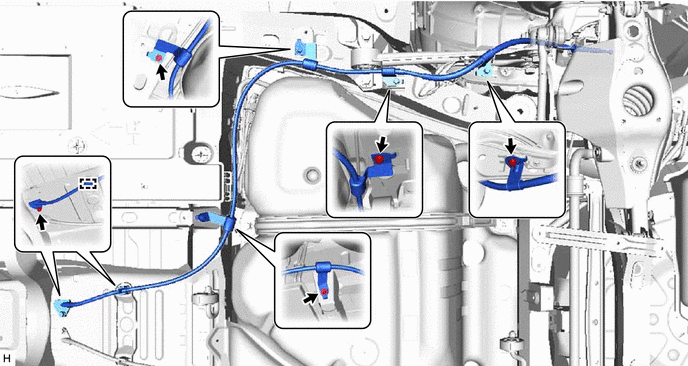
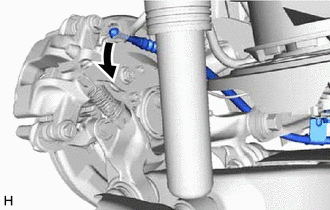
Remove the 5 bolts, disengage the clamp and remove the No. 3 parking brake cable assembly.
-
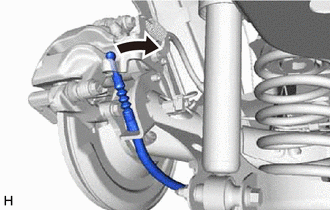
Pull out the No. 3 parking brake cable assembly to the outside of the body.
-
Separate the No. 3 parking brake cable assembly from the rear disc brake cylinder assembly.
-
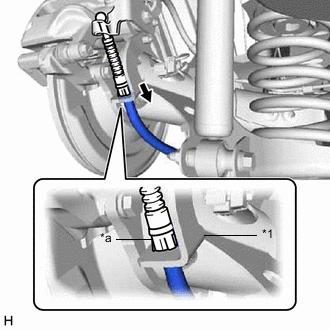
*1 Rear Disc Brake Cylinder Assembly *a Clip Disengage the clip and remove the No. 3 parking brake cable assembly.
-
-
REMOVE NO. 3 PARKING BRAKE CABLE ASSEMBLY (for Double Wishbone Type Suspension)
-
Remove the 5 bolts, disengage the clamp and remove the No. 3 parking brake cable assembly.
-
Pull out the No. 3 parking brake cable assembly to the outside of the body.
-
Separate the No. 3 parking brake cable assembly from the rear disc brake cylinder assembly.
-
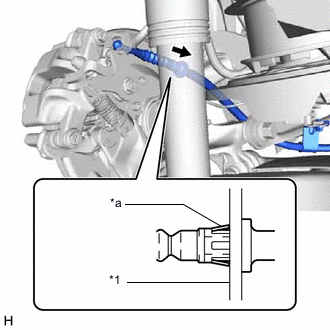
*1 Rear Disc Brake Cylinder Assembly *a Clip Disengage the clip and remove the No. 3 parking brake cable assembly.
-
-
REMOVE NO. 1 PARKING BRAKE CABLE CLAMP
-
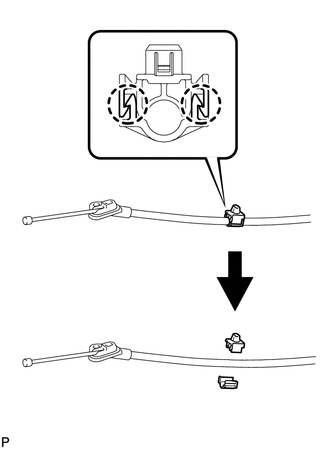
for Separate type No. 1 parking brake cable clamp:
-
Disengage the 2 claws to remove the No. 1 parking brake cable clamp from the No. 3 parking brake cable assembly.
-
-
for One-piece type No. 1 parking brake cable clamp:
-
Using pliers or equivalent, remove the No. 1 parking brake cable clamp from the No. 3 parking brake cable assembly.
Tech Tips
The No. 1 parking brake cable clamp cannot be reused once removed. Make sure to remove it from the No. 3 parking brake cable assembly.
-
-