RADIATOR(except Sedan) REMOVAL
PROCEDURE
-
REMOVE HEADLIGHT ASSEMBLY LH
-
REMOVE HEADLIGHT ASSEMBLY RH
Tech Tips
Use the same procedure as for the LH side.
-
REMOVE THERMISTOR ASSEMBLY
-
REMOVE NO. 1 ENGINE UNDER COVER
-
REMOVE BATTERY
-
DRAIN ENGINE COOLANT
-
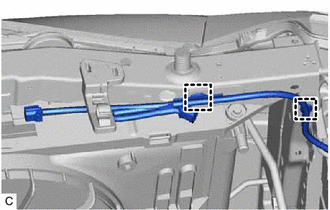
DISCONNECT NO. 1 WATER HOSE CLAMP BRACKET
-
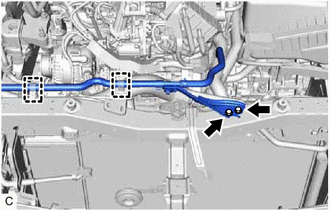
Remove the 2 bolts and disconnect the 2 clamps and No. 1 water hose clamp bracket from the upper radiator support sub-assembly.
-
-
REMOVE UPPER RADIATOR SUPPORT SUB-ASSEMBLY
-
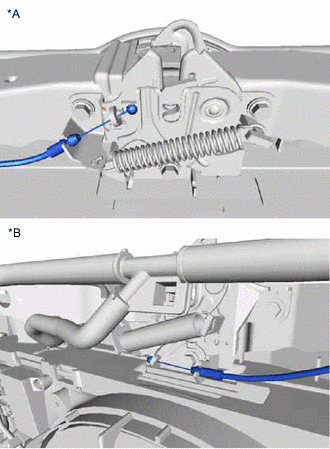
*A for LHD *B for RHD Disconnect the hood lock control cable assembly from the hood lock control lever sub-assembly.
-
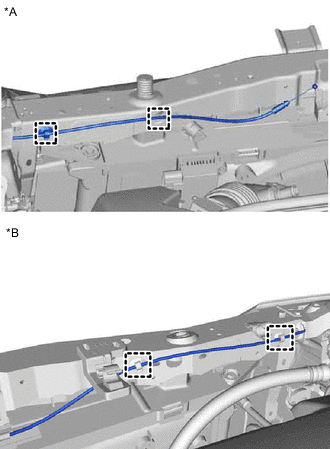
*A for LHD *B for RHD Disconnect the 2 clamps and hood lock control cable assembly from the upper radiator support sub-assembly.
-
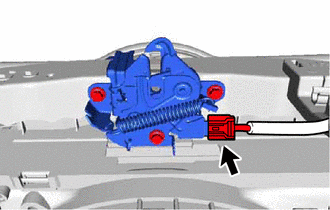
Disconnect the engine hood courtesy switch connector. (w/ Engine Hood Courtesy Switch)
-
Disconnect the 2 clamps and wire harness. (w/ Engine Hood Courtesy Switch)
-
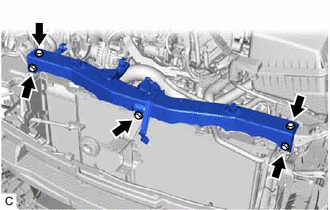
Remove the 5 bolts and upper radiator support sub-assembly.
-
-
DISCONNECT NO. 3 AIR HOSE
-
DISCONNECT NO. 2 AIR HOSE
-
REMOVE NO. 1 RADIATOR SUPPORT
-
REMOVE INTERCOOLER ASSEMBLY
-
DISCONNECT NO. 3 RADIATOR HOSE
-
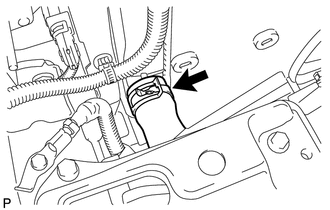
Slide the clip and disconnect the No. 3 radiator hose.
-
-
DISCONNECT NO. 2 RADIATOR HOSE
-
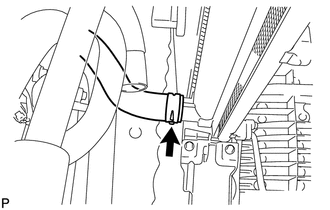
Slide the clip and disconnect the No. 2 radiator hose.
-
-
DISCONNECT NO. 3 WATER BY-PASS HOSE
-
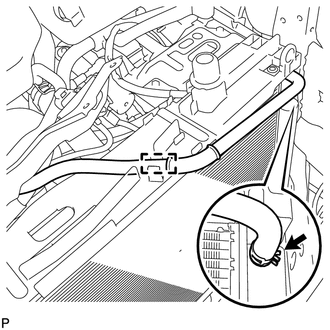
Disconnect the clamp.
-
Slide the clip and disconnect the No. 3 water by-pass hose.
-
-
REMOVE NO. 2 FAN SHROUD
-
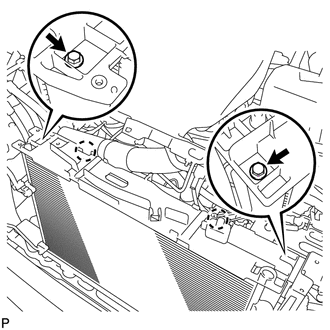
Disengage the 2 claws and remove the 2 bolts and No. 2 fan shroud.
-
Remove the radiator support cushion.
-
-
REMOVE RADIATOR ASSEMBLY
-
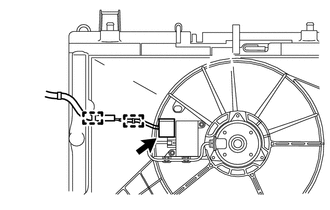
Disconnect the cooling fan motor connector.
-
Disconnect the 2 clamps.
-
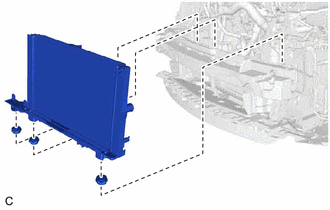
Remove the radiator assembly with the fan shroud.
Note
For vehicles with the air conditioning system, do not apply excessive force to the condenser assembly or pipe when removing the radiator assembly.
-
Remove the 3 lower radiator supports.
-
-
REMOVE FAN SHROUD
-
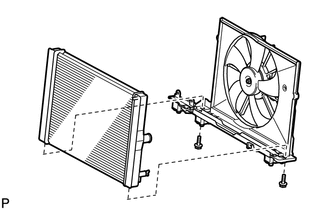
Remove the 2 bolts and fan shroud from the radiator assembly.
-