FRONT CONSOLE BOX(w/ Cool Box) DISASSEMBLY
CAUTION / NOTICE / HINT
Tech Tips
-
Use the same procedures for LHD and RHD vehicles.
-
The procedures listed below are for LHD vehicles.
PROCEDURE
-
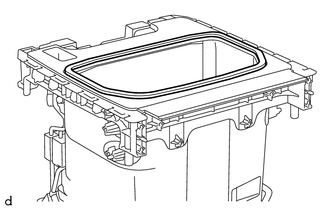
REMOVE COOLING BOX TRAY
-
Remove the cooling box tray.
-
-
REMOVE REAR CONSOLE BOX MOUNTING BRACKET
-
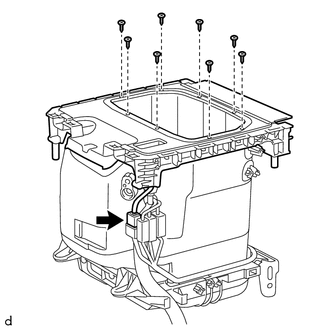
REMOVE COOL BOX CONSOLE COMPARTMENT DOOR SUB-ASSEMBLY
-
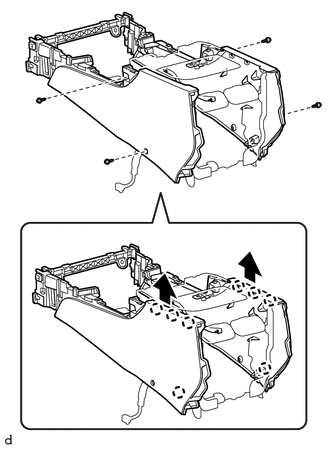
Remove the 6 screws and cool box console compartment door sub-assembly.
-
-
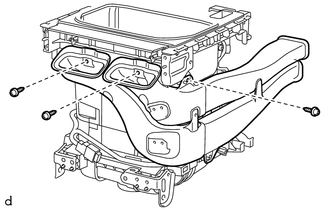
REMOVE COOLING UNIT CASE SUB-ASSEMBLY

-
Remove the clip and air duct sub-assembly.
-
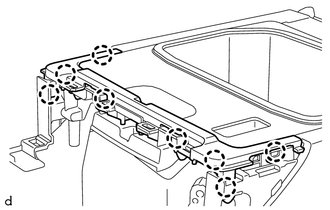
Detach the 8 claws and remove the upper panel.
-
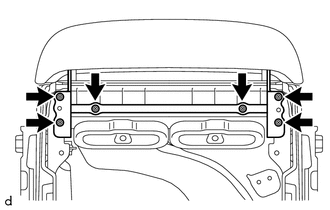
Remove the 4 screws.
-
Detach the 8 claws and remove the cooling unit case sub-assembly.
-
-
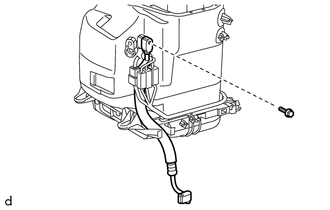
REMOVE COOL BOX AIR CONDITIONING AMPLIFIER ASSEMBLY
-
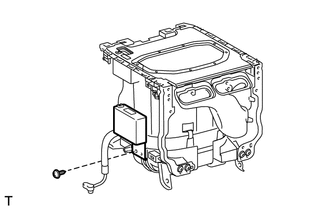
Disconnect the connector.
-
Remove the screw and cool box air conditioning amplifier assembly.
-
-
REMOVE NO. 2 COOLING BOX BRACKET
-
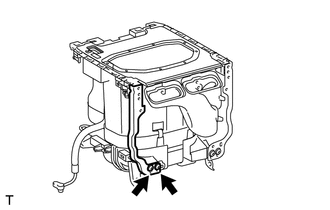
Remove the 2 screws and upper mounting bracket LH.
-
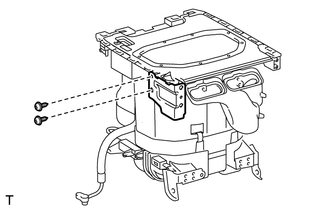
Remove the 2 screws and No. 2 cooling box bracket.
-
-
REMOVE COOLING BOX BRACKET
-
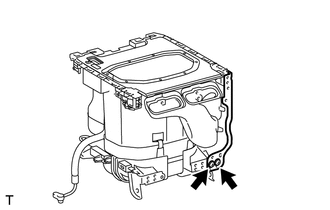
Remove the 2 screws and upper mounting bracket RH.
-
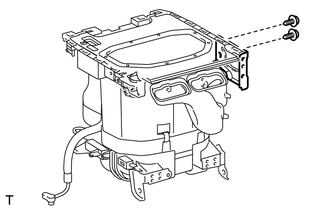
Remove the 2 screws and cooling box bracket.
-
-
REMOVE COOLING BOX BASE
-
Remove the 3 screws and air duct.
-
Remove the packing.
-

Remove the packing.
-
Disconnect the connector.
-
Remove the 8 screws and cooling box base.
-
-
REMOVE COOLER CONTROL SWITCH SUB-ASSEMBLY
-
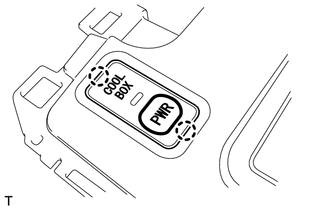
Detach the 2 claws.
-
Disconnect the connector and remove the cooler control switch sub-assembly.
-
-
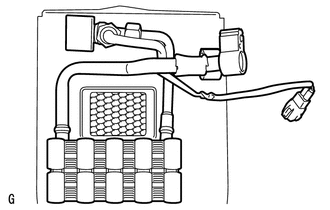
REMOVE LIQUID HOSE
-
Remove the bolt and liquid hose.
-
Remove the O-ring from the liquid hose.
-
-
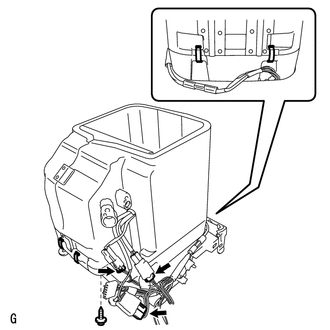
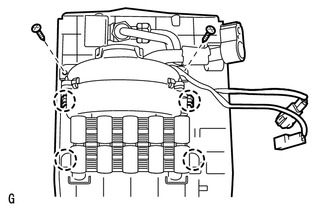
REMOVE LOWER COOLING UNIT CASE
-
Remove the screw.
-
Disconnect the 3 connectors.
-
Remove the 4 holding springs and lower cooling unit case.
-
-
REMOVE UPPER COOLING UNIT CASE
-
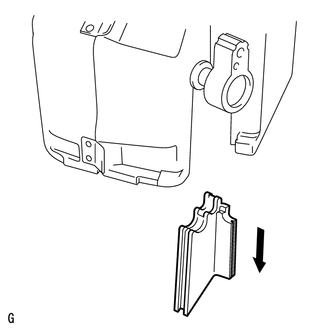
Remove the cooling unit case.
-
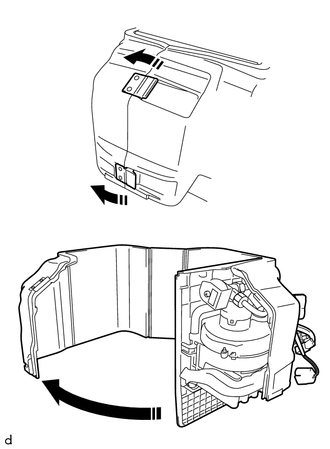
Detach the 2 hooks and open the upper cooling unit case.
-
Slide the case upwards and remove it.
-
-
REMOVE NO. 3 COOLER THERMISTOR
-
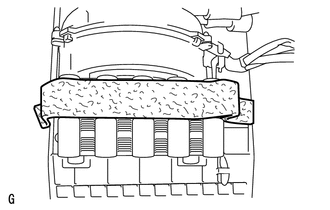
Remove the cool box insulator.
-

Remove the No. 3 cooler thermistor.
-
-
REMOVE COOL BOX BLOWER WITH FAN MOTOR SUB-ASSEMBLY
-
Remove the 2 screws.
-
Detach the 4 claws and remove the cool box blower with fan motor sub-assembly.
-
-
REMOVE COOLER (COOL BOX) EVAPORATOR SUB-ASSEMBLY
-
Remove the cooler (cool box) evaporator sub-assembly.
-