CONTROL VALVE ASSEMBLY REMOVAL
PROCEDURE
-
REMOVE TAILPIPE ASSEMBLY
-
REMOVE CENTER EXHAUST PIPE ASSEMBLY
-
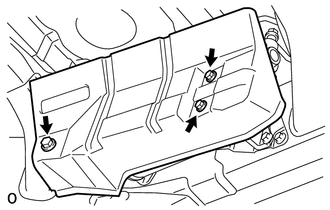
REMOVE HEIGHT CONTROL UNIT INSULATOR
-
Remove the 3 bolts and insulator from the control unit.
-
-
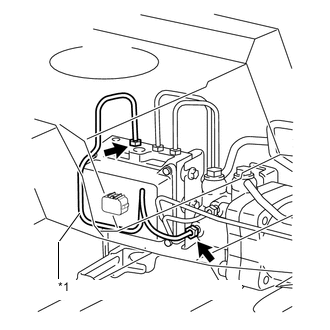
REMOVE CLAMP
-
Remove the clamp from the 3 height control tubes.
-
-
DISCHARGE SUSPENSION FLUID PRESSURE
-
REMOVE NO. 7 HEIGHT CONTROL TUBE
-
DISCONNECT REAR NO. 4 HEIGHT CONTROL TUBE
-
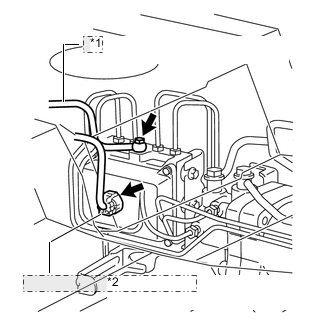
*1 Rear No. 4 Height Control Tube *2 Height Control Valve Connector Disconnect the connector.
-
Remove the union bolt and gasket, then disconnect the rear No. 4 height control tube from the control valve.
-
-
REMOVE NO. 5 HEIGHT CONTROL TUBE
-
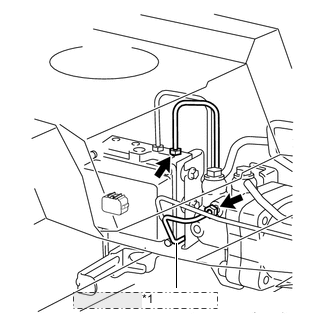
Using a union nut wrench, remove the No. 5 height control tube from the control valve and center cylinder.
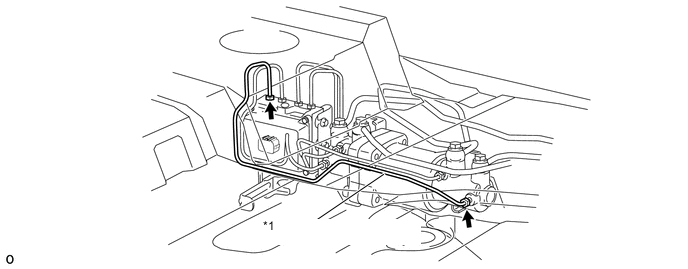
*1 No. 5 Height Control Tube
-
-
REMOVE NO. 5 HEIGHT CONTROL TUBE LH
*1 No. 5 Height Control Tube LH
-
Using a union nut wrench, remove the No. 5 height control tube LH from the control valve and center cylinder.
-
-
REMOVE NO. 6 HEIGHT CONTROL TUBE
*1 No. 6 Height Control Tube
-
Using a union nut wrench, remove the No. 6 height control tube from the control valve and center cylinder.
-
-
REMOVE NO. 6 HEIGHT CONTROL TUBE LH
-
Using a union nut wrench, remove the No. 6 height control tube LH from the control valve and center cylinder.

*1 No. 6 Height Control Tube LH
-
-
REMOVE NO. 1 HEIGHT CONTROL VALVE ASSEMBLY
-
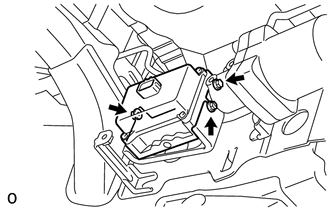
Remove the 3 nuts and control valve.
-
Remove the 3 bolt holders and 3 bolt cushions from the control valve.
-