TELEMATICS TRANSCEIVER INSTALLATION
PROCEDURE
-
INSTALL TELEPHONE ANTENNA CORD SUB-ASSEMBLY
-
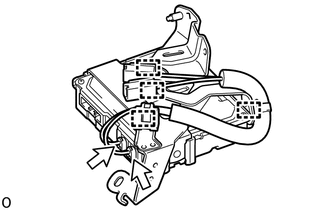
Attach the 4 clamps to install the telephone antenna cord sub-assembly.
-
Connect the connectors.
-
-
INSTALL TELEMATICS TRANSCEIVER
-
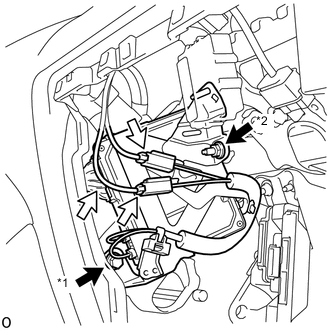
*1 BOLT *2 NUT Connect the connectors.
-
Insert the telematics transceiver into the vehicle.
-
Install the telematics transceiver with bracket with the bolt and nut.
- Torque:
- for bolt
- 13 N*m { 127 kgf*cm, 9 ft.*lbf }
- for nut
- 5.5 N*m { 56 kgf*cm, 49 in.*lbf }
-
-
INSTALL DOUBLE LOCK DOOR CONTROL RELAY ASSEMBLY (w/ Double Door Lock)
-
INSTALL GLOVE COMPARTMENT DOOR ASSEMBLY
-
INSTALL INSTRUMENT PANEL ORNAMENT
-
INSTALL NO. 2 INSTRUMENT PANEL UNDER COVER SUB-ASSEMBLY
-
INSTALL INSTRUMENT SIDE PANEL RH
-
INSTALL COWL SIDE TRIM BOARD RH
-
INSTALL DOOR SCUFF PLATE ASSEMBLY RH
-
CONNECT CABLE TO NEGATIVE BATTERY TERMINAL
Note
When disconnecting the cable, some systems need to be initialized after the cable is reconnected Click here.
-
CHECK SRS WARNING LIGHT
-
Check the SRS warning light Click here.
-
-
PERFORM REGISTRATION
-
Perform registration Click here.
Note
When replacing the mayday battery or telematics transceiver together with the mayday battery, perform registration.
-