ELECTRIC PARKING BRAKE ACTUATOR REMOVAL
PROCEDURE
-
RELEASE PARKING BRAKE
-
With the engine switch on (IG), operate the electric parking brake switch to release the parking brake. Then turn the engine switch off.
Tech Tips
If the parking brake cannot be released, use the luggage compartment's parking brake release tool to manually release the parking brake (refer to the Owner's Manual).
-
-
REMOVE COWL TOP VENTILATOR LOUVER
-
DISCONNECT CABLE FROM NEGATIVE BATTERY TERMINAL
CAUTION:
Wait at least 90 seconds after disconnecting the cable from the negative (-) battery terminal to prevent airbag and seat belt pretensioner activation.
Note
-
After turning the engine switch off, waiting time may be required before disconnecting the cable from the battery terminal. Therefore, make sure to read the disconnecting the cable from the battery terminal notice before proceeding with work Click here.
-
When disconnecting the cable, some systems need to be initialized after the cable is reconnected Click here.
-
-
REMOVE REAR WHEEL
-
REMOVE LUGGAGE COMPARTMENT TRIM COVER ASSEMBLY LH
-
DISCONNECT WIRING HARNESS CONNECTOR
-
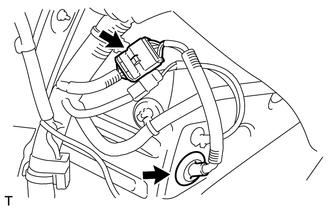
Disconnect the trunk interior's electric parking brake actuator grommet and connector.
-
-
REMOVE REAR WHEEL HOUSE LINER LH
-
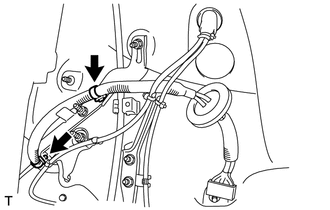
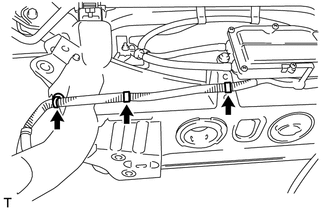
DISCONNECT WIRE HARNESS CLAMP
-
Remove the clamps shown in the illustration.
-
-
REMOVE FLOOR NO. 1 UNDER COVER
-
DISCONNECT PROPELLER WITH CENTER BEARING SHAFT ASSEMBLY
-
DISCONNECT ELECTRIC PARKING BRAKE ACTUATOR CAP
-
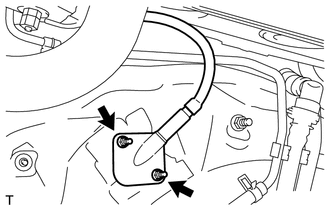
Remove the electric parking brake actuator emergency release cable cap and 2 nuts.
-
-
REMOVE REAR SUSPENSION MEMBER SUB-ASSEMBLY
-
DISCONNECT PARKING BRAKE CABLE
-
REMOVE PARKING BRAKE W/BRACKET ACTUATOR ASSEMBLY
-
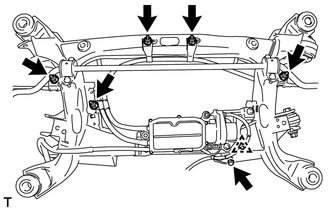
Remove the bolt and 5 nuts.
-
Detach the clamp from the member.
-
Remove the 3 harness clamps from the member.
-
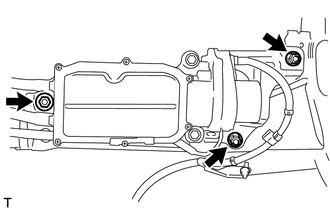
Remove the 3 nuts and actuator.
-