COMPRESSOR(for 1WW, 2WW) REMOVAL
PROCEDURE
-
RECOVER REFRIGERANT FROM REFRIGERATION SYSTEM
-
for HFC-134a(R134a):
-
for HFO-1234yf(R1234yf):
-
-
REMOVE RADIATOR ASSEMBLY
-
for 1WW:
Remove the radiator assembly Click here.
-
for 2WW:
Remove the radiator assembly Click here.
-
-
REMOVE FAN AND GENERATOR V BELT
-
for 1WW:
Remove the fan and generator V belt Click here.
-
for 2WW:
Remove the fan and generator V belt Click here.
-
-
DISCONNECT SUCTION HOSE SUB-ASSEMBLY
-
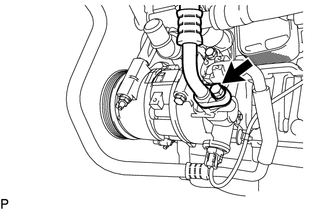
Remove the bolt and disconnect the suction hose sub-assembly from the compressor assembly with pulley.
Note
Seal the openings of the disconnected parts using vinyl tape to prevent entry of moisture and foreign matter.
-
Remove the O-ring from the suction hose sub-assembly.
-
-
DISCONNECT DISCHARGE HOSE SUB-ASSEMBLY
-
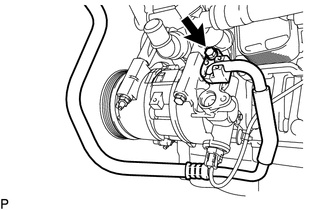
Remove the bolt and disconnect the discharge hose sub-assembly from the compressor assembly with pulley.
Note
Seal the openings of the disconnected parts using vinyl tape to prevent entry of moisture and foreign matter.
-
Remove the O-ring from the discharge hose sub-assembly.
-
-
REMOVE COMPRESSOR ASSEMBLY WITH PULLEY
-
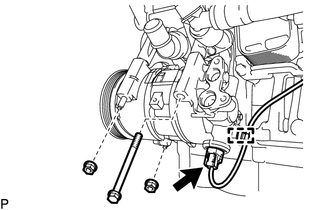
Disconnect the connector and detach the harness clamp.
-
Remove the bolt, 2 nuts and compressor assembly with pulley.
-
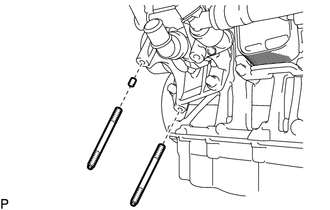
Using an E8 "TORX" socket wrench, remove the 2 stud bolts.
-
Remove the compressor pin.
Note
It is not necessary to remove a compressor pin unless it being replaced.
-