INSTRUMENT PANEL SPEAKER INSTALLATION

-
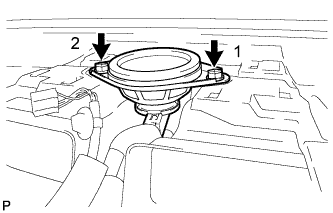
INSTALL FRONT NO. 2 SPEAKER ASSEMBLY (for Side)
-
Connect the connector.
-
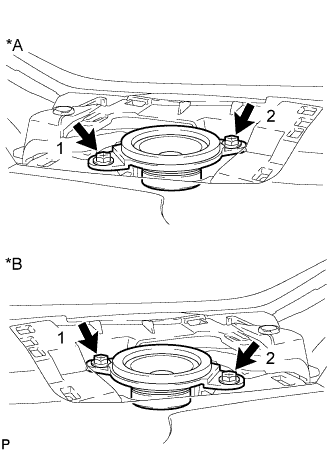
Text in Illustration *A LH Side *B RH Side Install the front No. 2 speaker assembly with the 2 screws.
Note
Do not touch the speaker cone.
Tech Tips
Install the screws in the order shown in the illustration.
-
-
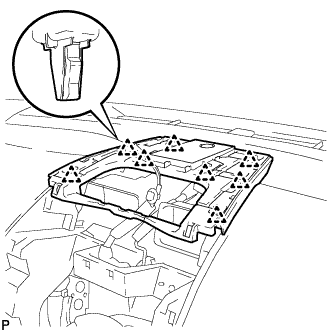
INSTALL INSTRUMENT PANEL SPEAKER PANEL SUB-ASSEMBLY (for Side)
-
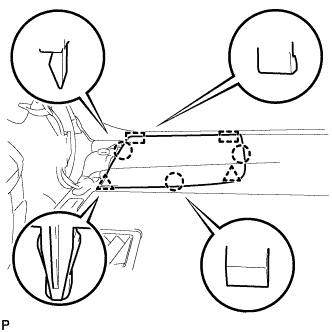
Engage the 2 guides.
-
Engage the 3 claws and 2 clips to install the No. 1 instrument panel speaker panel sub-assembly.
-
-
INSTALL FRONT PILLAR GARNISH (for Side)
-
Remove the protective cover.
-
Make sure that the front pillar garnish clip is not damaged.
Note
If there is any damage, replace the garnish clip with a new one.
-
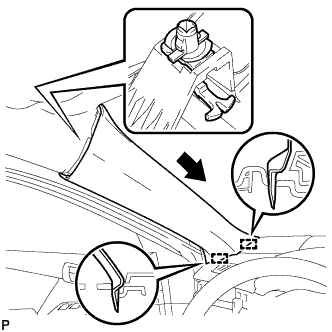
Install the front pillar garnish clip to front pillar garnish LH.
Tech Tips
Install the front pillar garnish clip so that it faces as shown in the illustration.
-
Engage the 2 guides as shown in the illustration.
-
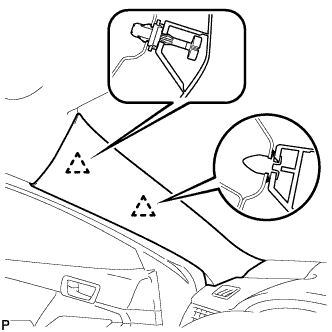
Engage the 2 clips to install the front pillar garnish LH.
-
-
INSTALL FRONT DOOR OPENING TRIM WEATHERSTRIP (for Side)
for LH side: Click here
for RH side: Click here
-
INSTALL FRONT NO. 3 SPEAKER ASSEMBLY (for Center)
-
Connect the connector.
-
Install the front No. 3 speaker assembly with the 2 screws.
Note
Do not touch the speaker cone.
Tech Tips
Install the screws in the order shown in the illustration.
-
-
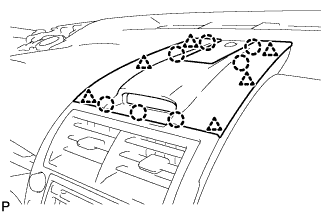
INSTALL NO. 1 SPEAKER OPENING COVER ASSEMBLY (for Center)
-
Connect the connector.
-
Engage the 8 clips to install the No. 1 speaker opening cover assembly.
-
-
INSTALL RADIO RECEIVER ASSEMBLY WITH AIR CONDITIONING CONTROL ASSEMBLY (for Center)
w/ Intuitive Parking Assist System: Click here
-
INSTALL NAVIGATION RECEIVER ASSEMBLY WITH AIR CONDITIONING CONTROL ASSEMBLY (for Center)
w/o Intuitive Parking Assist System: Click here
-
INSTALL NO. 2 INSTRUMENT PANEL REGISTER ASSEMBLY (for Center)
-
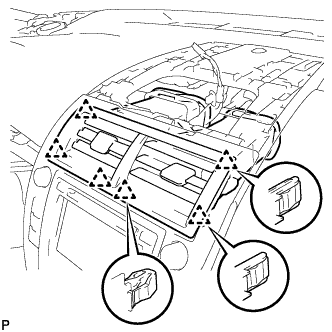
Engage the 6 clips to install the No. 2 instrument panel register assembly.
Note
When installing the No. 2 instrument panel register assembly, check that the wire harness is not caught between the No. 2 instrument panel register assembly and duct.
-
-
INSTALL CENTER INSTRUMENT CLUSTER FINISH PANEL ASSEMBLY (for Center)
-
Connect the connector.
-
Engage the clamp.
-
Engage the 6 clips and 7 claws to install the center instrument cluster finish panel assembly.
-
-
INSTALL UPPER CONSOLE PANEL SUB-ASSEMBLY (for Center)
-
Connect each connector.
-
Engage the 4 clips and guide.
-
Install the upper console panel sub-assembly with the 2 screws <C> or <D>.
-
-
INSTALL BOX BOTTOM MAT (for Center)
-
Install the box bottom mat.
-
-
INSTALL REAR CONSOLE BOX ASSEMBLY (for Center)
-
CONNECT CABLE TO NEGATIVE BATTERY TERMINAL (for Center)
Note
When disconnecting the cable, some systems need to be initialized after the cable is reconnected Click here.