FRONT WIPER MOTOR REMOVAL

Tech Tips
-
Use the same procedure for RHD and LHD vehicles.
-
The procedure listed below is for LHD vehicles.
-
PRECAUTION
Note
After turning the engine switch off, waiting time may be required before disconnecting the cable from the battery terminal. Therefore, make sure to read the disconnecting the cable from the battery terminal notice before proceeding with work ( Click here).
-
REMOVE COWL TOP VENTILATOR LOUVER RH
-

Remove the 6 clips and cowl top ventilator louver RH.
-
-
DISCONNECT CABLE FROM NEGATIVE BATTERY TERMINAL
Note
When disconnecting the cable, some systems need to be initialized after the cable is reconnected Click here.
-
REMOVE FRONT WIPER ARM LH
-
Remove the nut, wiper arm and blade.
-
-
REMOVE FRONT WIPER ARM RH
-
Remove the nut, wiper arm and blade.
-
-
REMOVE ENGINE ROOM SIDE COVER LH
-
Remove the 5 clips and engine room side cover LH.
-
-
REMOVE ENGINE ROOM SIDE COVER RH
-
Remove the 5 clips and engine room side cover RH.
-
-
REMOVE FRONT FENDER PROTECTOR UPPER LH
-
Using a clip remover, detach the 3 clips and remove the fender protector upper.
-
-
REMOVE FRONT FENDER PROTECTOR UPPER RH
Tech Tips
Use the same procedure described for the LH side.
-
REMOVE HOOD TO COWL TOP SEAL
-
Using a clip remover, detach the 11 clips and remove the hood to cowl top seal.
-
-
REMOVE FRONT FENDER TO COWL SIDE SEAL LH
-

Detach the clip and claw, and then remove the cowl side seal LH.
-
-
REMOVE FRONT FENDER TO COWL SIDE SEAL RH
Tech Tips
Use the same procedure described for the LH side.
-
REMOVE COWL TOP VENTILATOR LOUVER PROTECTOR LH
-
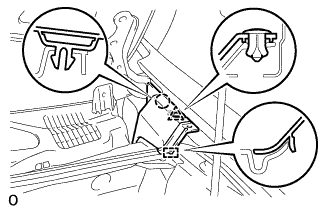
Detach the clip and claw.
-
Detach the guide and remove the cowl top ventilator louver protector LH.
-
-
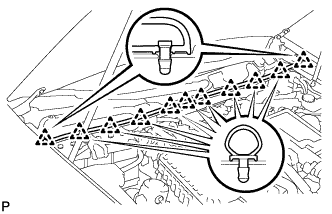
REMOVE COWL TOP VENTILATOR LOUVER SUB-ASSEMBLY
-
Using a clip remover, detach the 2 clips.
-
Disengage the 9 claws.
-
Remove the cowl top ventilator louver sub-assembly.
-
-
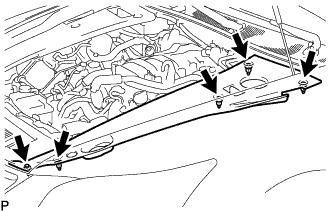
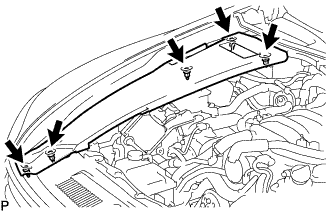
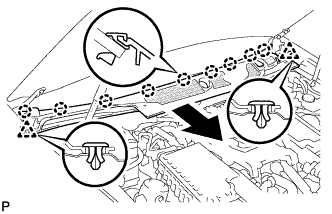
REMOVE WINDSHIELD WIPER LINK ASSEMBLY
-
Disconnect the connector. Then detach the 2 clamps and remove the wire harness from the cowl top panel.
-
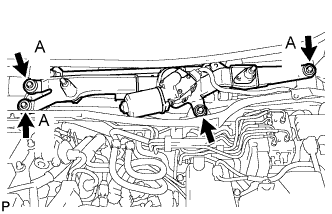
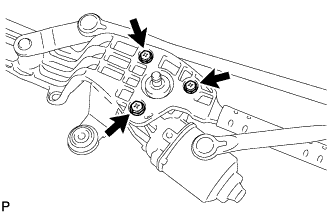
Remove the 4 bolts and the wiper motor and link.
Tech Tips
The 3 bolts labeled (A) in the illustration cannot be removed from the wiper motor and link because they are integrated into the wiper motor and link.
-
-
REMOVE WIPER MOTOR COVER
-
Remove the wiper motor cover.
-
-
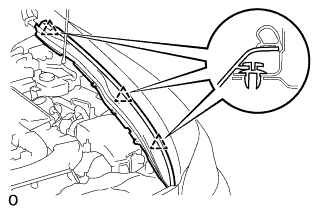
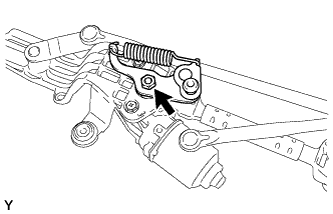
REMOVE FRONT WIPER CRANK SUB-ASSEMBLY
-
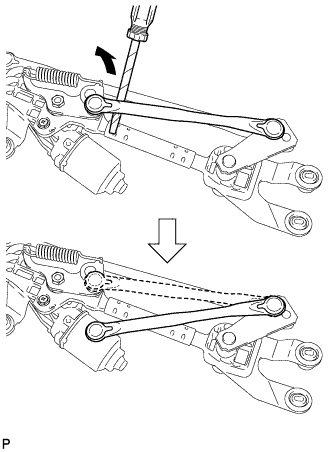
Using a screwdriver, disconnect the rod of the wiper link from the front wiper crank sub-assembly as shown in the illustration.
Tech Tips
Tape the screwdriver tip before use.
-
Remove the nut and front wiper crank sub-assembly.
-
-
REMOVE WINDSHIELD WIPER MOTOR ASSEMBLY
-
Remove the 3 bolts and windshield wiper motor assembly.
-