FLOOR SHIFT ASSEMBLY REMOVAL

Tech Tips
-
Use the same procedure for the RHD and LHD sides.
-
The procedure listed below is for the LHD sides.
-
REMOVE FRONT EXHAUST PIPE ASSEMBLY
-
REMOVE FRONT FLOOR NO. 1 HEAT INSULATOR
-
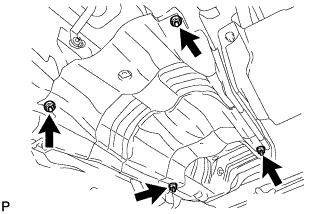
for 2WD:
Remove the 4 nuts and heat insulator.
-
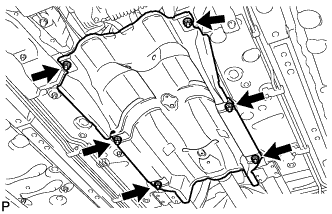
for AWD:
Remove the 6 nuts and heat insulator.
-
-
DISCONNECT FLOOR SHIFT GEAR SHIFTING ROD SUB-ASSEMBLY
-
Move the shift lever to N.
-
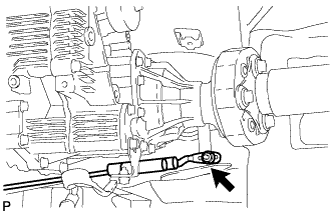
Remove the nut and disconnect the shifting rod from the connecting rod swivel.
-
-
REMOVE CONSOLE BOX ASSEMBLY
for 5-Passenger with Ottoman: Click here
w/o Rear Seat Entertainment System: Click here
w/ DVD Player: Click here
-
REMOVE NO. 1 CONSOLE BOX DUCT
-
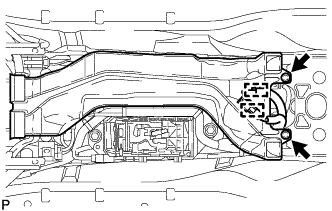
Disconnect the 2 wire harness clamps from the No. 1 console box duct.
-
Remove the 2 clips and pull out the No. 1 console box duct.
-
-
REMOVE TRANSMISSION FLOOR SHIFT ASSEMBLY
-
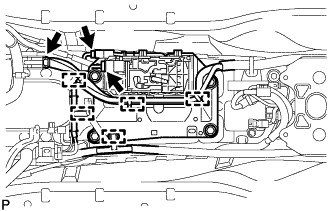
for LHD:
-

Disconnect the 2 connectors.
-
Disconnect the 6 wire harness clamps from the transmission floor shift assembly.
-
-
for RHD:
-
Disconnect the 3 connectors.
-
Disconnect the 5 wire harness clamps from the transmission floor shift assembly.
-
-
Remove the 4 bolts and transmission floor shift assembly.
-