TRANSMISSION WIRE INSTALLATION

-
INSTALL TRANSMISSION WIRE
-
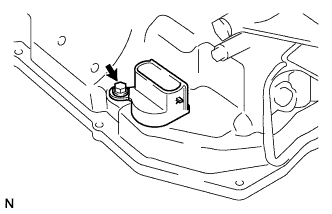
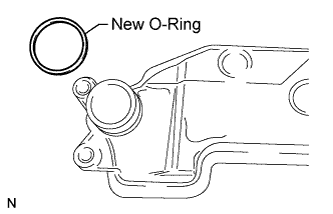
Coat a new O-ring with ATF and install it to the transmission wire connector.
-
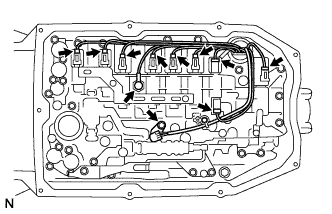
Install the transmission wire.
-
Install the bolt.
- Torque:
- 5.4 N*m { 55 kgf*cm, 48 in.*lbf }
-
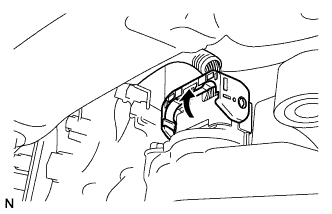
Connect the wire connector.
Tech Tips
Push up the lever until the claw of the transmission wire connector makes a connection sound.
-
Connect the 3 speed sensor connectors.
-
-
INSTALL TRANSMISSION VALVE BODY ASSEMBLY
-
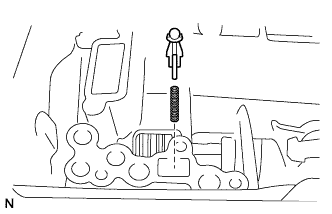
Install the spring and check ball body.
-
Align the groove of the manual valve with the lever pin.
-
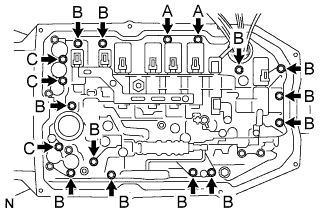
Install the 17 bolts.
- Torque:
- 11 N*m { 112 kgf*cm, 8 ft.*lbf }
Tech Tips
Each bolt length is indicated below.
Bolt length 21 mm (0.83 in.) for bolt A 31 mm (1.22 in.) for bolt B 64 mm (2.52 in.) for bolt C -
Install the detent spring and detent spring cover with the bolt.
Note
Make sure to install the detent spring so that its roller is perpendicularly at the center of the manual valve lever.
- Torque:
- 10 N*m { 102 kgf*cm, 7 ft.*lbf }
-
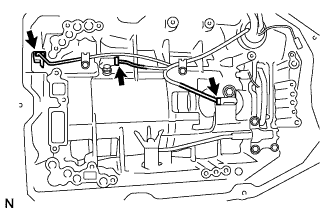
Connect the 8 connectors to the solenoid valves.
-
Connect the oil pressure switch connector.
-
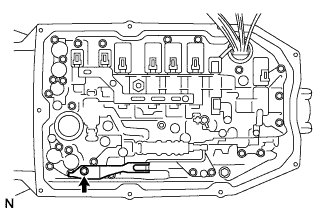
Coat a new O-ring with ATF and install it to the ATF temperature sensor.
-
Install the ATF temperature sensor and lock plate with the bolt.
- Torque:
- 10 N*m { 102 kgf*cm, 7 ft.*lbf }
-
-
INSTALL VALVE BODY OIL STRAINER ASSEMBLY
-
Coat a new O-ring with ATF and install it to the oil strainer.
Note
Ensure that the O-ring is not twisted or pinched.
-
Install the oil strainer to the valve body with the 4 bolts.
- Torque:
- 11 N*m { 112 kgf*cm, 8 ft.*lbf }
-
-
INSTALL AUTOMATIC TRANSMISSION OIL PAN SUB-ASSEMBLY
-
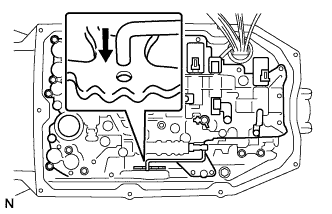
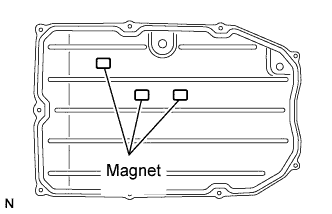
Install the 3 magnets to the oil pan.
-

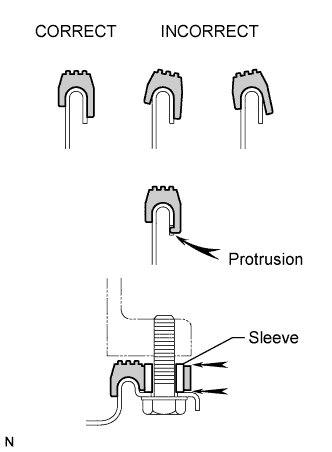
Install a new gasket and the oil pan to the transmission case with the 9 bolts.
- Torque:
- 7.3 N*m { 74 kgf*cm, 64 in.*lbf }
Note
-
-
Make sure that there is no oil or foreign matter on the gasket seal surface and oil pan contact surface.
-
Install the gasket so that there is no slack in the gasket, and that the seal surface's entire circumference is level.
-
Make sure that the 9 gasket drop prevention protrusions are set on the oil pan.
-
When tightening the oil pan, make sure that the gasket is not pinched between the gasket tightening area's sleeve and the transmission's seal surface.
-
-
CONNECT CABLE TO NEGATIVE BATTERY TERMINAL
Note
When disconnecting the cable, some systems need to be initialized after the cable is reconnected Click here.
-
INSTALL COWL TOP VENTILATOR LOUVER
-

for LHD:
Install the 6 clips and cowl top ventilator louver RH.
Note
If the cowl top ventilator louver RH is not properly installed, water may leak into the engine room and cause malfunctions. Therefore, make sure the cowl top ventilator louver RH is installed properly.
-

for RHD:
Install the 6 clips and cowl top ventilator louver LH.
Note
If the cowl top ventilator louver LH is not properly installed, water may leak into the engine room and cause malfunctions. Therefore, make sure the cowl top ventilator louver LH is installed properly.
-
-
ADD AUTOMATIC TRANSMISSION FLUID
-
Add automatic transmission fluid Click here.
-