FUEL FILTER INSTALLATION

-
INSTALL FUEL FILTER ELEMENT
-
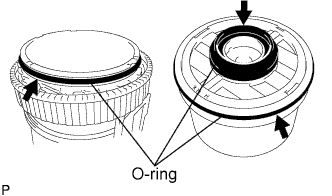
Attach 2 new O-rings to a new fuel filter element sub-assembly and a new O-ring to the fuel filter case sub-assembly.
-
Install the new fuel filter element sub-assembly onto fuel filter case sub-assembly.
-
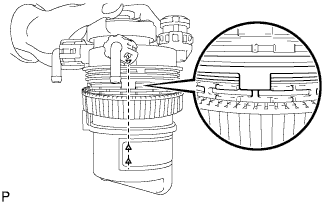
Align the alignment mark on fuel filter cap assembly with the 2 alignment marks on the fuel filter case sub-assembly.
-
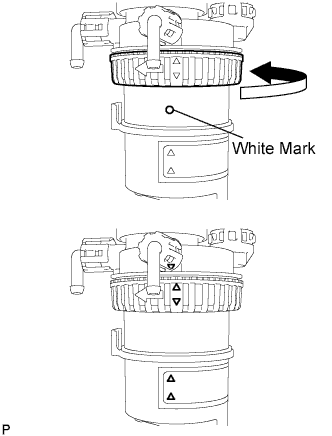
Turn the fastener nut until a 'click' sound is heard.
Tech Tips
As the marks near alignment, it will become increasingly difficult to tighten the fastener nut by hand.
If necessary, use a screwdriver as a lever to turn the fastener nut.
-
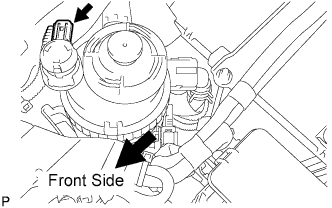
Install the fuel filter assembly.
-
Install the 2 fuel hoses.
-
-
INSTALL FUEL TANK CAP ASSEMBLY
-
CONNECT CABLE TO NEGATIVE BATTERY TERMINAL
- Torque:
- 5.4 N*m { 55 kgf*cm, 48 in.*lbf }
-
RESET FUEL FILTER AND FILTER WARNING LIGHT
-
Turn the ignition switch ON.
-
After turning the ignition switch on, connect the clogging sensor connector within 3 to 60 seconds.
-
Check that the combination meter filter warning light turns OFF.
-
-
BLEED FUEL LINE
-
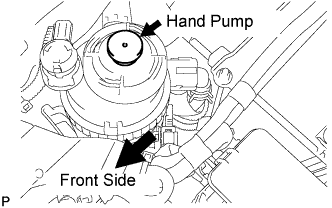
Using a hand pump, bleed air from the fuel system until pumping becomes difficult.
-
-
INSPECT FOR FUEL LEAK
-
Perform the Active Test.
-
Connect the intelligent tester to the DLC3.
-
Turn the ignition switch ON.
-
Turn the intelligent tester ON.
-
Select the following menu items: Powertrain / ECD / Active Test.
-
Perform the Active Test.
Intelligent Tester Display Test Details Control Range Diagnostic Notes Test the Fuel Leak Pressurizes common rail internal fuel pressure, and checks for fuel leaks Stop/Start
-
Fuel pressure inside common rail pressurized to specified value and engine speed increased to 2,000 rpm when ON is selected
-
Above conditions preserved while test is ON
-
-
-
-
PREFORM INITIALIZATION
-
Perform initialization procedures Click here.
Note
Certain systems need to be initialized after reconnecting the cable to the negative (-) battery terminal.
-