CAUTION / NOTICE / HINT
The necessary procedures (adjustment, calibration, initialization or registration) that must be performed after parts are installed, removed or replaced during the rear combination light assembly removal/installation are shown below.
| Replacement Part or Procedure | Necessary Procedures | Effects/Inoperative Functions when not Performed | Link |
|---|---|---|---|
| Rear bumper assembly (Including removal and installation) |
|
Parking support brake system |
-
Use the same procedure for the RH and LH sides.
-
The procedure described below is for the LH side.
PROCEDURE
- Click here
REMOVE LUGGAGE COMPARTMENT FLOOR MAT
- Click here
REMOVE LUGGAGE COMPARTMENT TRIM COVER LH
- Click here
REMOVE LUGGAGE COMPARTMENT TRIM COVER RH
- Click here
REMOVE ROPE HOOK ASSEMBLY
- Click here
REMOVE REAR FLOOR FINISH PLATE
- Click here
REMOVE NO. 2 ROPE HOOK
-
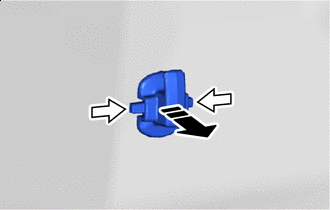

Push 
Remove in this Direction Push the 2 knobs and remove the No. 2 rope hook.
-
- Click here
REMOVE REAR COMBINATION LIGHT COVER LH
- Click here
REMOVE REAR COMBINATION LIGHT COVER RH
Tip:Use the same procedure described for the LH side.
- Click here
REMOVE REAR BUMPER ASSEMBLY
- Click here
REMOVE REAR COMBINATION LIGHT ASSEMBLY LH
-
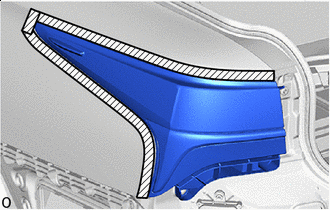

Protective Tape Apply protective tape around the rear combination light assembly LH.
-
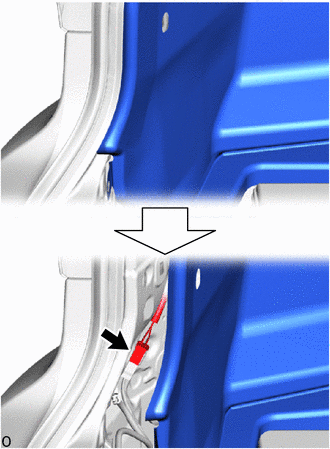
Fold back the rear side of the luggage compartment trim inner cover LH and disconnect the connector as shown in the illustration.
-
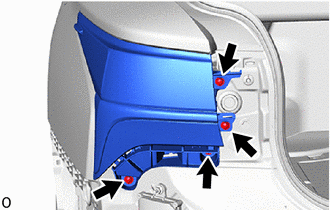
Remove the 4 screws.
-
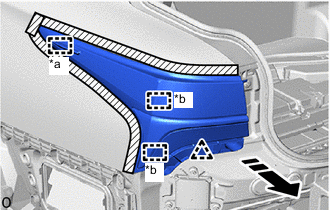
*a Guide *b Pin Remove in this Direction Slide the rear combination light assembly LH toward the rear of the vehicle to detach the guide, pin and clip.
-
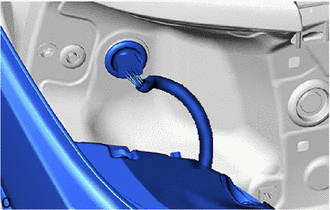
Remove the grommet and pull out the wire harness.
-